Holy Cross 
Carnage Canyon
|
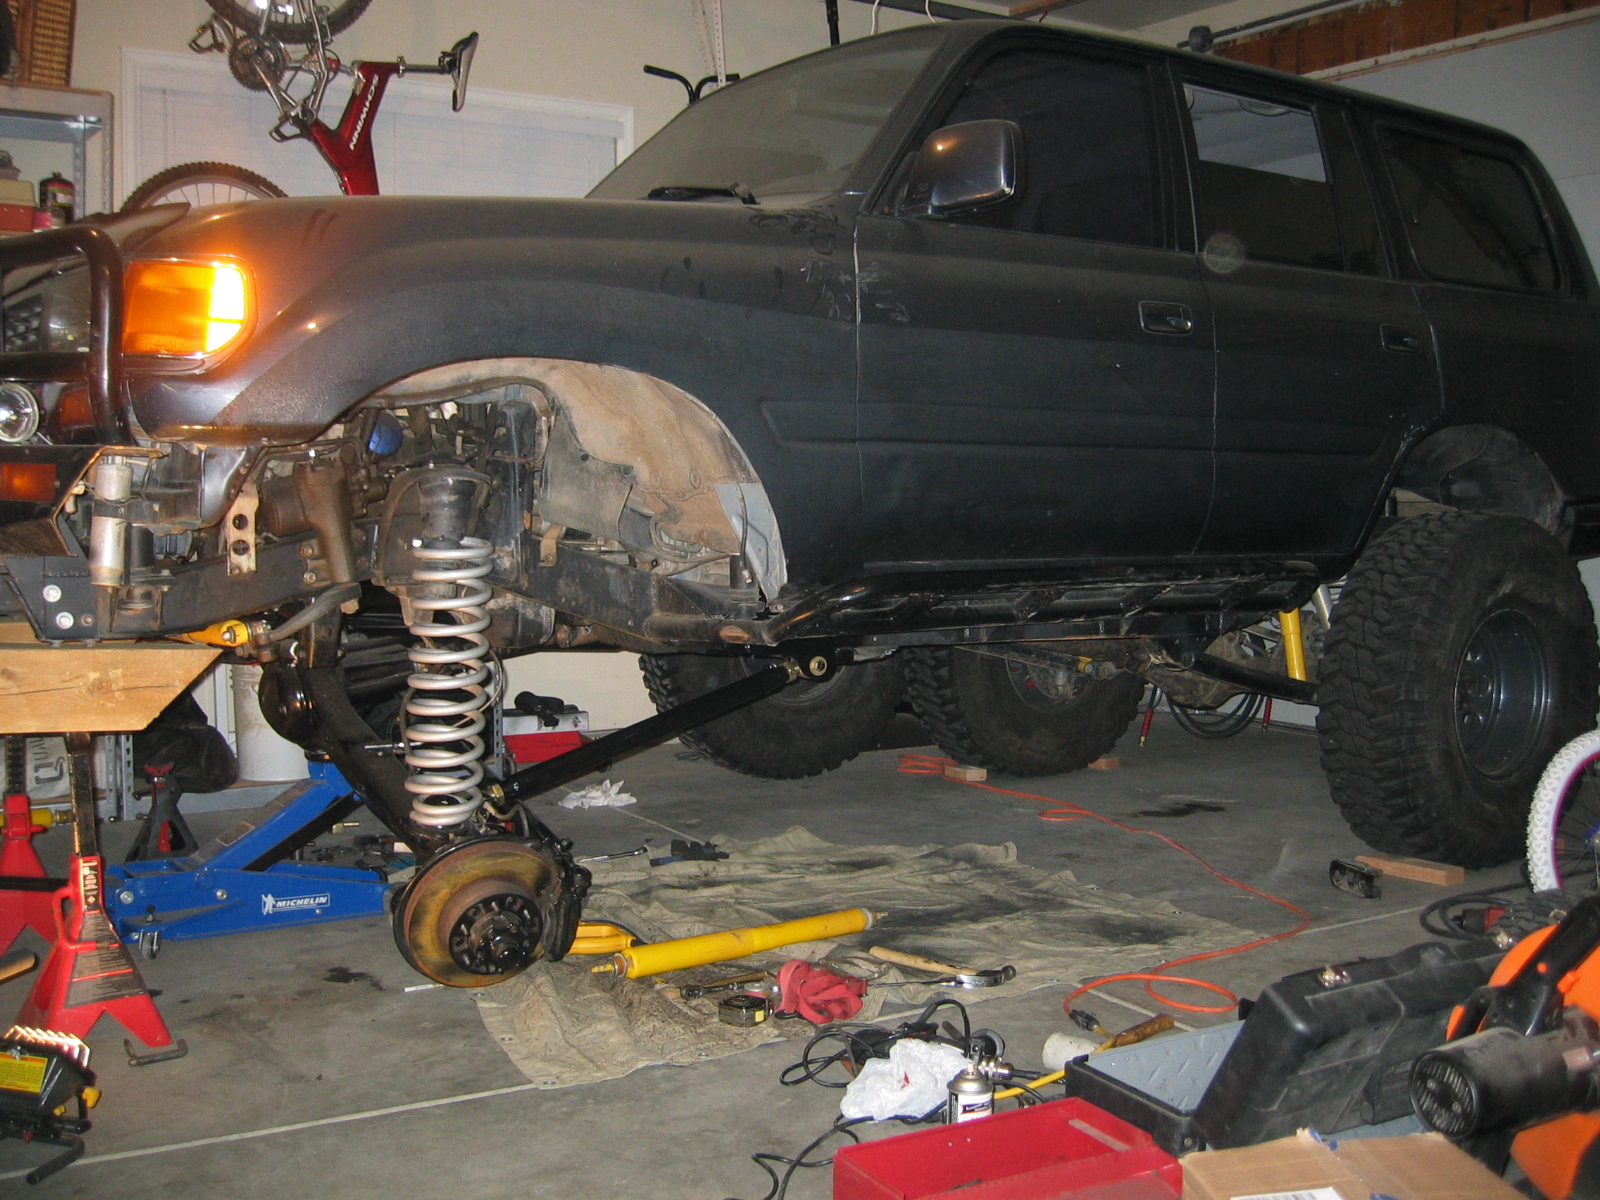
Truck Modifications - January 2006
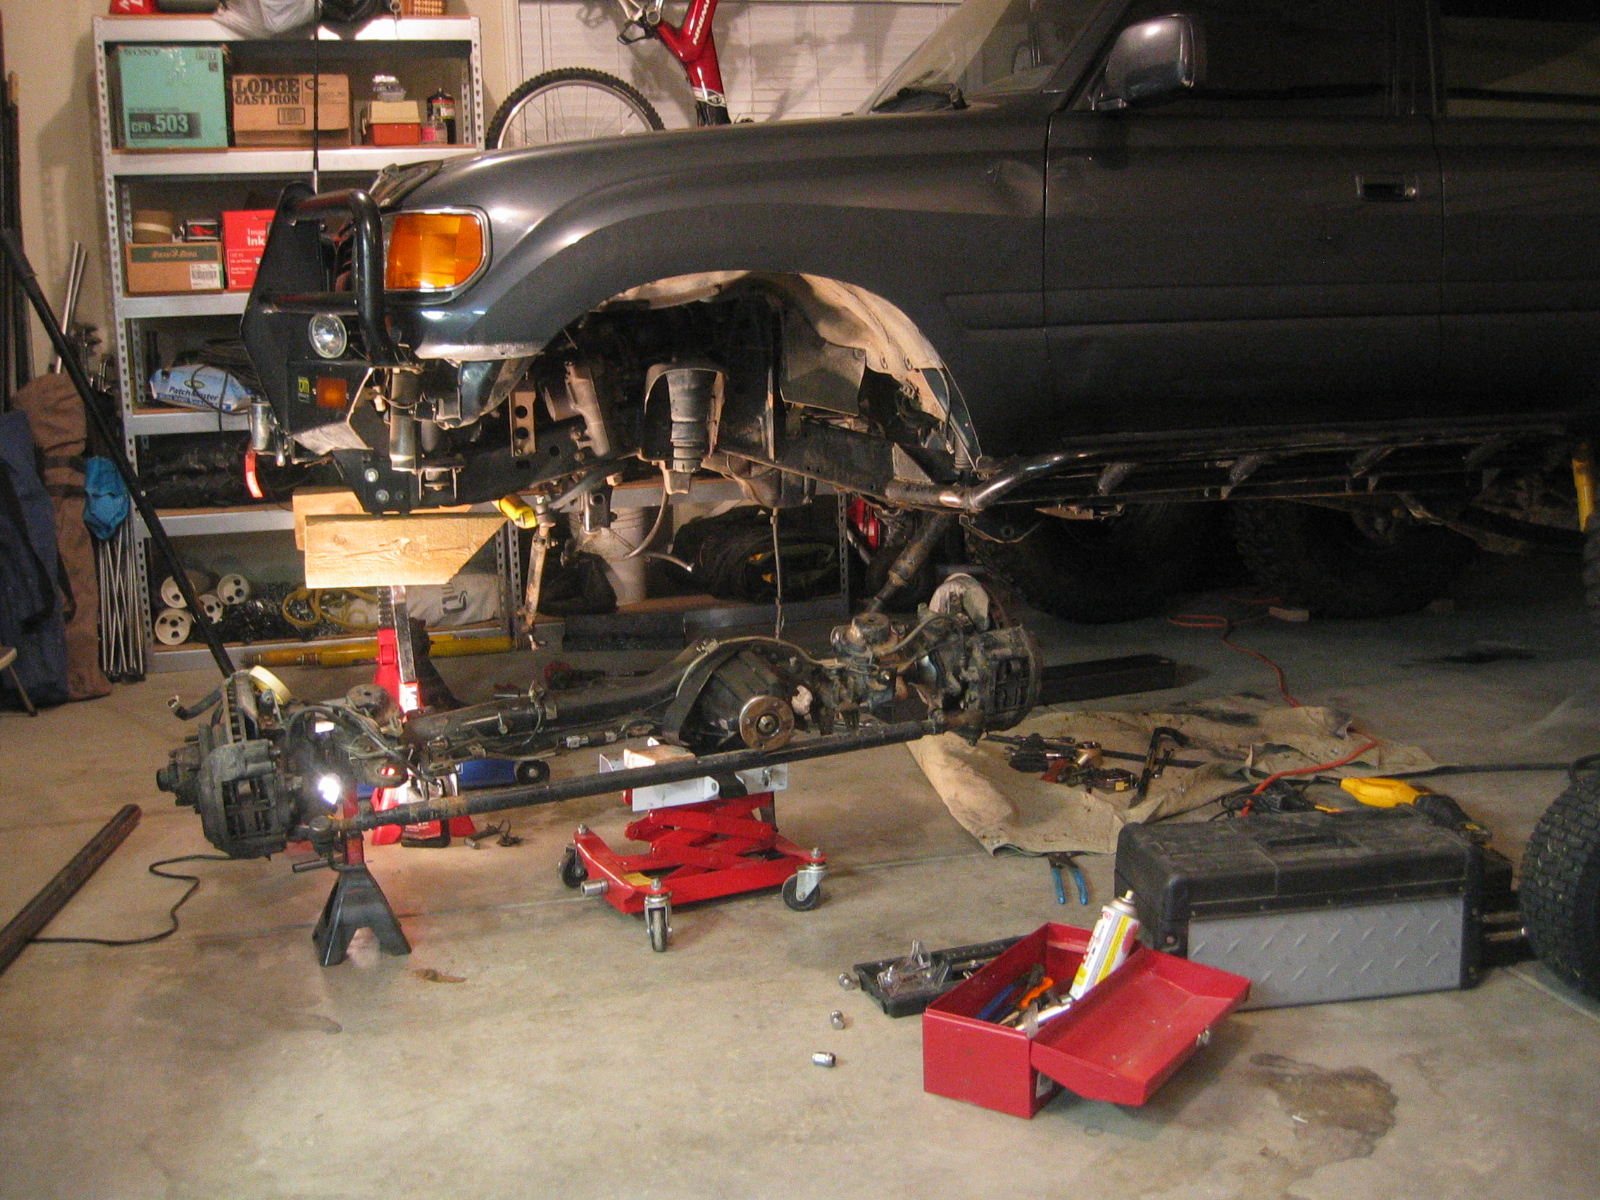
I've decided to put in a front three link suspension to replace my stock radius arms. I've taken a look at several alternatives out there and believe this is the best solution for what I want to accomplish. The problem I've had with my stock FJ80 front suspension is the following:
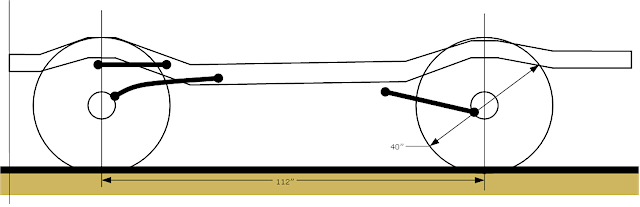
Here is scaled diagram of where the front links will attach. I have studied several sources on 3-link and 4-link design and here is what I have come up with. I have had to modify my ideal setup because of limitations of where I can actually place the links under my 80. They are not as long as I hoped but at least they are longer than the stock arms. I feel this setup should work just fine. Next year I'll redo the rear links. Look at that horrible angle of my rear control arm... lol!
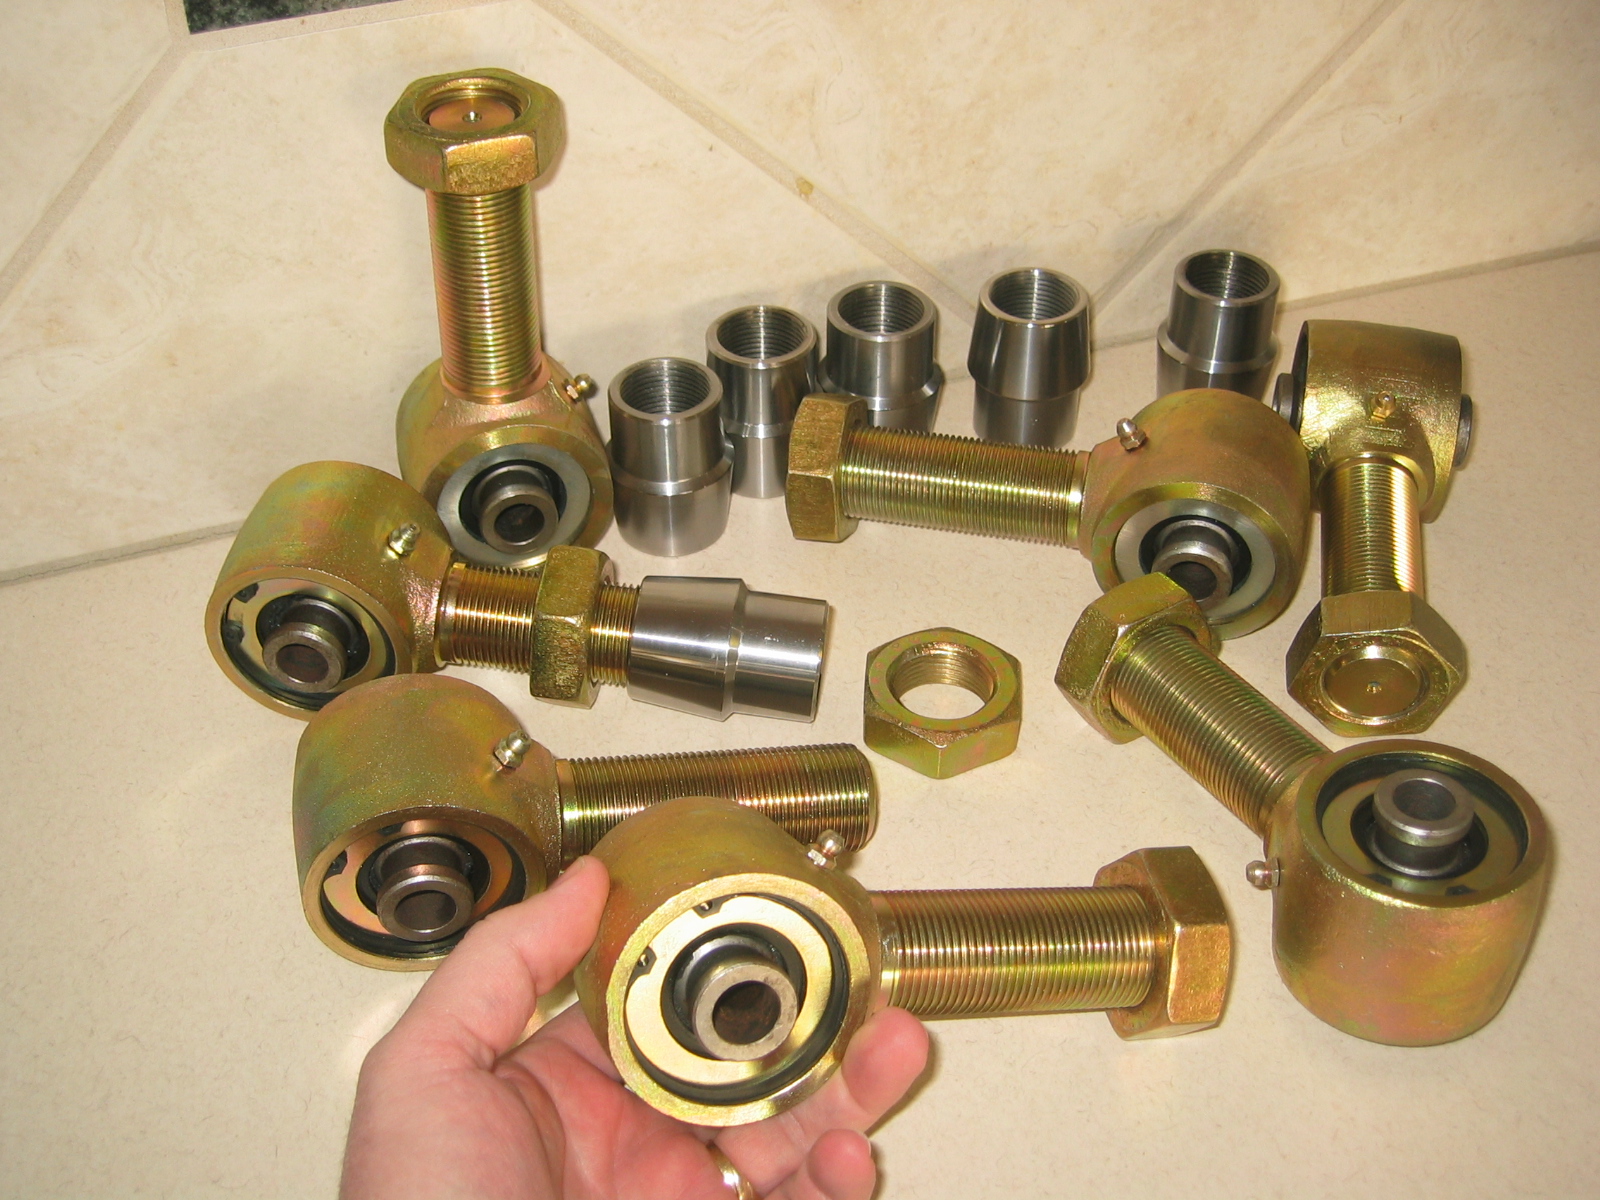
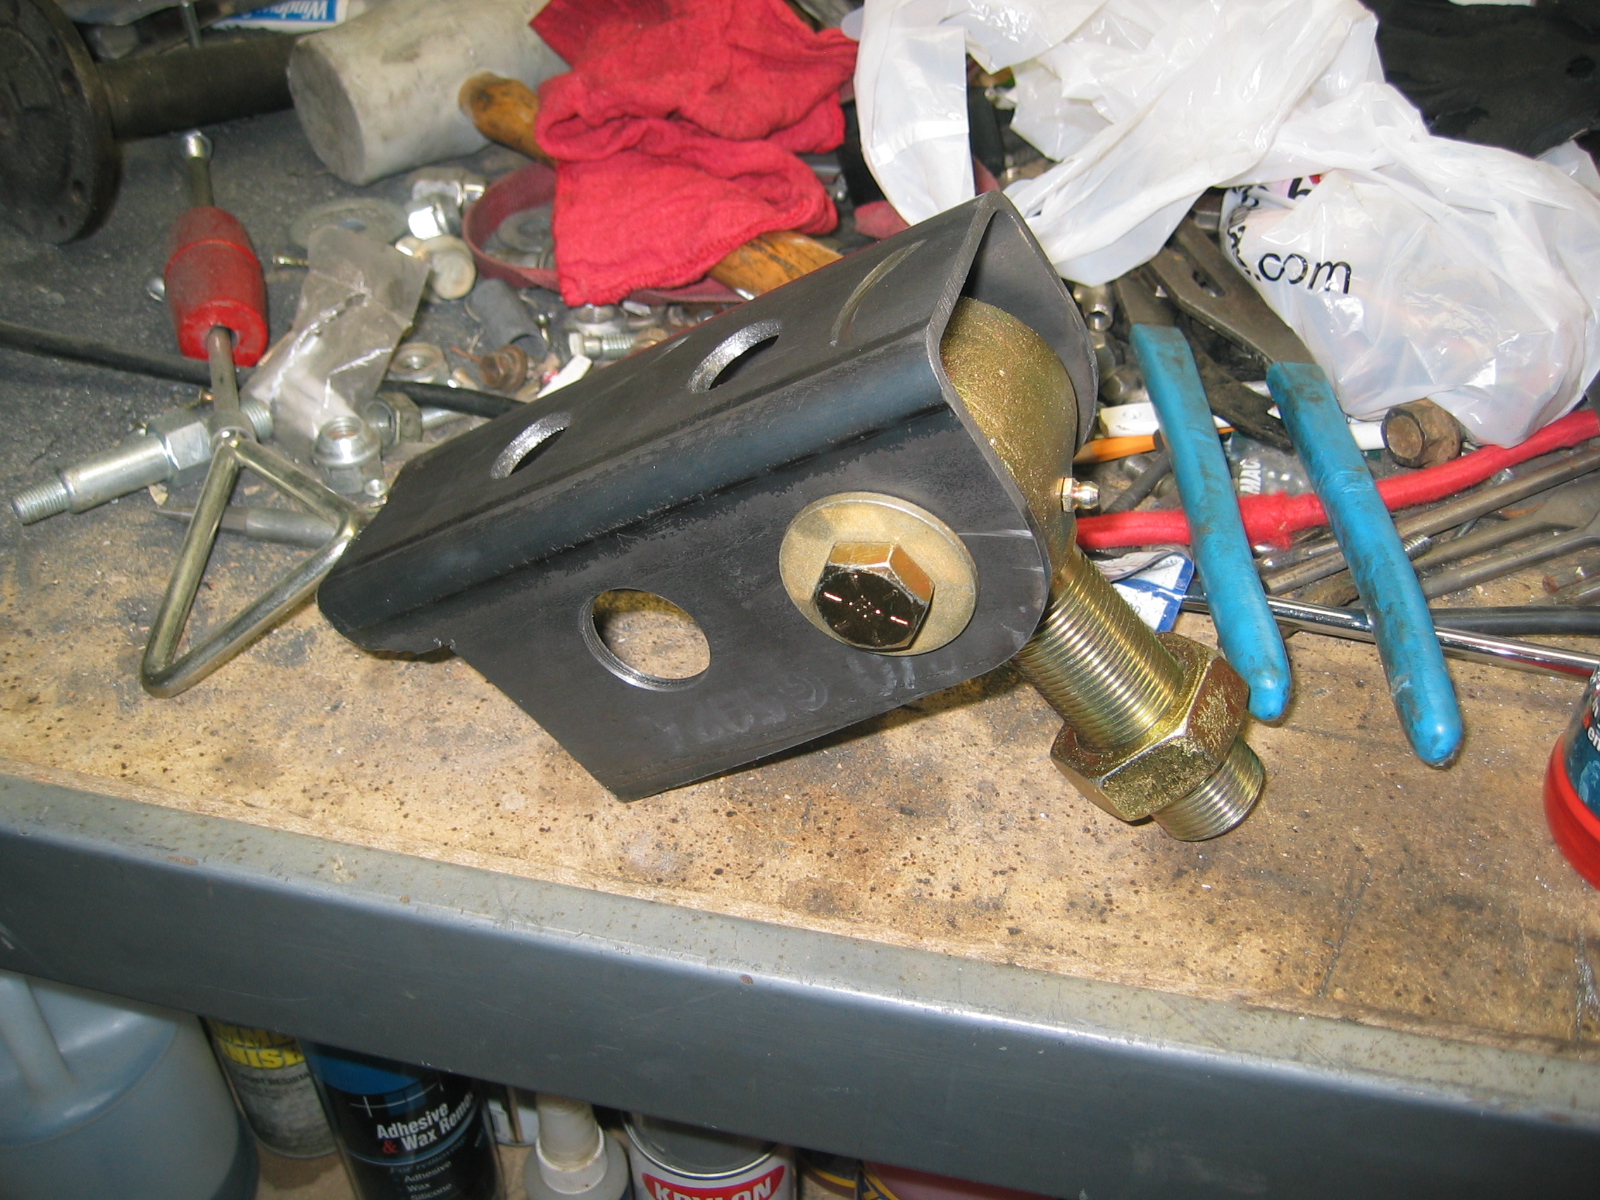
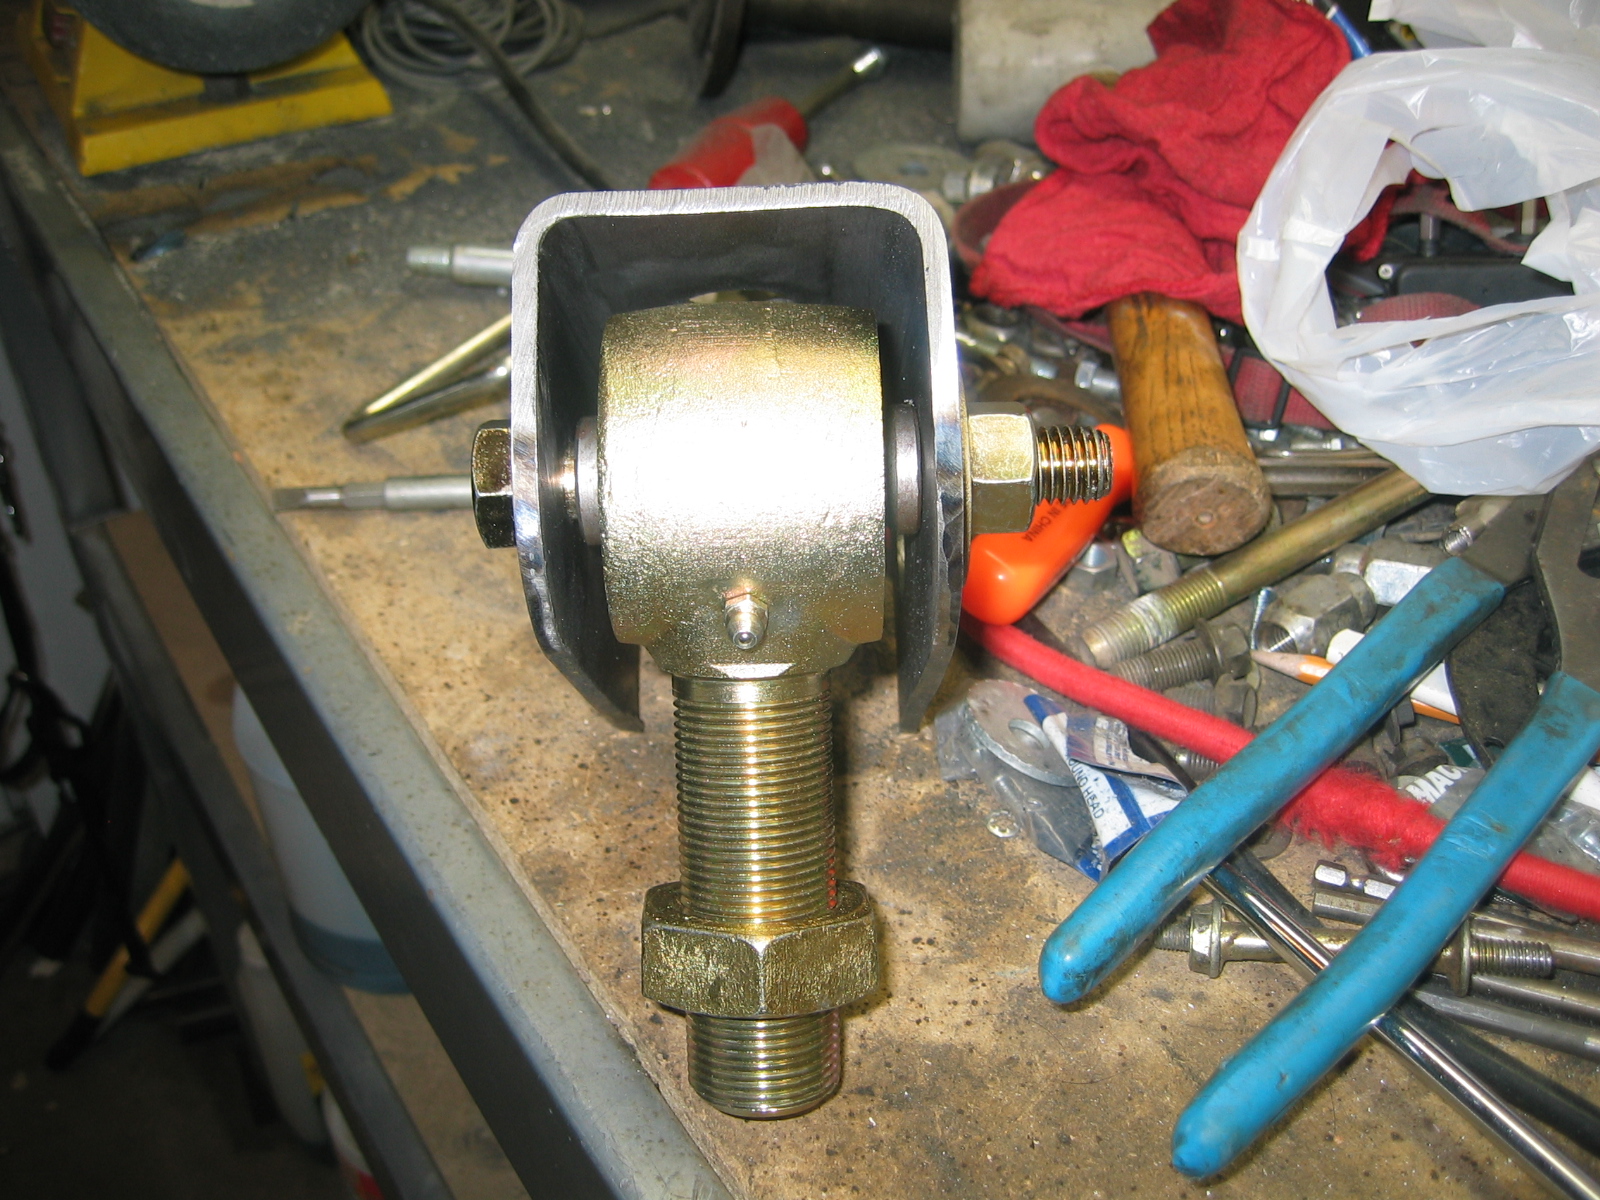
January 10th - Got my Joints!! I've decided to use Johnny Joints for all link points. I went with Johnny Joints because they give more angle rotation compared to Heim Joints (30 degrees compared to only 22). Also heim joints are more expensive and are noisier than johnny joints. After pricing them out I decided to order them through the manufacturer Currie Enterprises for around $36 ea with jam nut. I ordered 7 total because I want to have one as a spare :) I went with the heavy duty 2.5" Johnny Joints with the larger 1.25" forged stud. Also I went with the larger 5/8" through bolt size. Standard is only 9/16" bolt size. The nice thing about these larger johnny joints are the threaded stud is forged instead of welded on. This provides much more strength and almost matches the stock bolt size of my radius arm mounts which are around .68" thick. There was no cost increase by going with the bigger 5/8" (.625") bolt size and this is the biggest size you can go and still get your 30 degrees of rotation out of the joint. The Tube adapters were ordered through Poly Performance at $14 per. They are all 1.25"-12 RH. I decided to get everything Right Hand thread (RH) because if I ever break a joint I would have to replace it with the same threaded joint. If I broke a LH joint I would have to replace it with a LH spare or vise versus. Instead of carrying two different spares why not go with all the same kind. The only downside of going with all RH is you can't easily loosen the jam nuts and simply twist the tube adjusting the length of your link. I don't plan on adjusting my castor angle that often anyways :) For the lower arms it is almost recommended to go with the same thread because as the jam nuts get hit on the rocks and loosen up the length of the arm can't change. These things are huge and heavy!
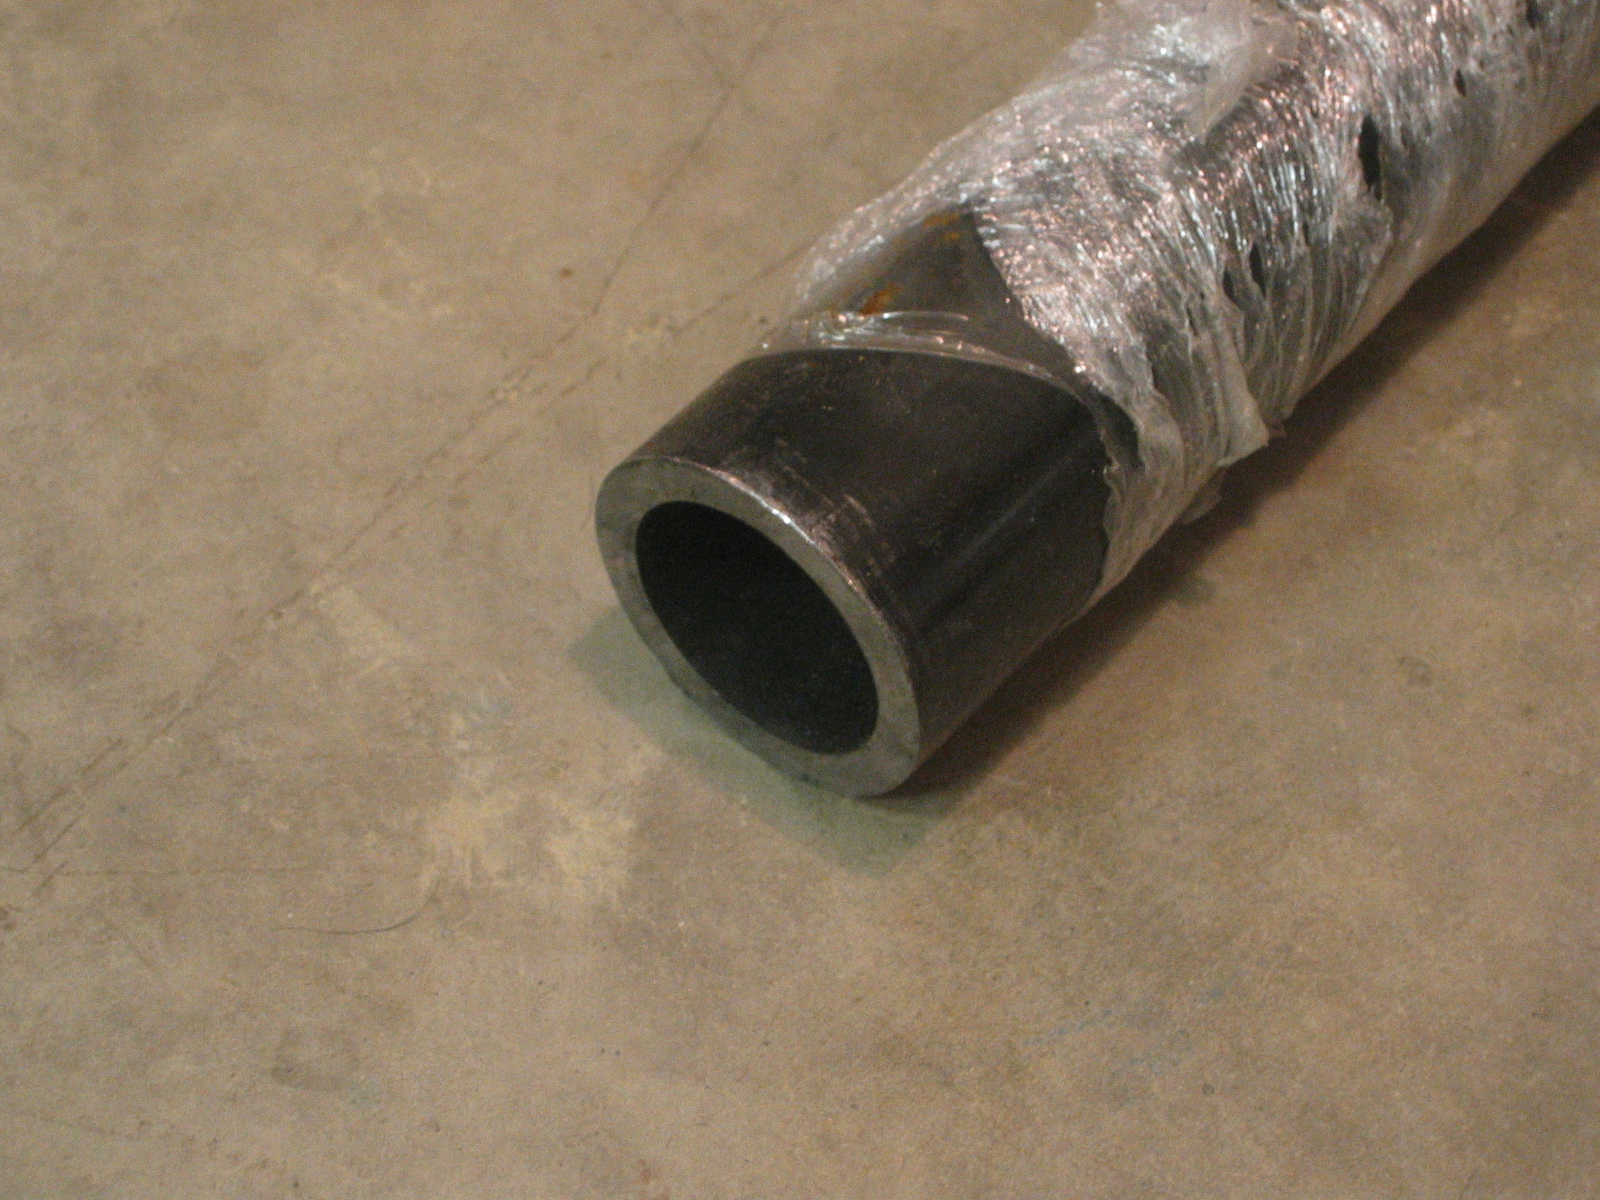
I should have my 2" .250 wall DOM tubing next Tuesday! In the meantime I'm going to wash the truck good and start tearing things apart. Stay tuned!
January 19th - Got my tubing finally!
Now the real work begins....
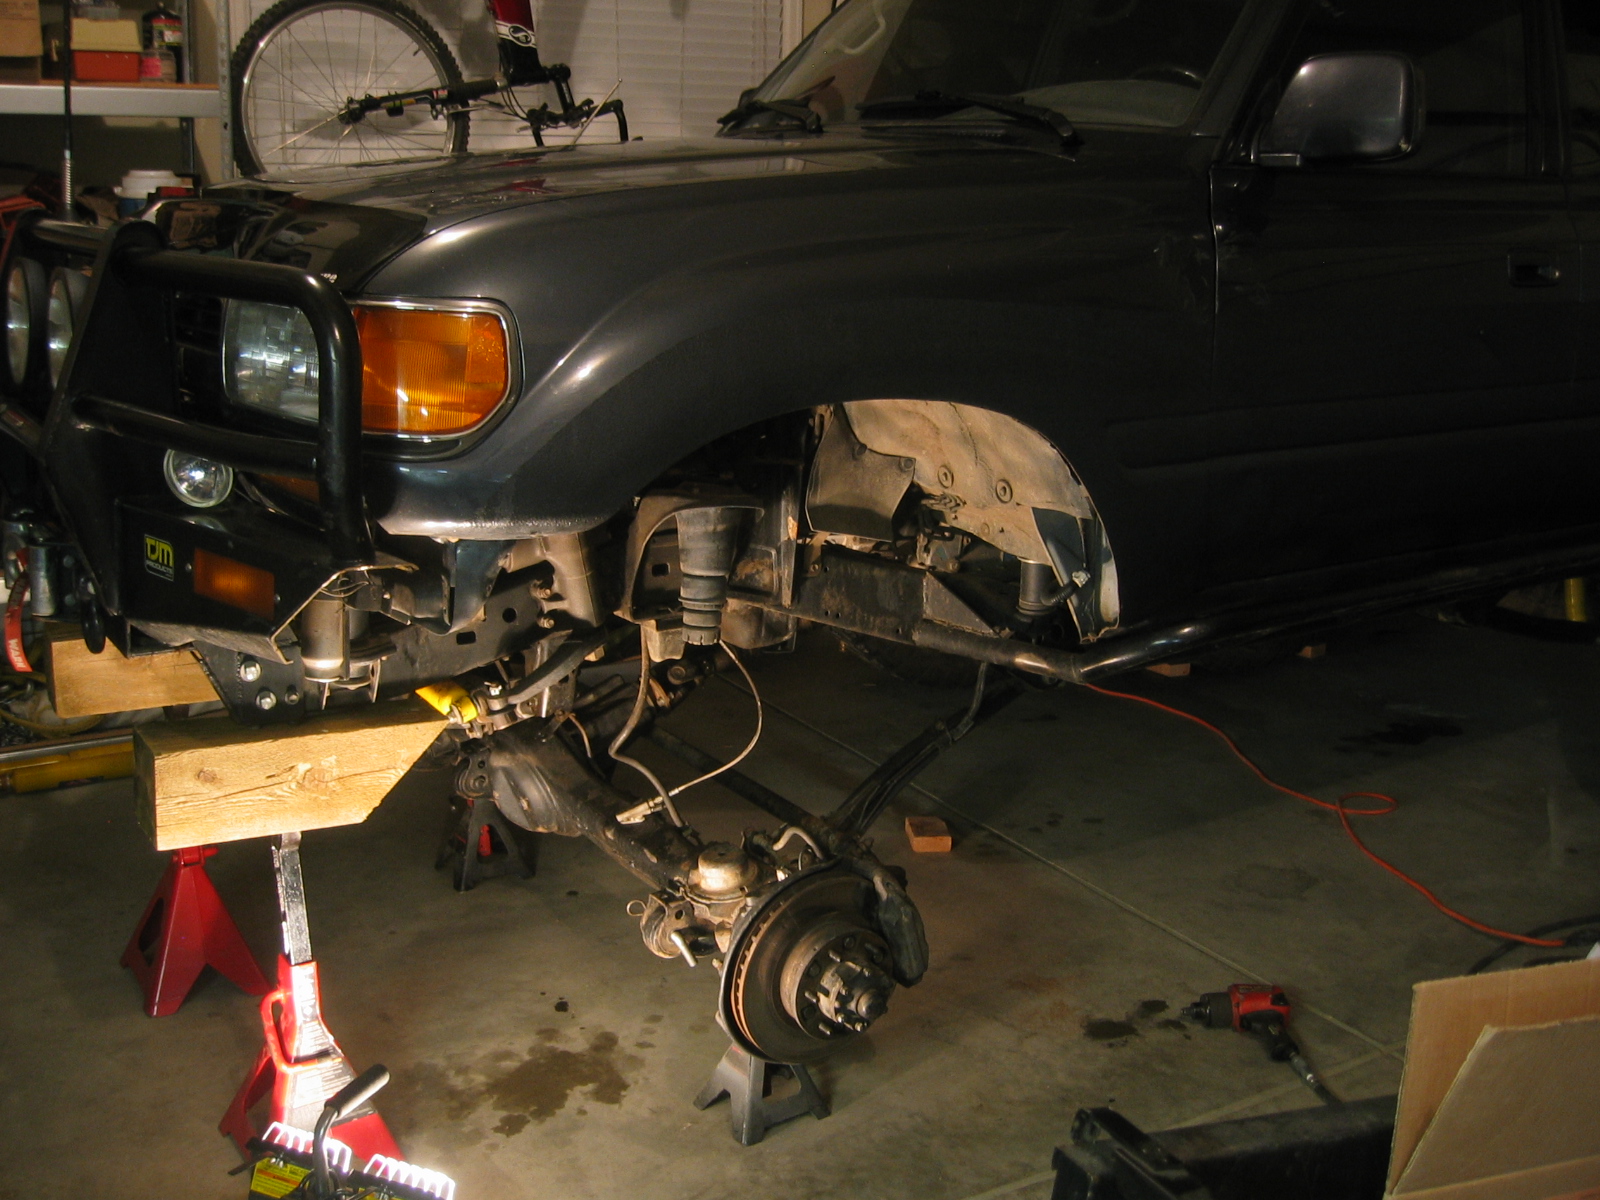
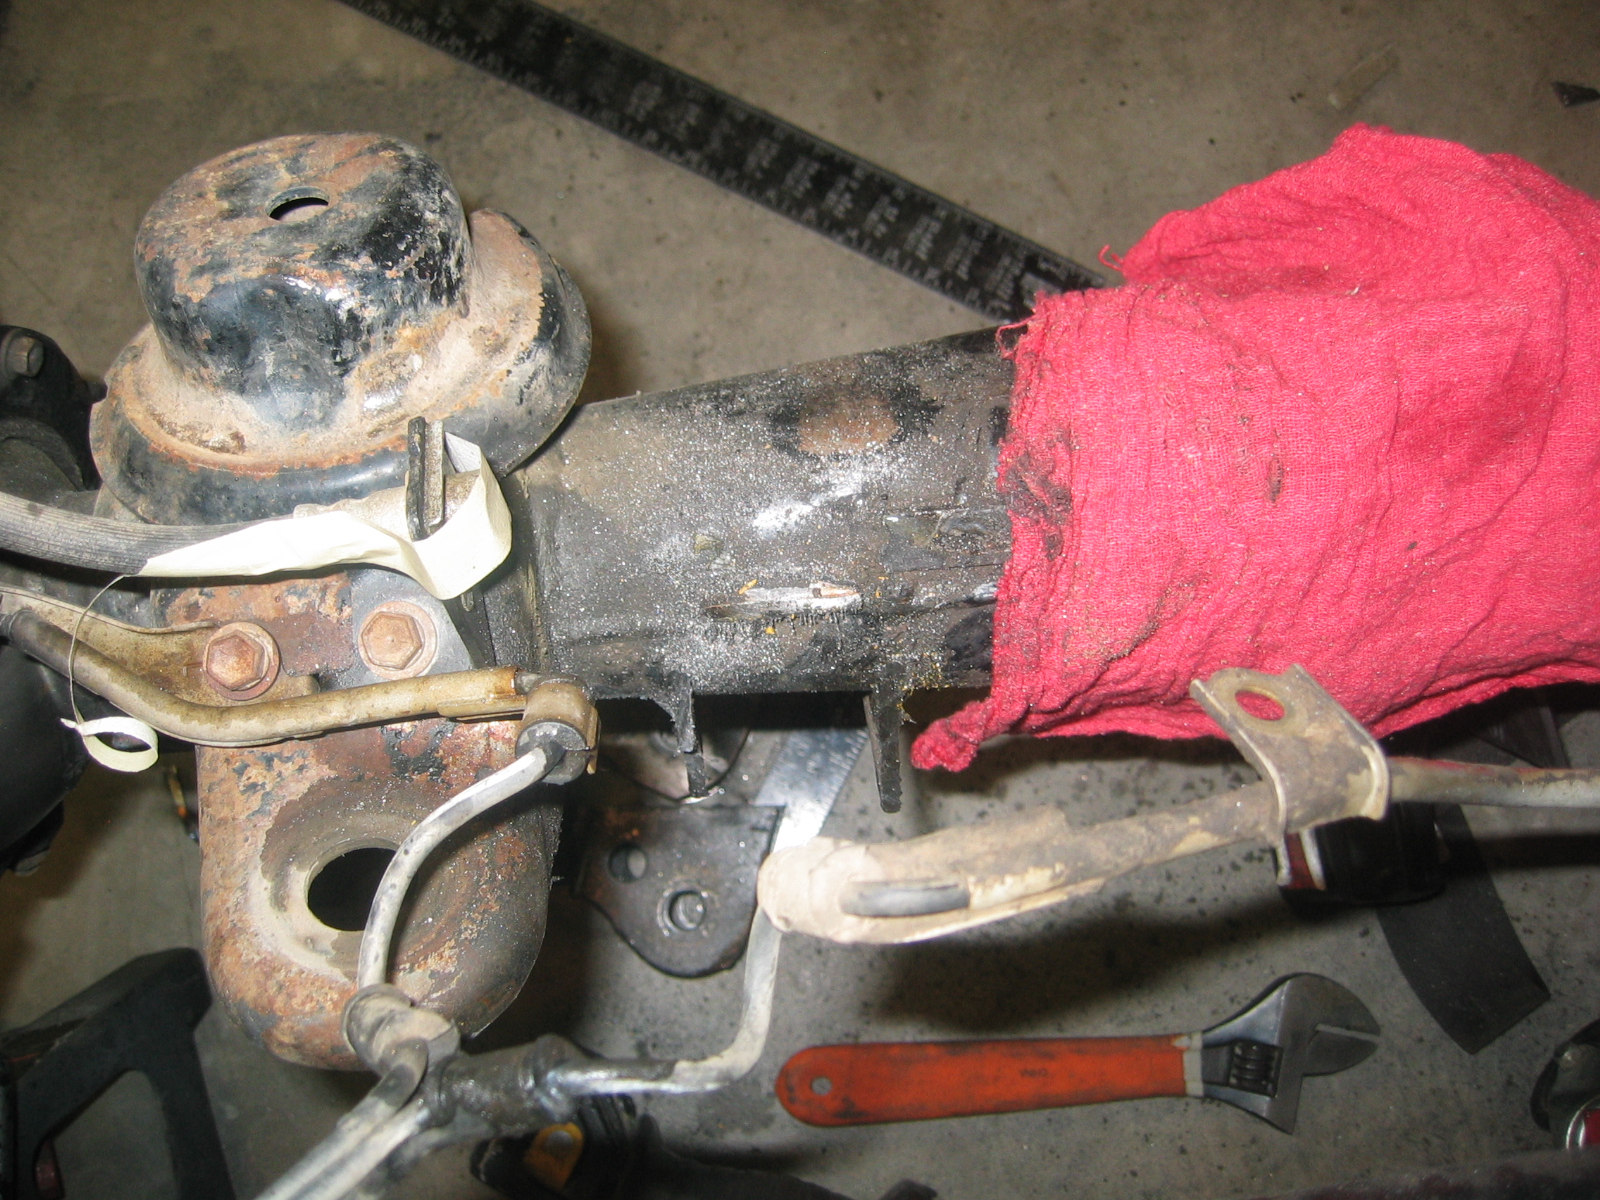
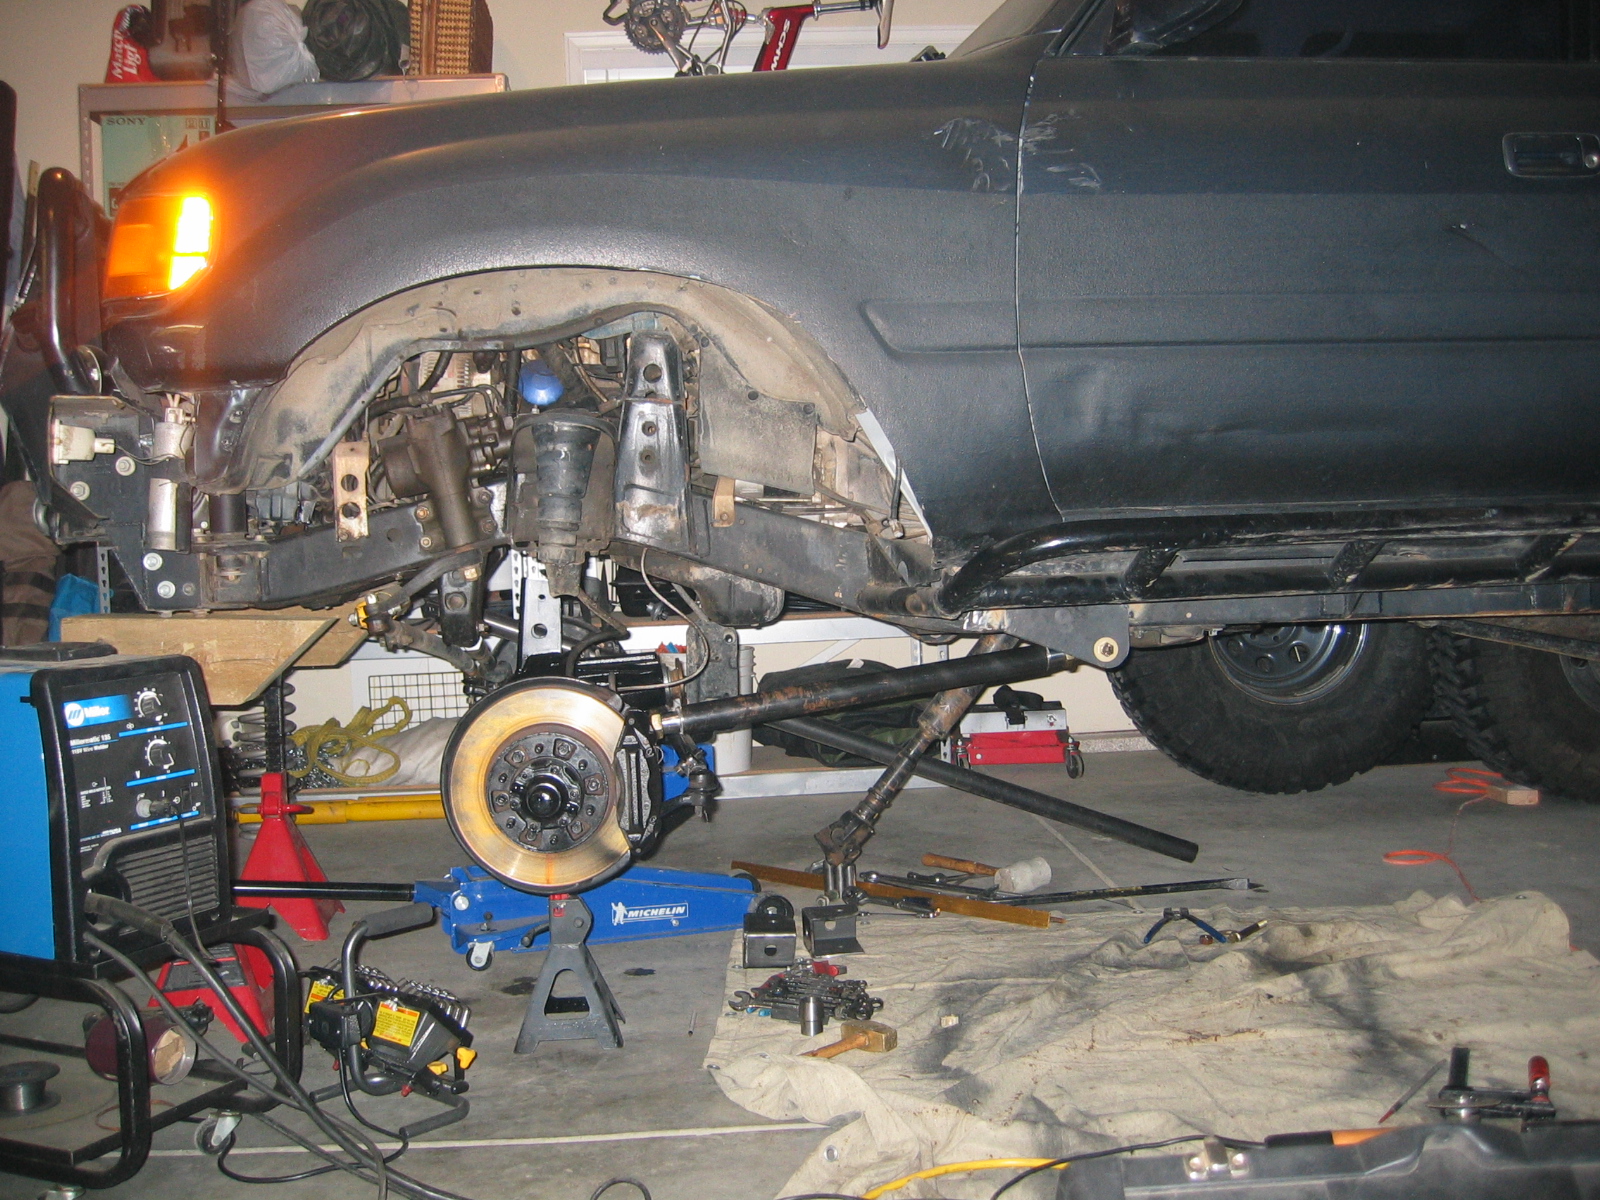
January 21st - Preparing for the surgury
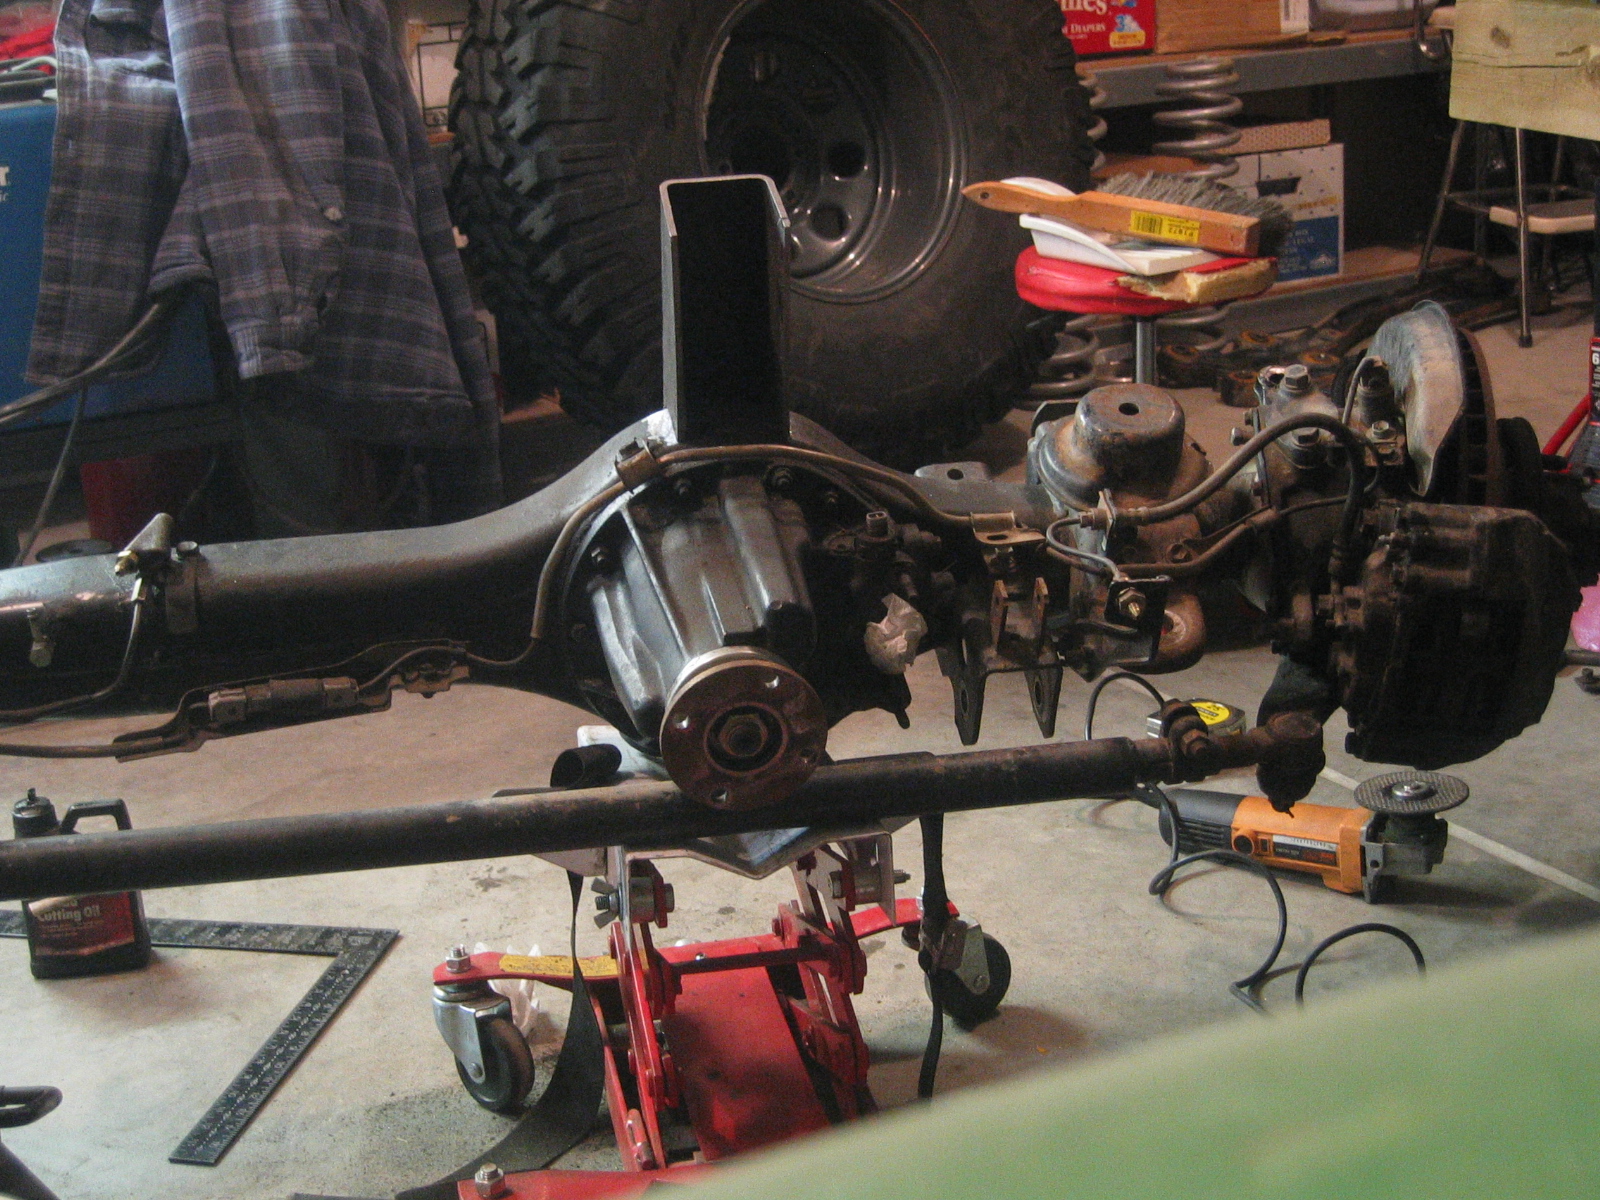
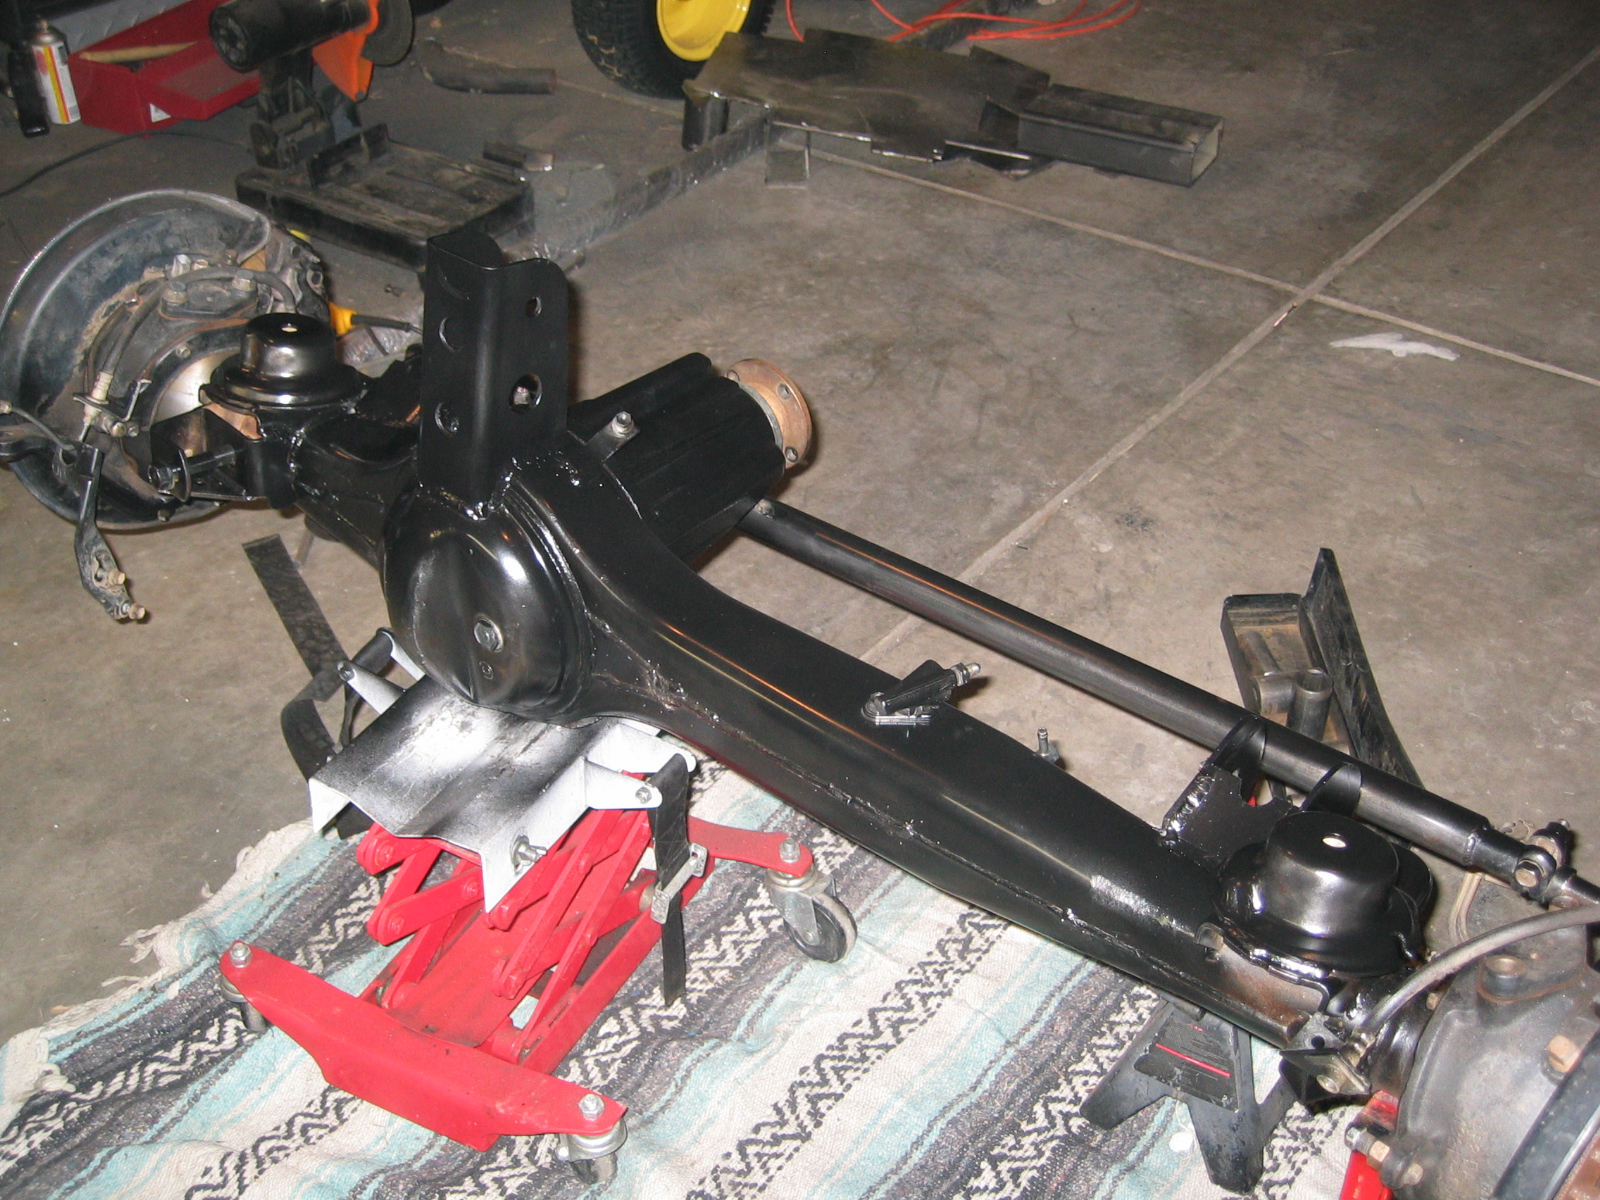
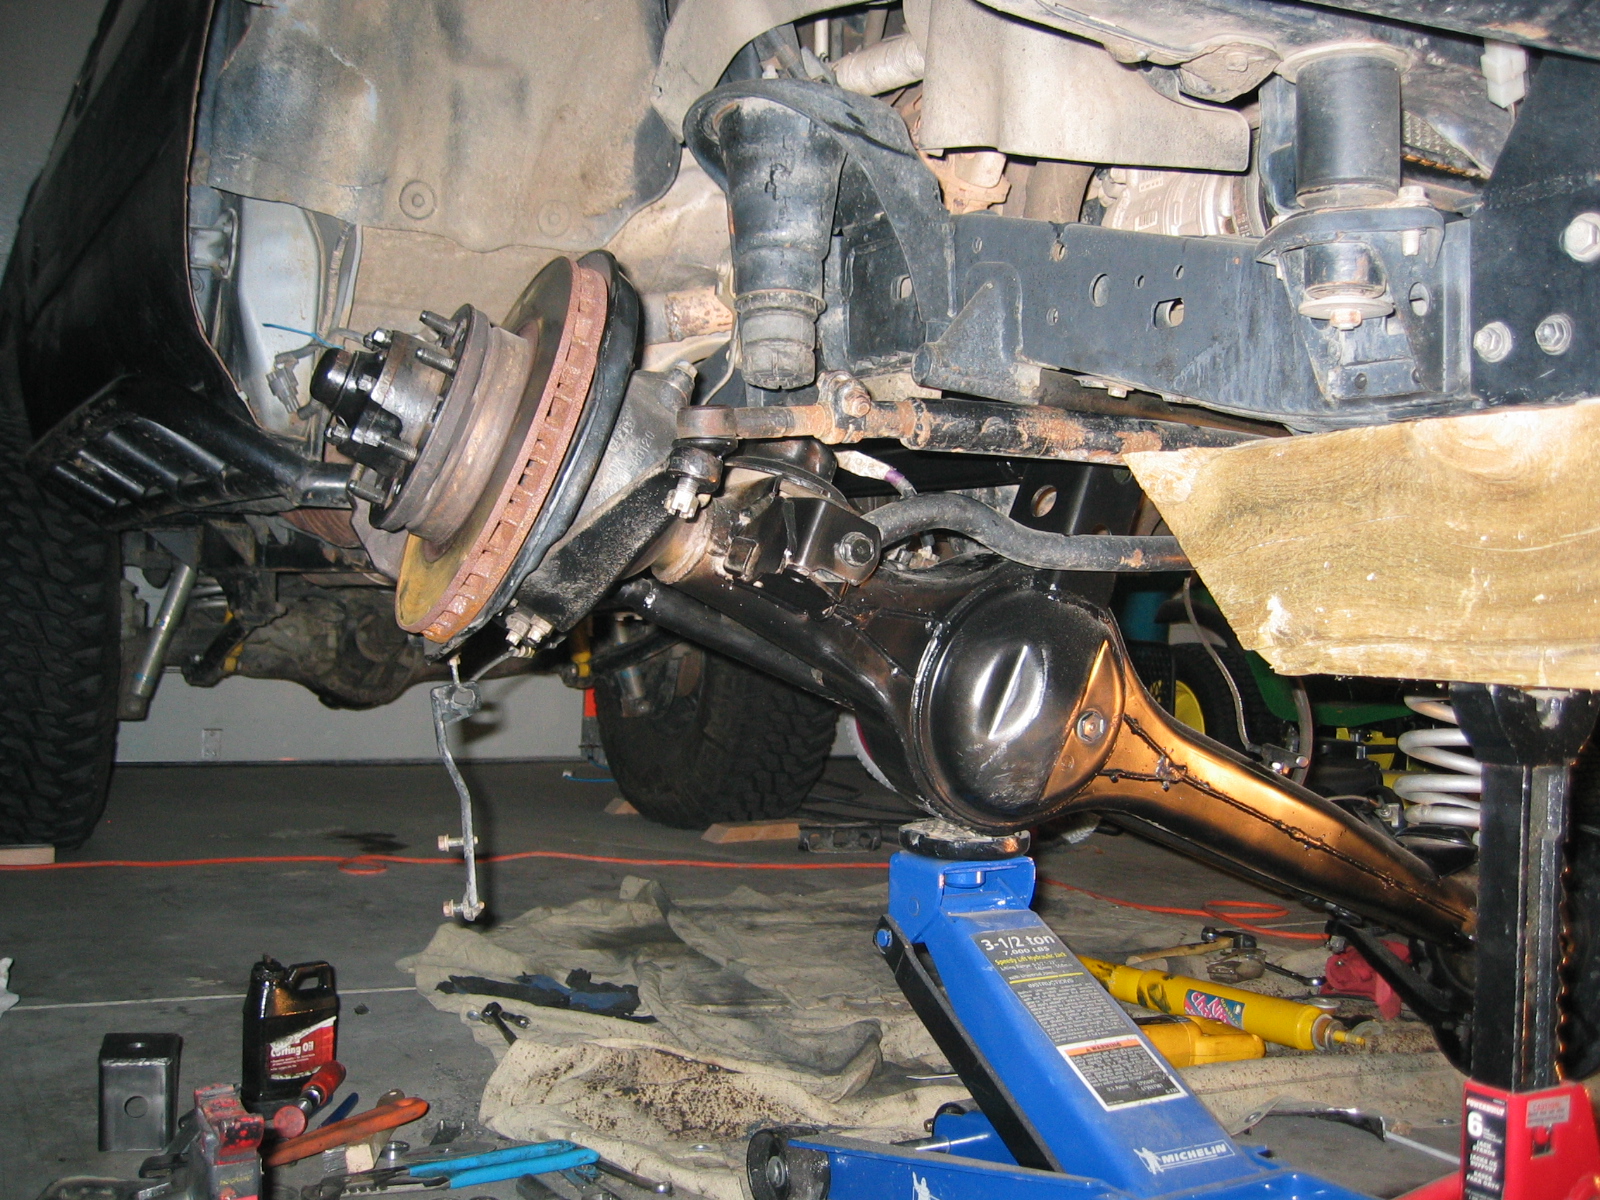
January 26th - Removed Axle and started building tower The tower is 6 inches above the diff and my link point will end up being 5" above the top. This should give around 10 inches of verticle spacing between the links at the axle. With 40" tires this is a good amount of seperation to fight axle wrap. Since I'm keeping my panhard rod the side to side forces will be taken care of. The forward/backward forces will be huge on this tower so I widened the base to wrap down the front of the diff which should strengthen it even more. I'm planning on welding another plate to enclose the tower at the lower half. The 3" metal tubing is almost an exact fit for the Johnny Joints. I have not welded anything yet. I just have the tower sitting there for reference. While I'm at it I think I'll put on a diff guard as well :)
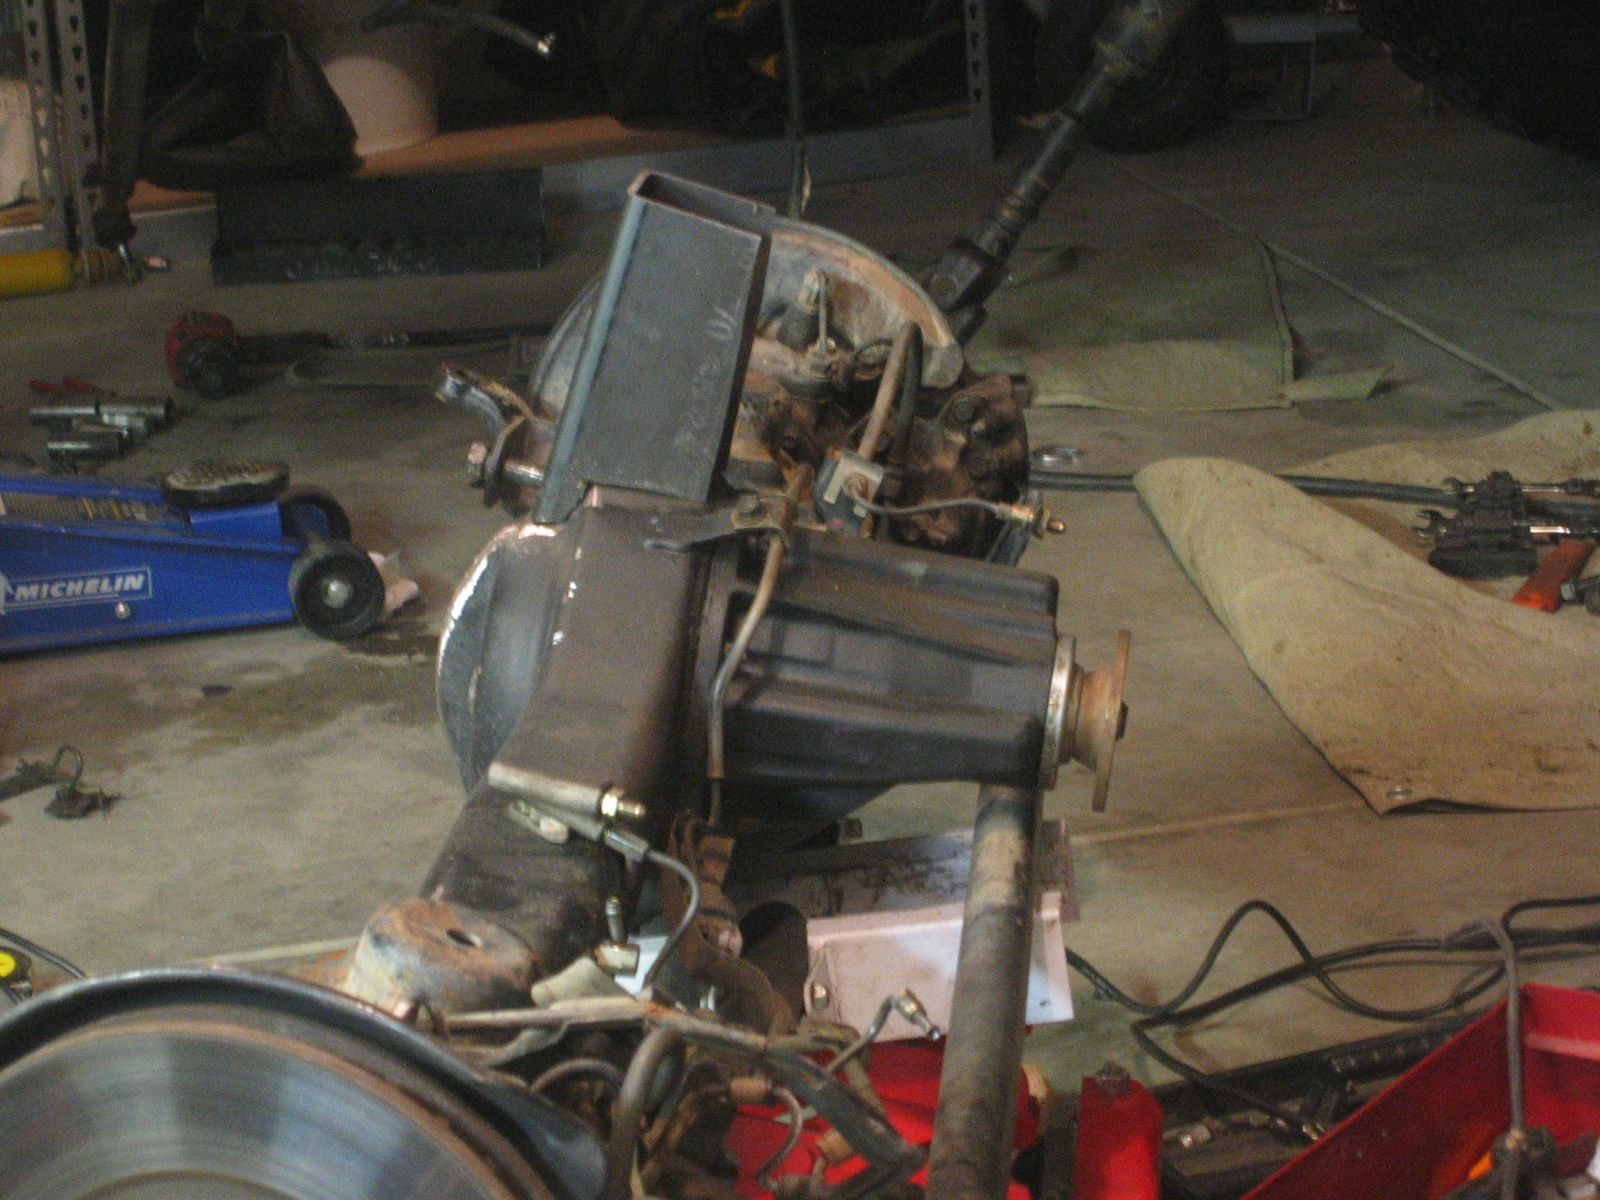
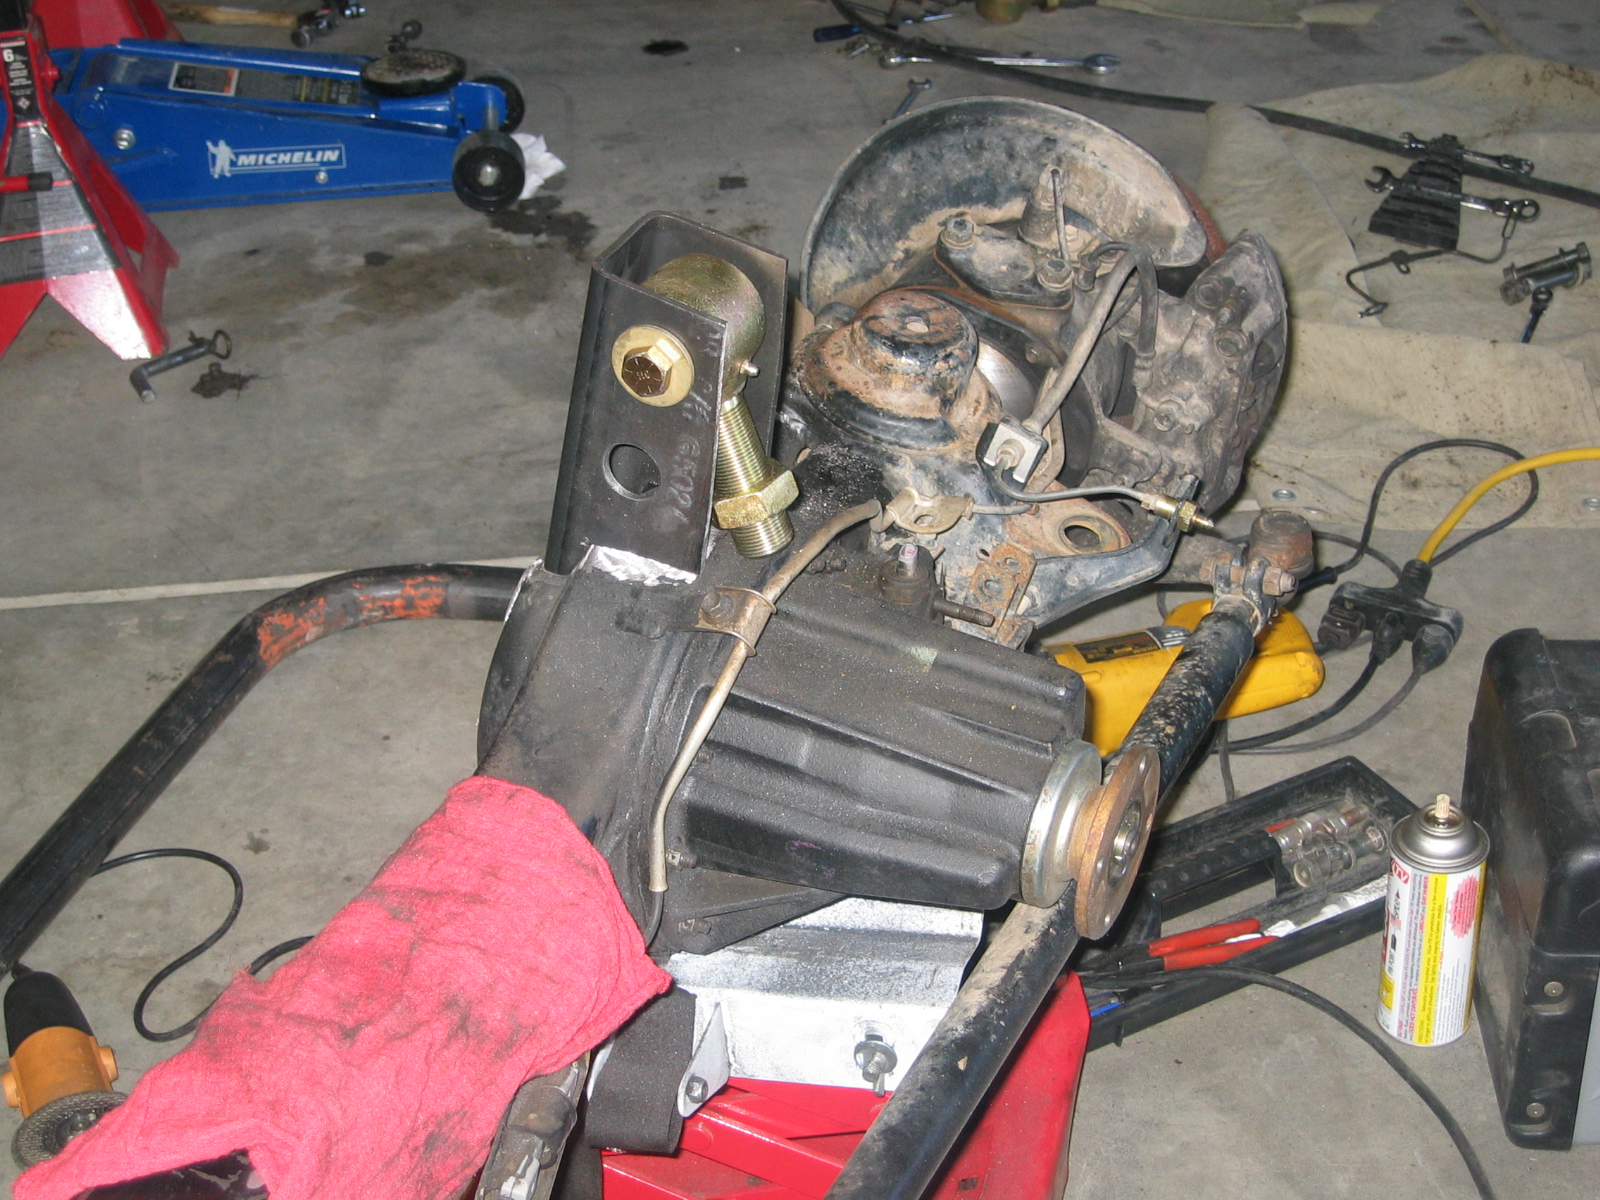
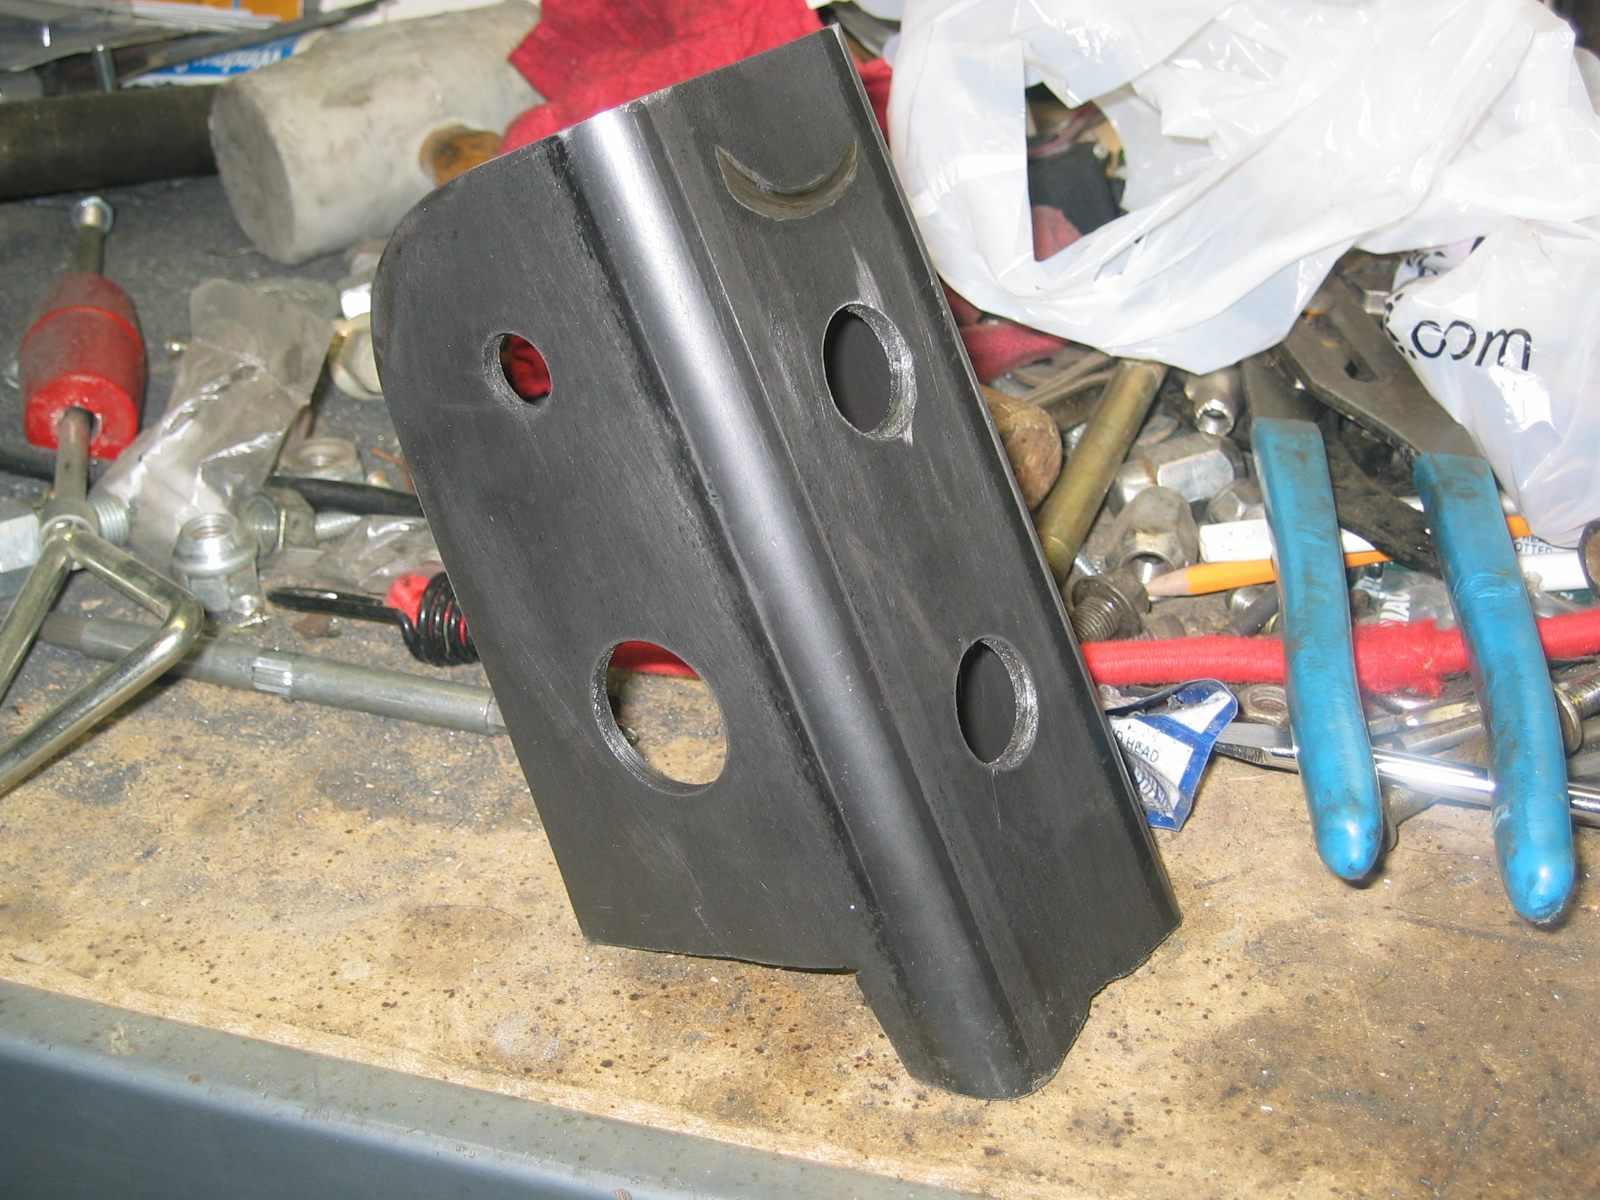
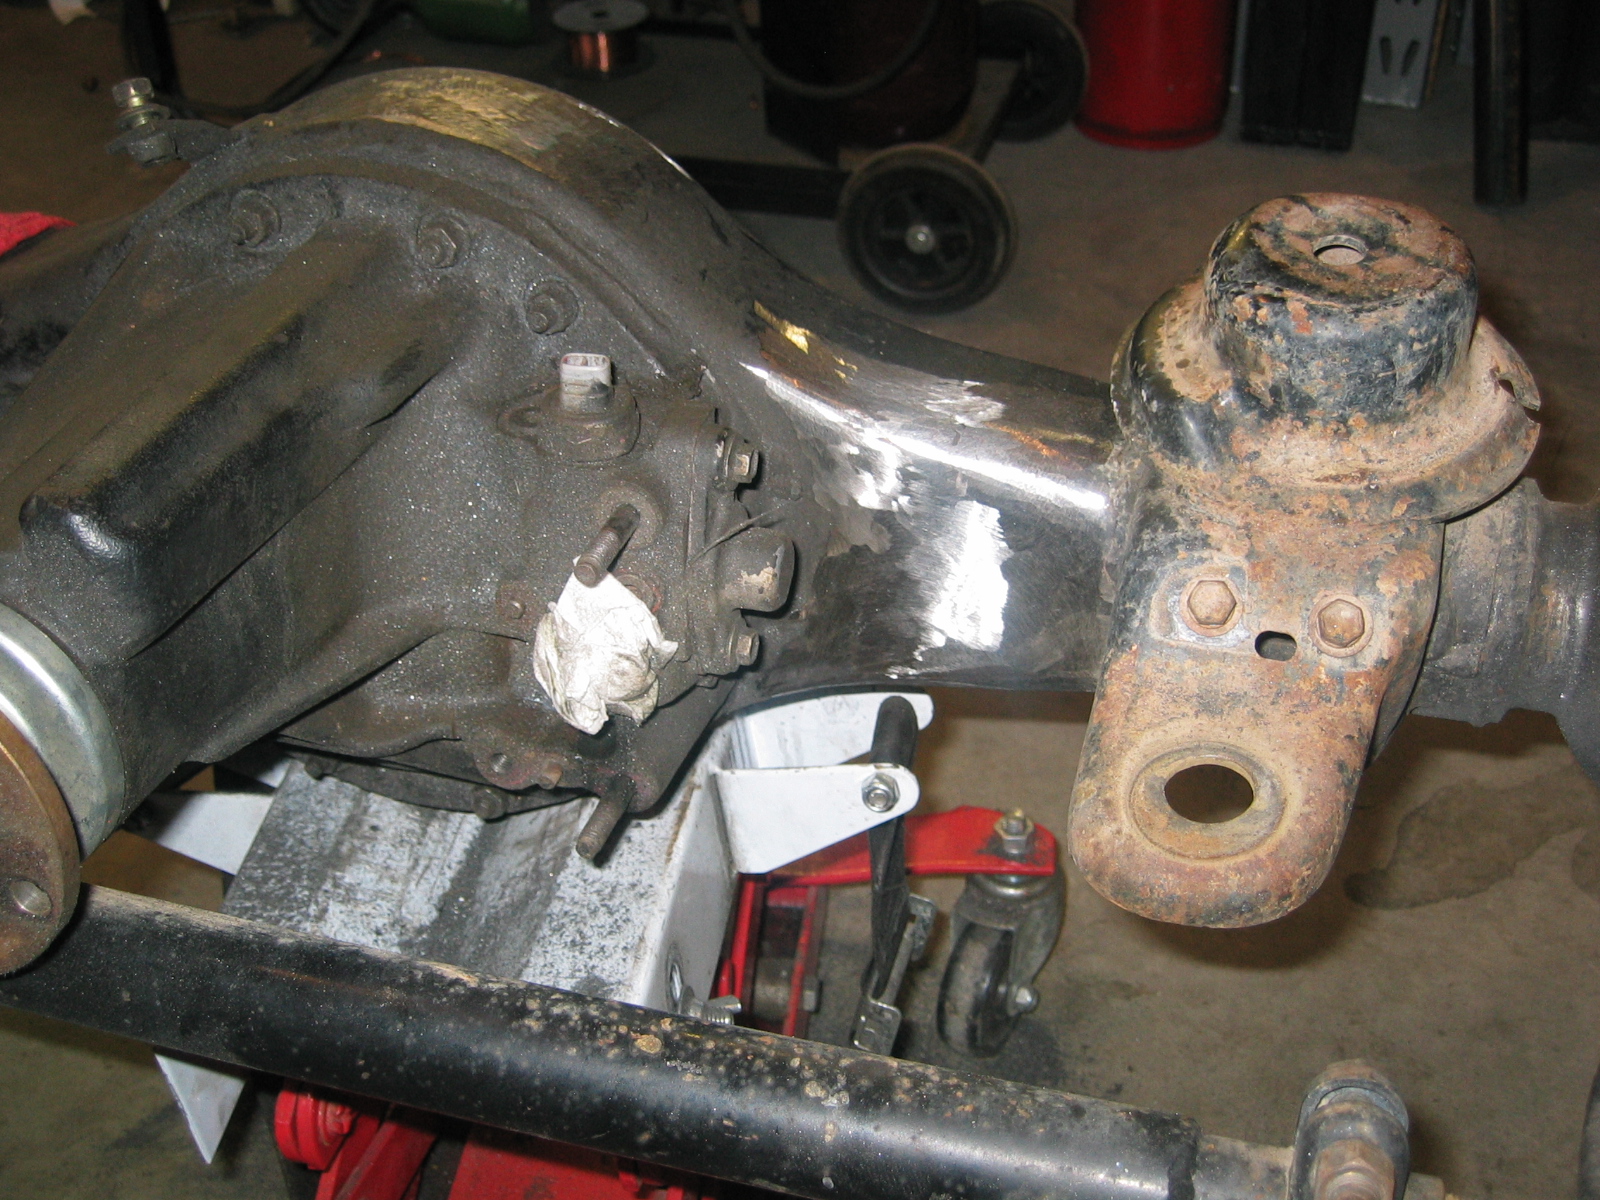
January 28th - Removed control arm brackets and started new axle mounts It was fun cutting off those old axle mounts :) The tower piece is coming along nicely. I drilled the 5/8" holes for the upper link. The Johnny Joint is exactly 5 inches above the top point of the diff housing. Still have more work to do until the tower is ready to go.
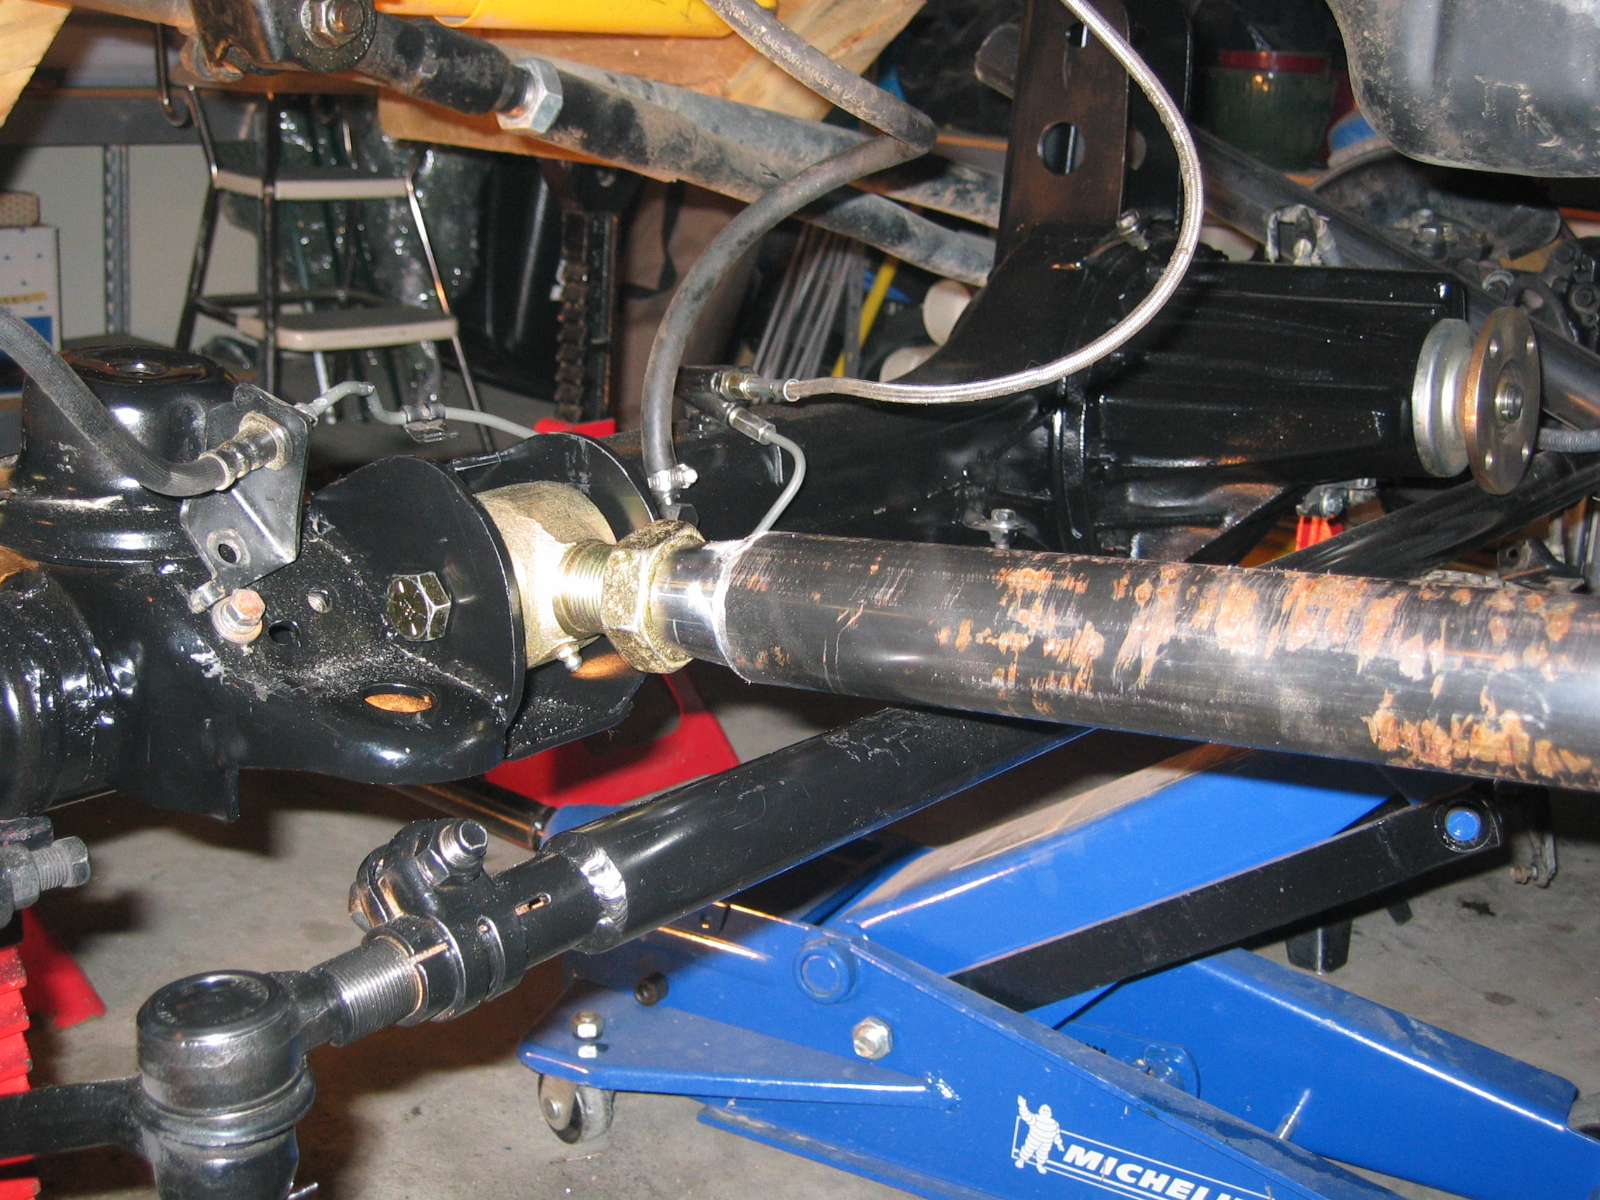
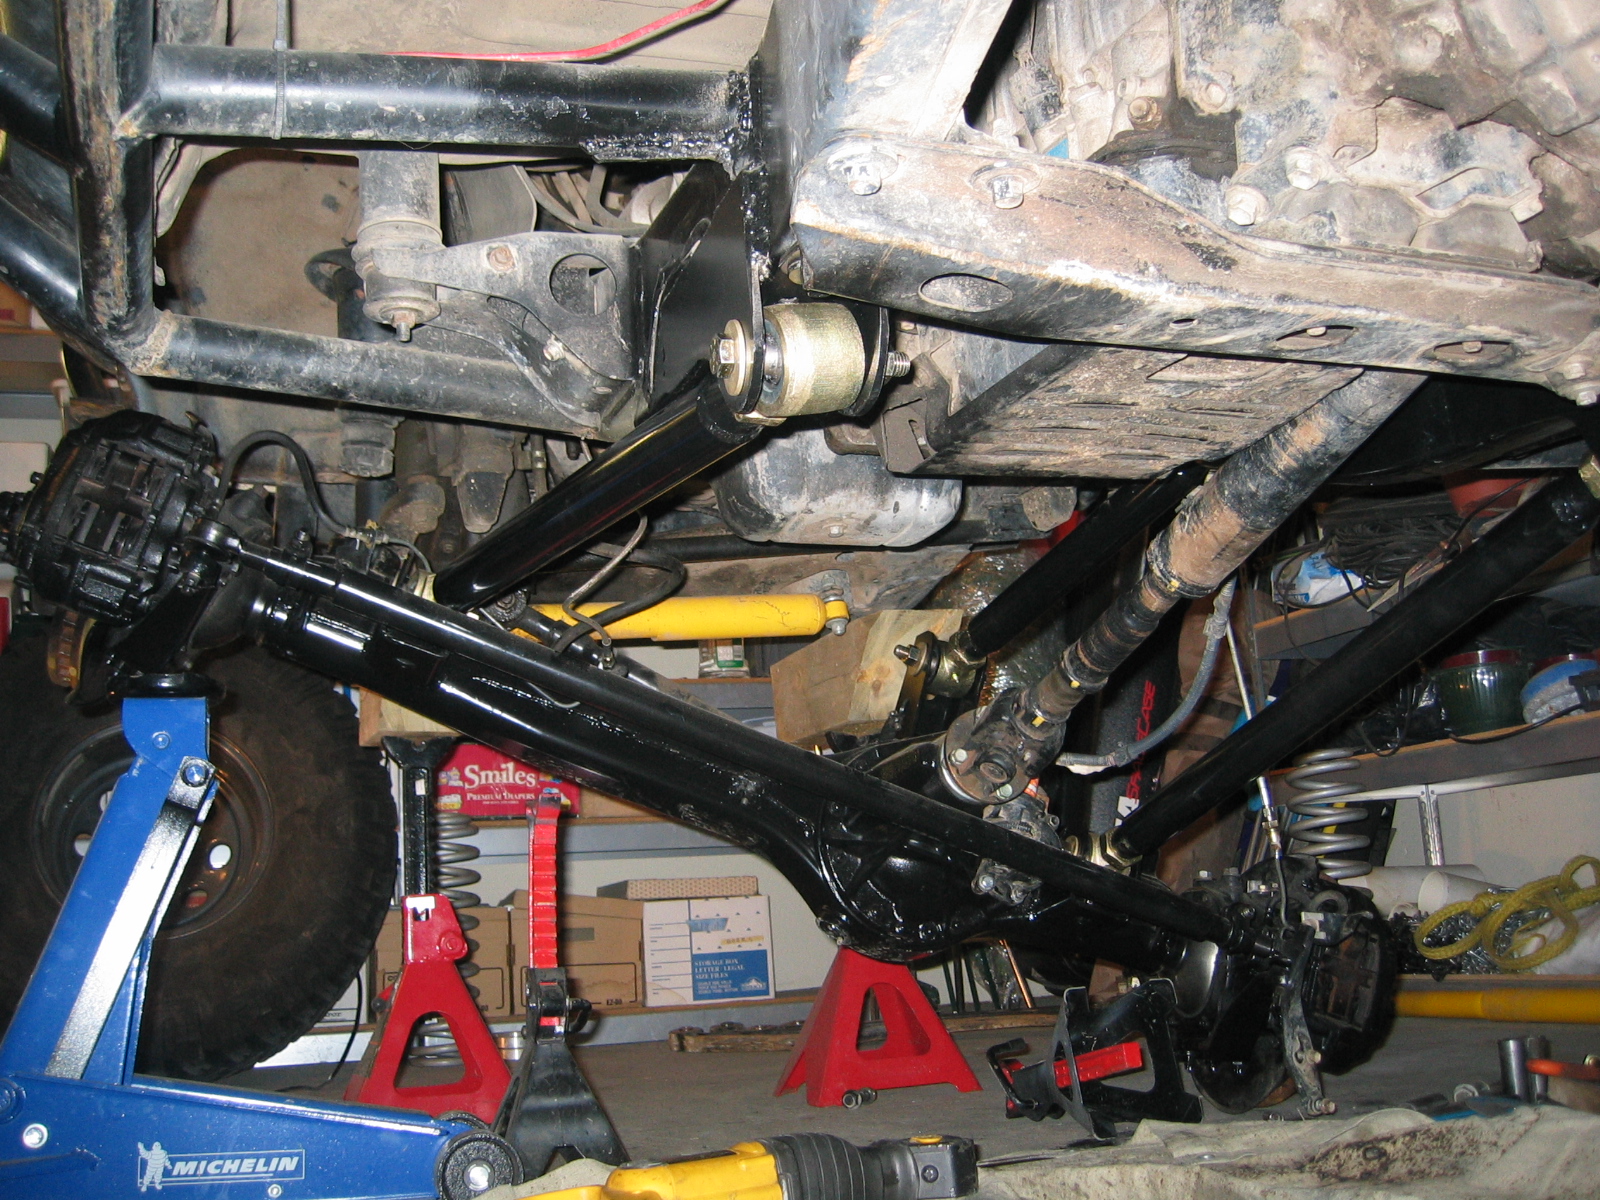
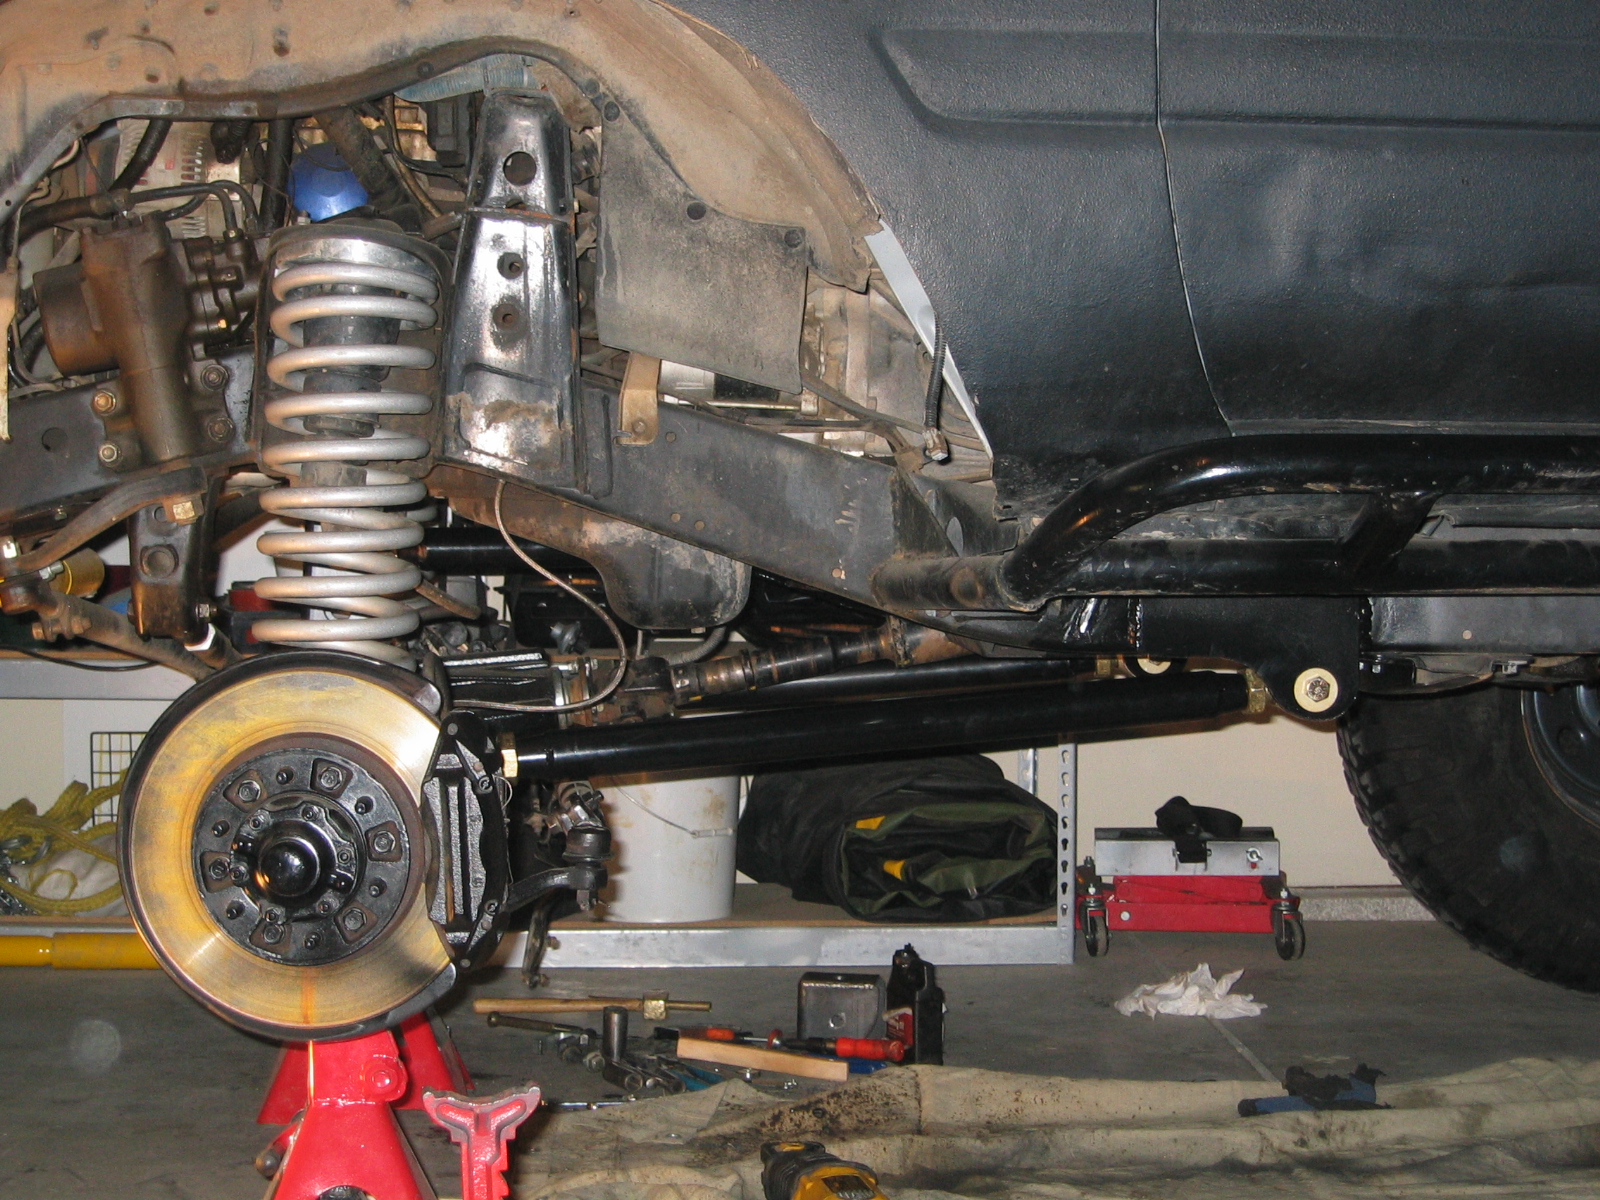
After grinding down the old axle mounts I started on the new ones. The tricky side is the right side because of how close the diff actuator and spring mounts are. There is not a lot of room to work with here. You either make the johnny joint link bolt slide in above the shock mount or below it. I decided to make the mounts so the link point is just above the lower shock mount position. I left room so you can still slide the bolt in/out (maintenance) without taking off the shocks or spring. I also decided to make my mounts flush with the side of the spring perches so not only will they be welded to the axle but also to the perches for added support. It looks like I'm still about 9-10 inches seperation between upper and lower links points. So far I haven't had to make any major changes to my original design.
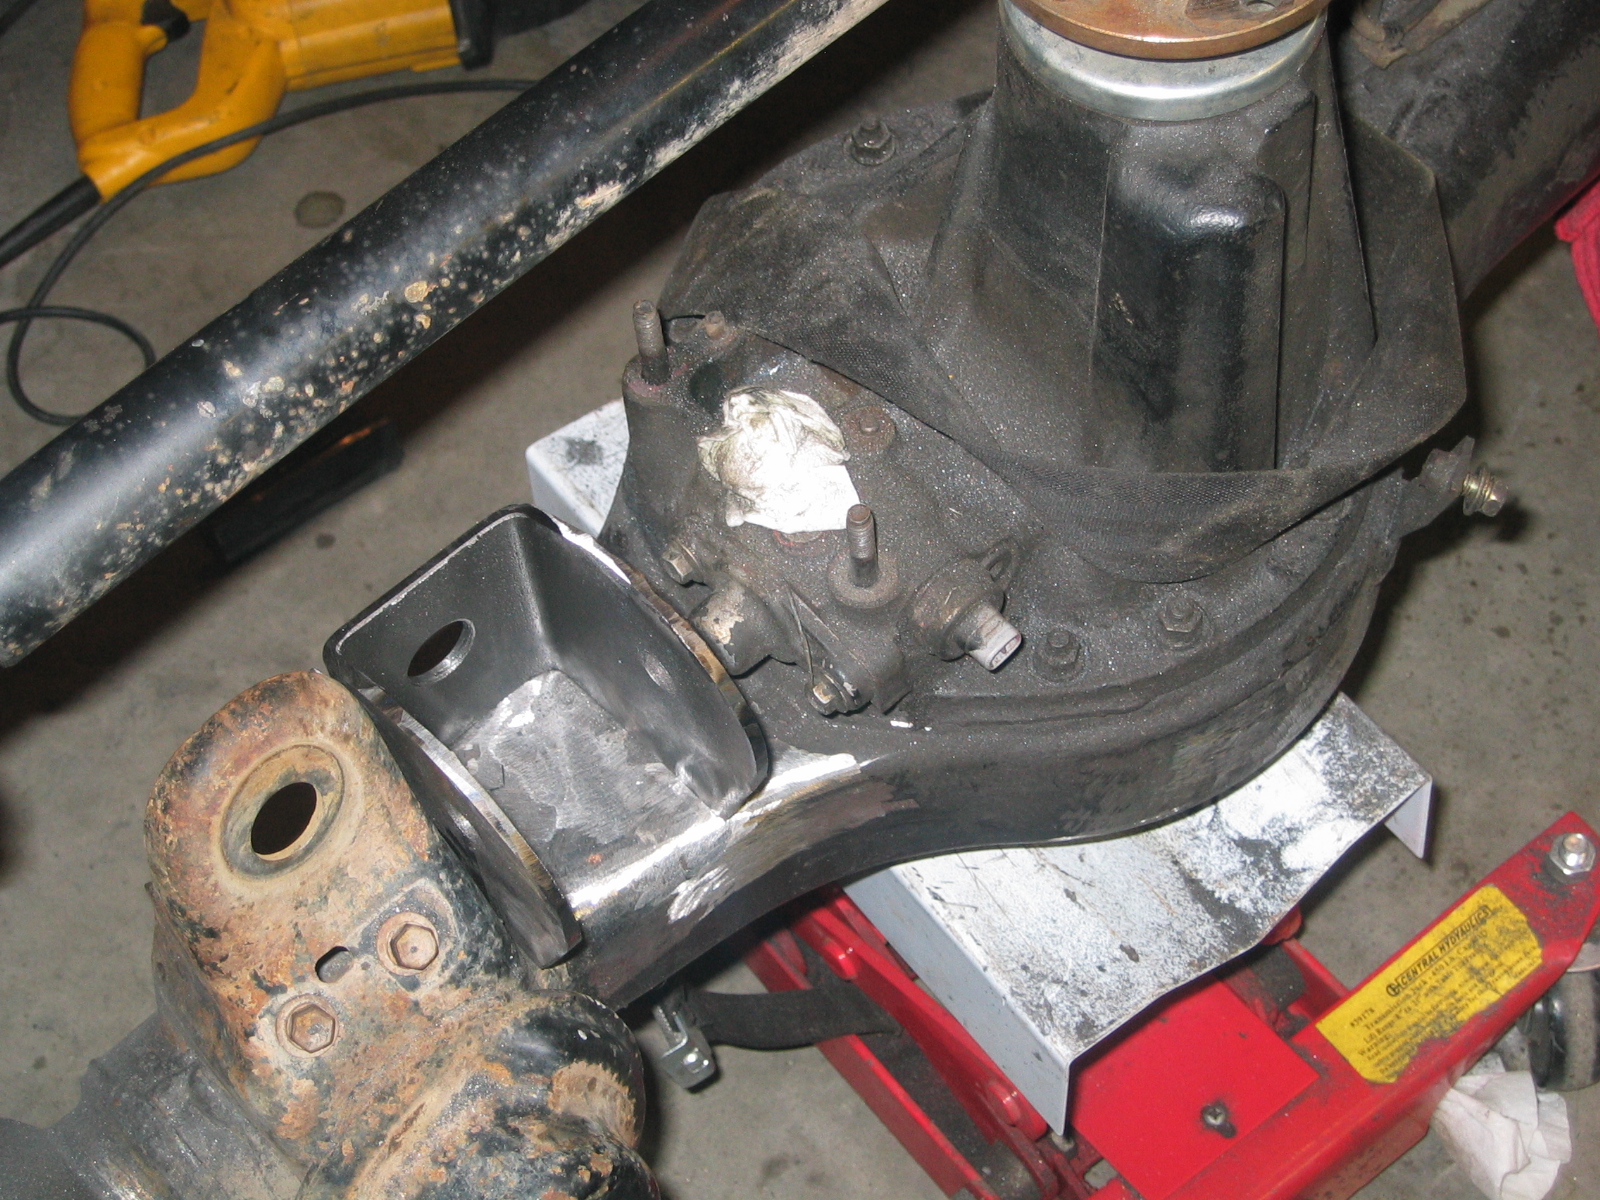
February 3rd - Axle mounts done and welded in place I finally got around to working on the truck again. All the mounts are done and welded into place. With my little Miller 135 welder I chose to use flux core over gas so I can get the most penetration. With it on 10 (max) it gets pretty good penetration on 3/16" metal. Not as pretty as gas but it'll do. I put the Johnny Joints in just for show :) 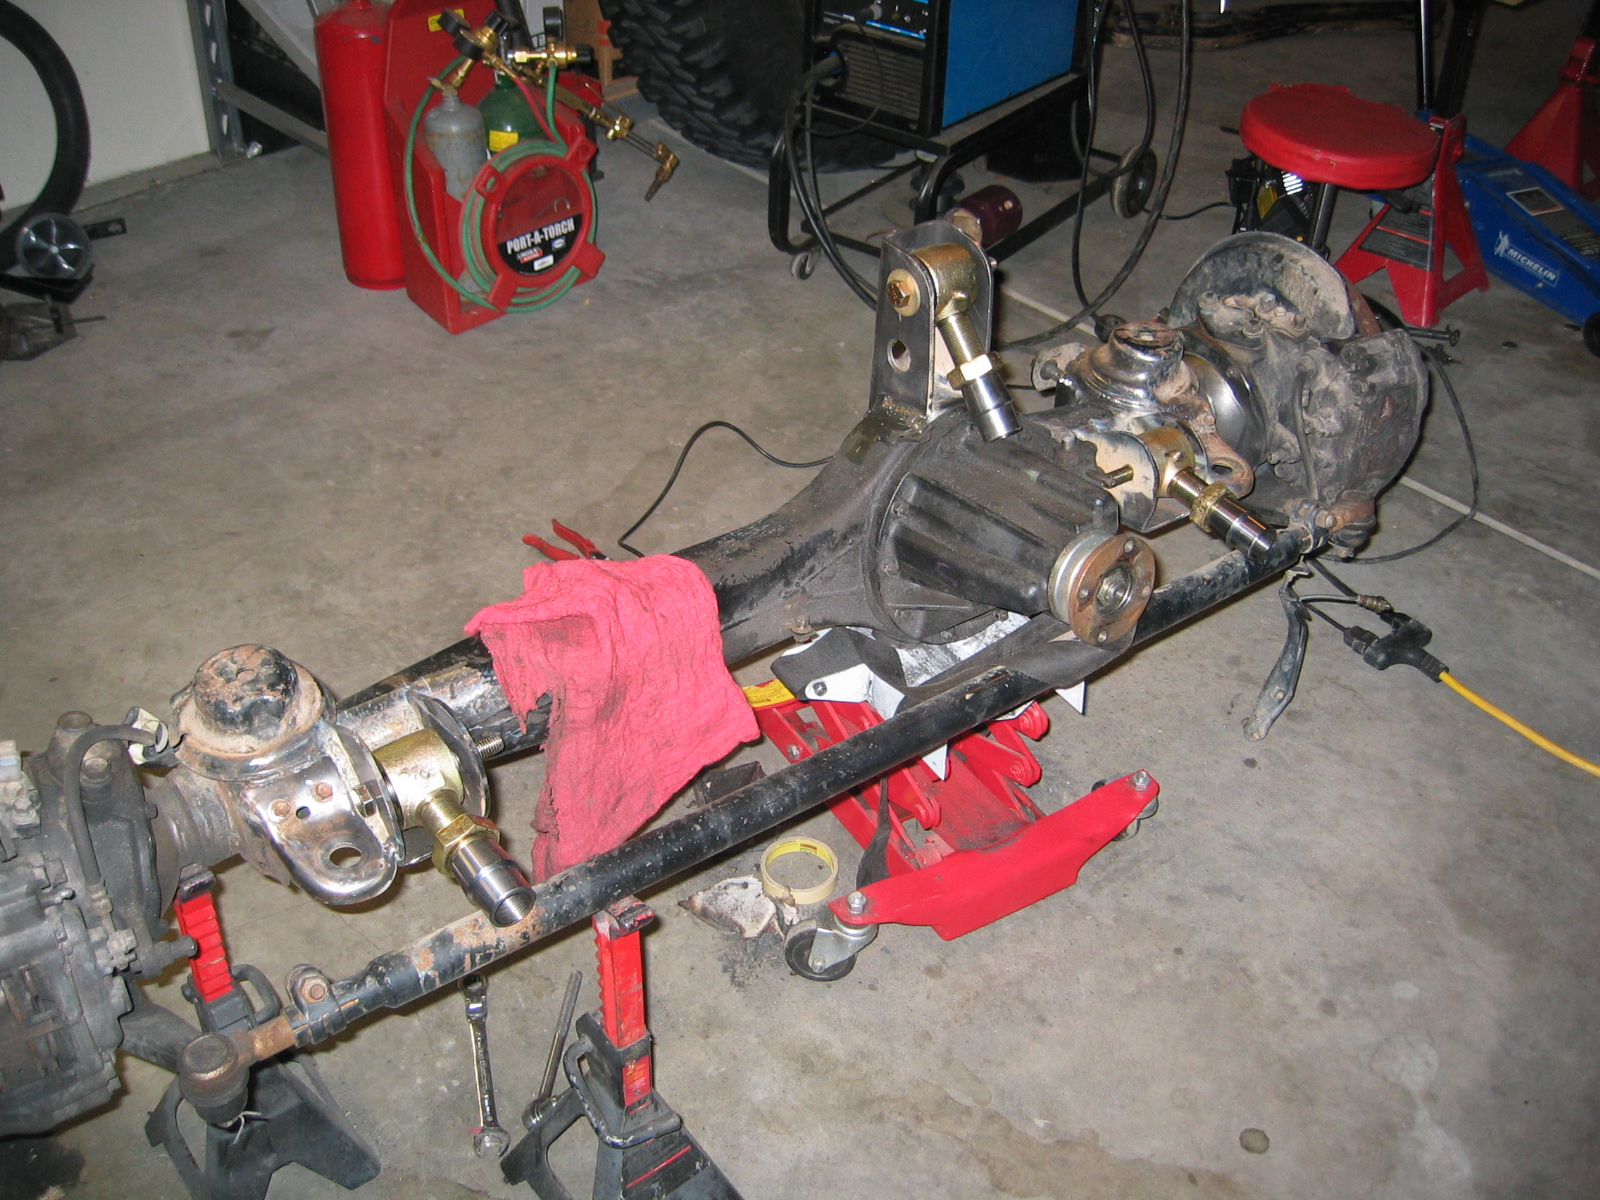
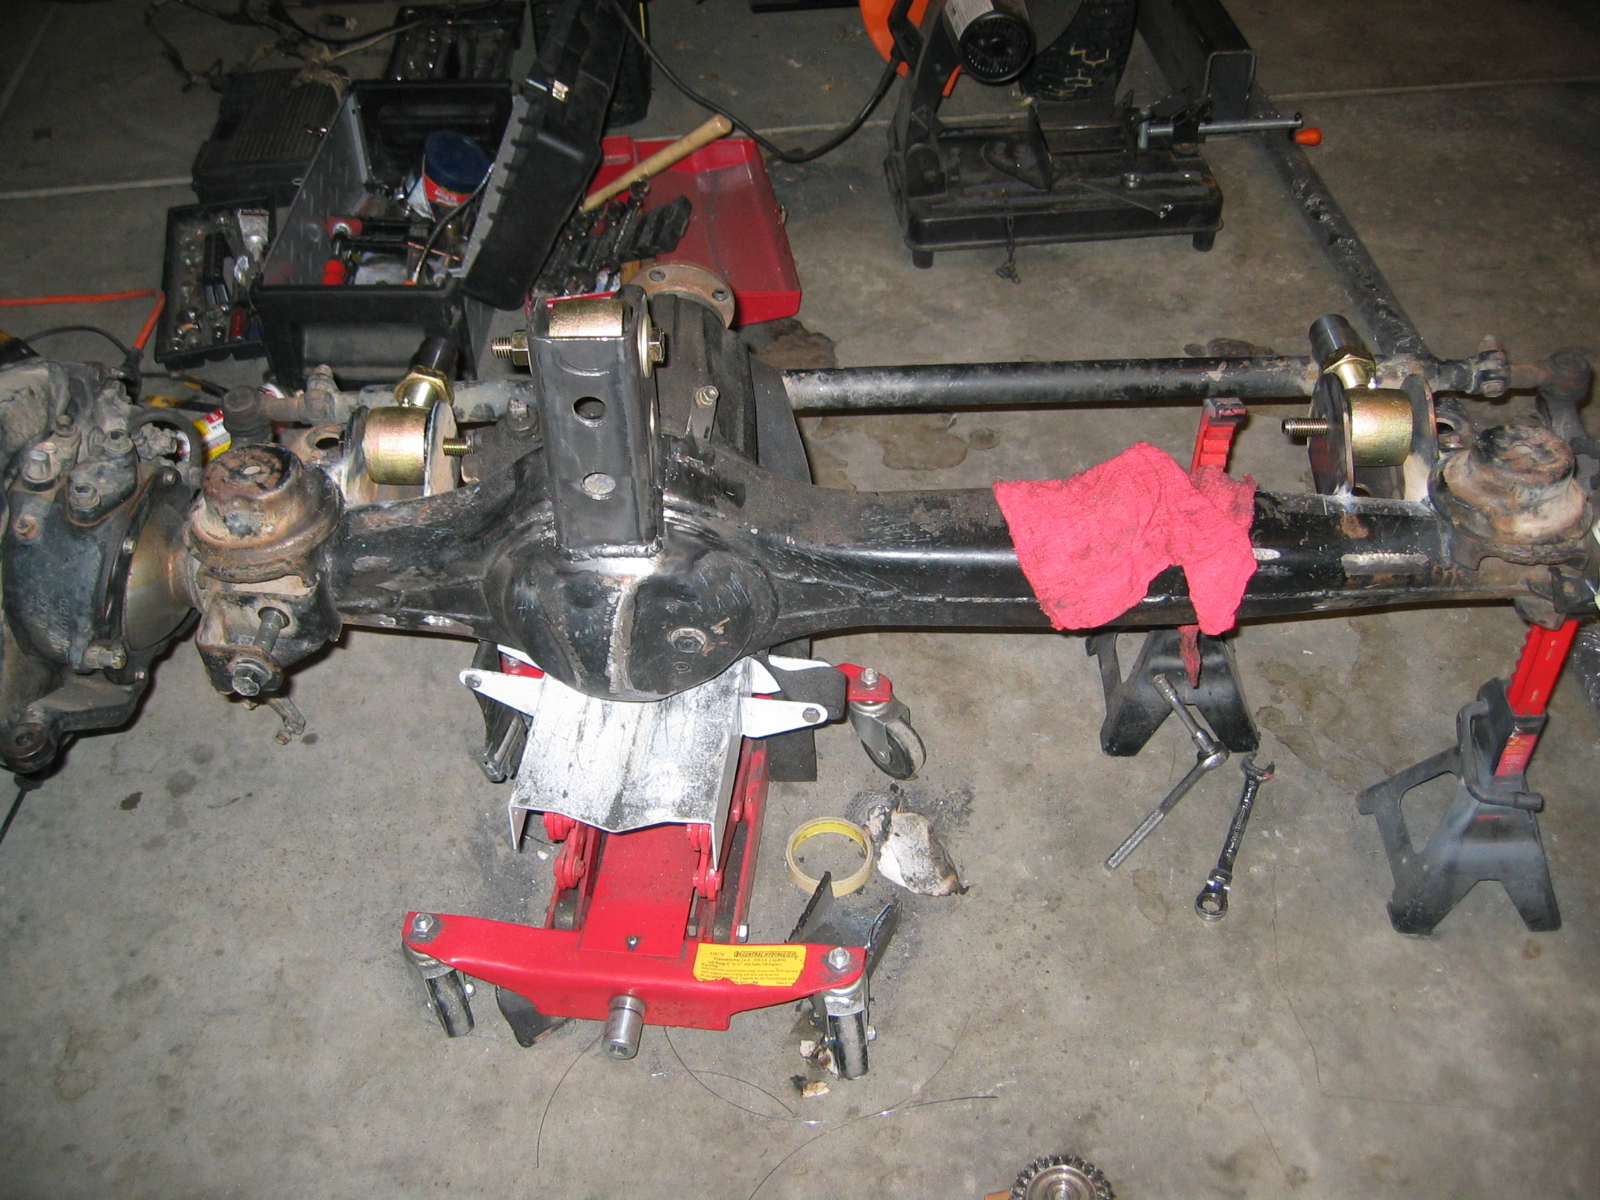
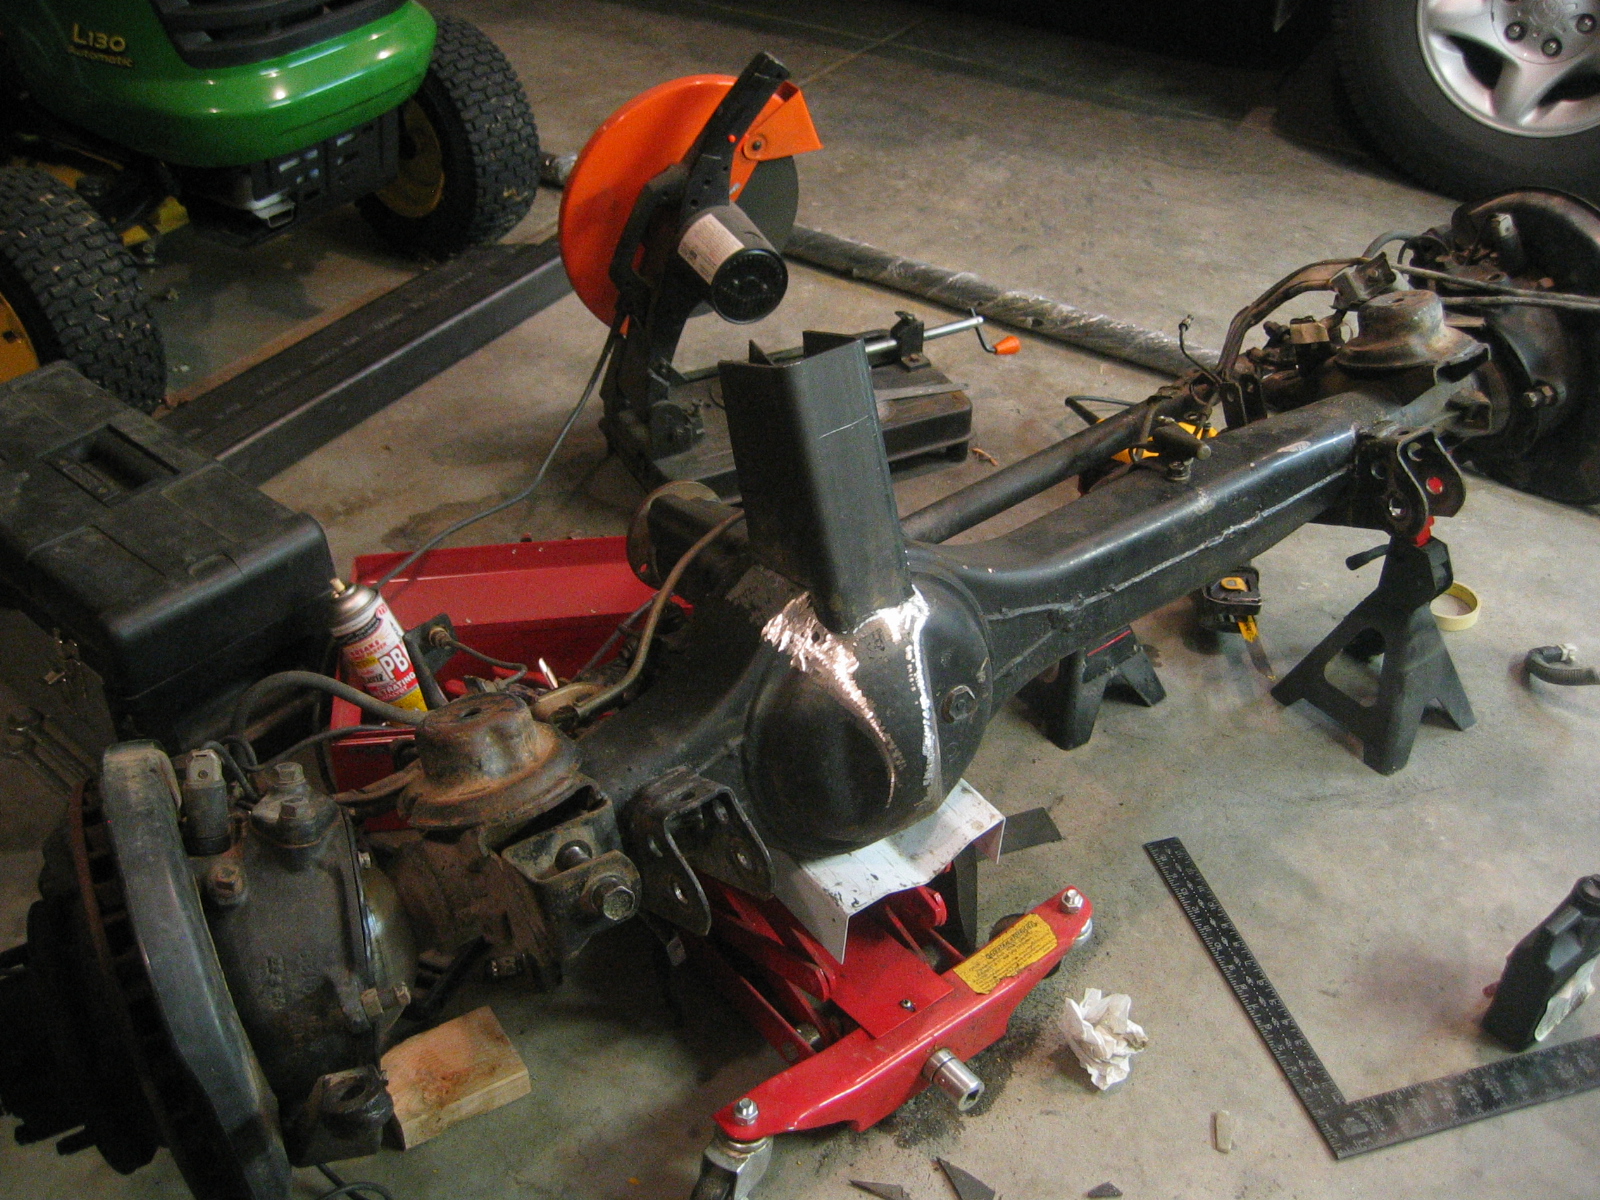
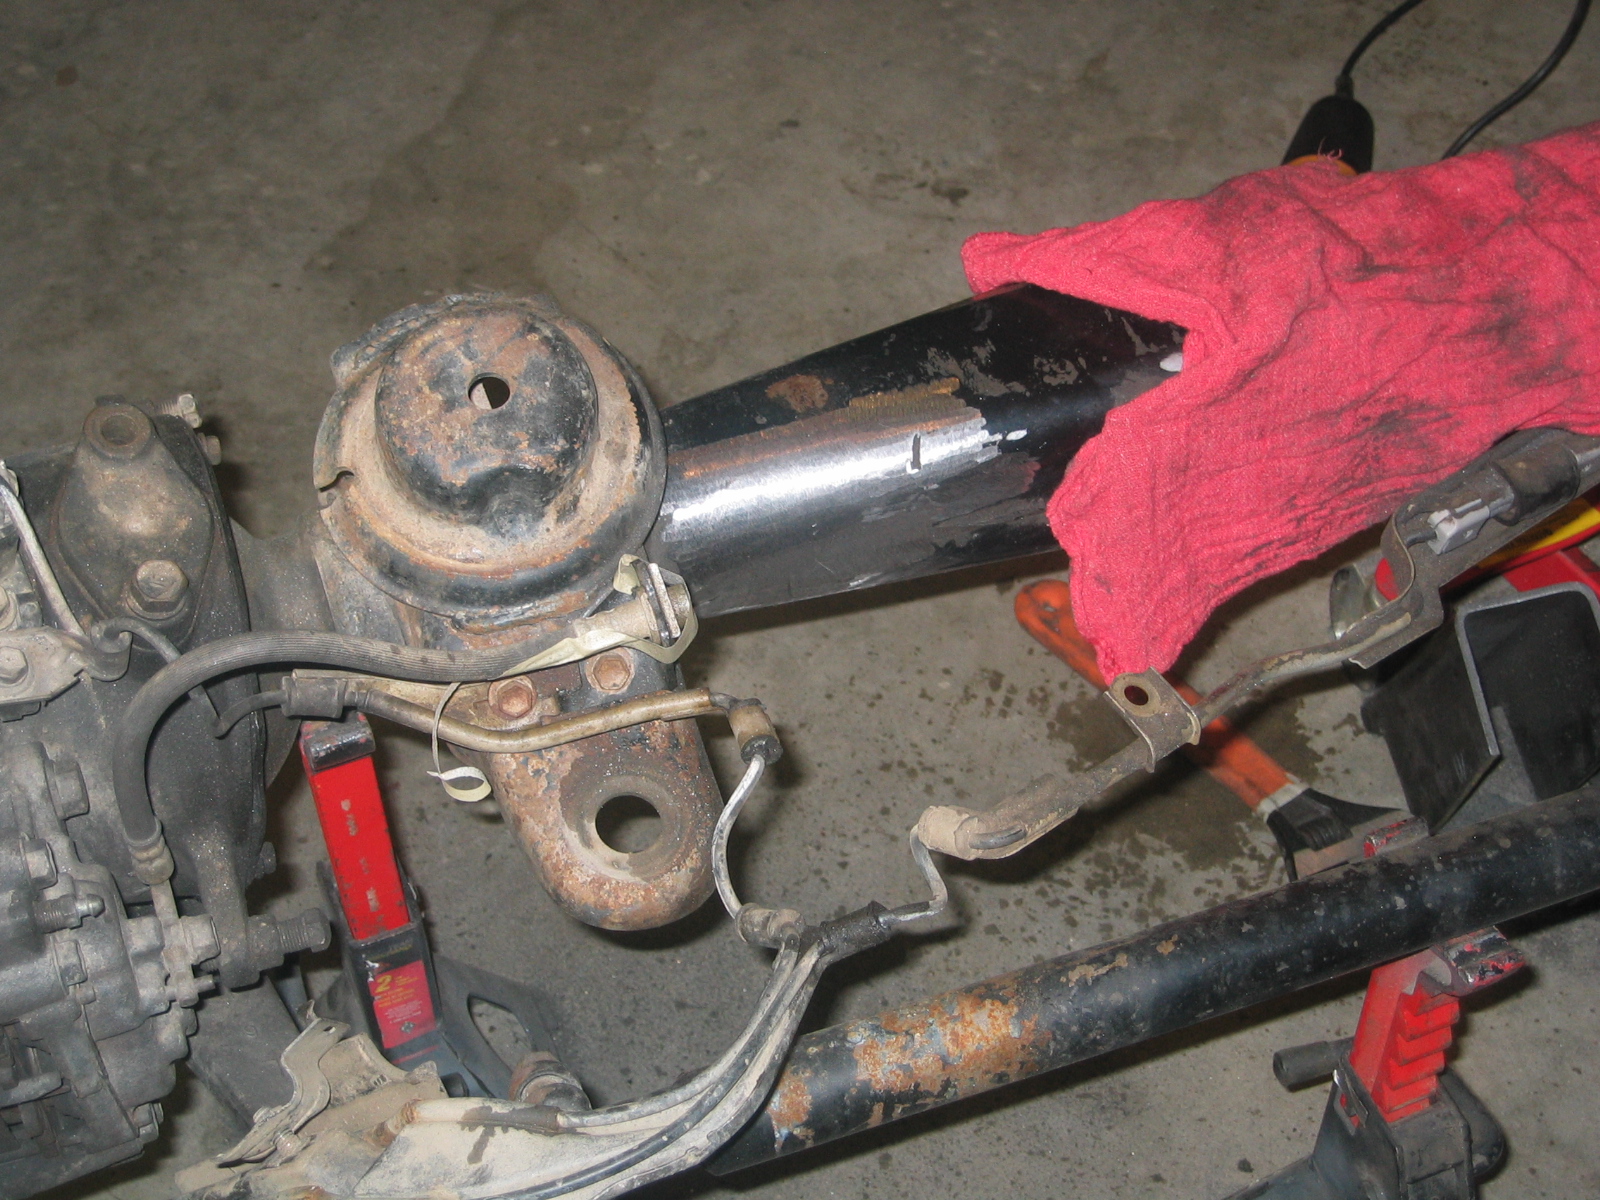
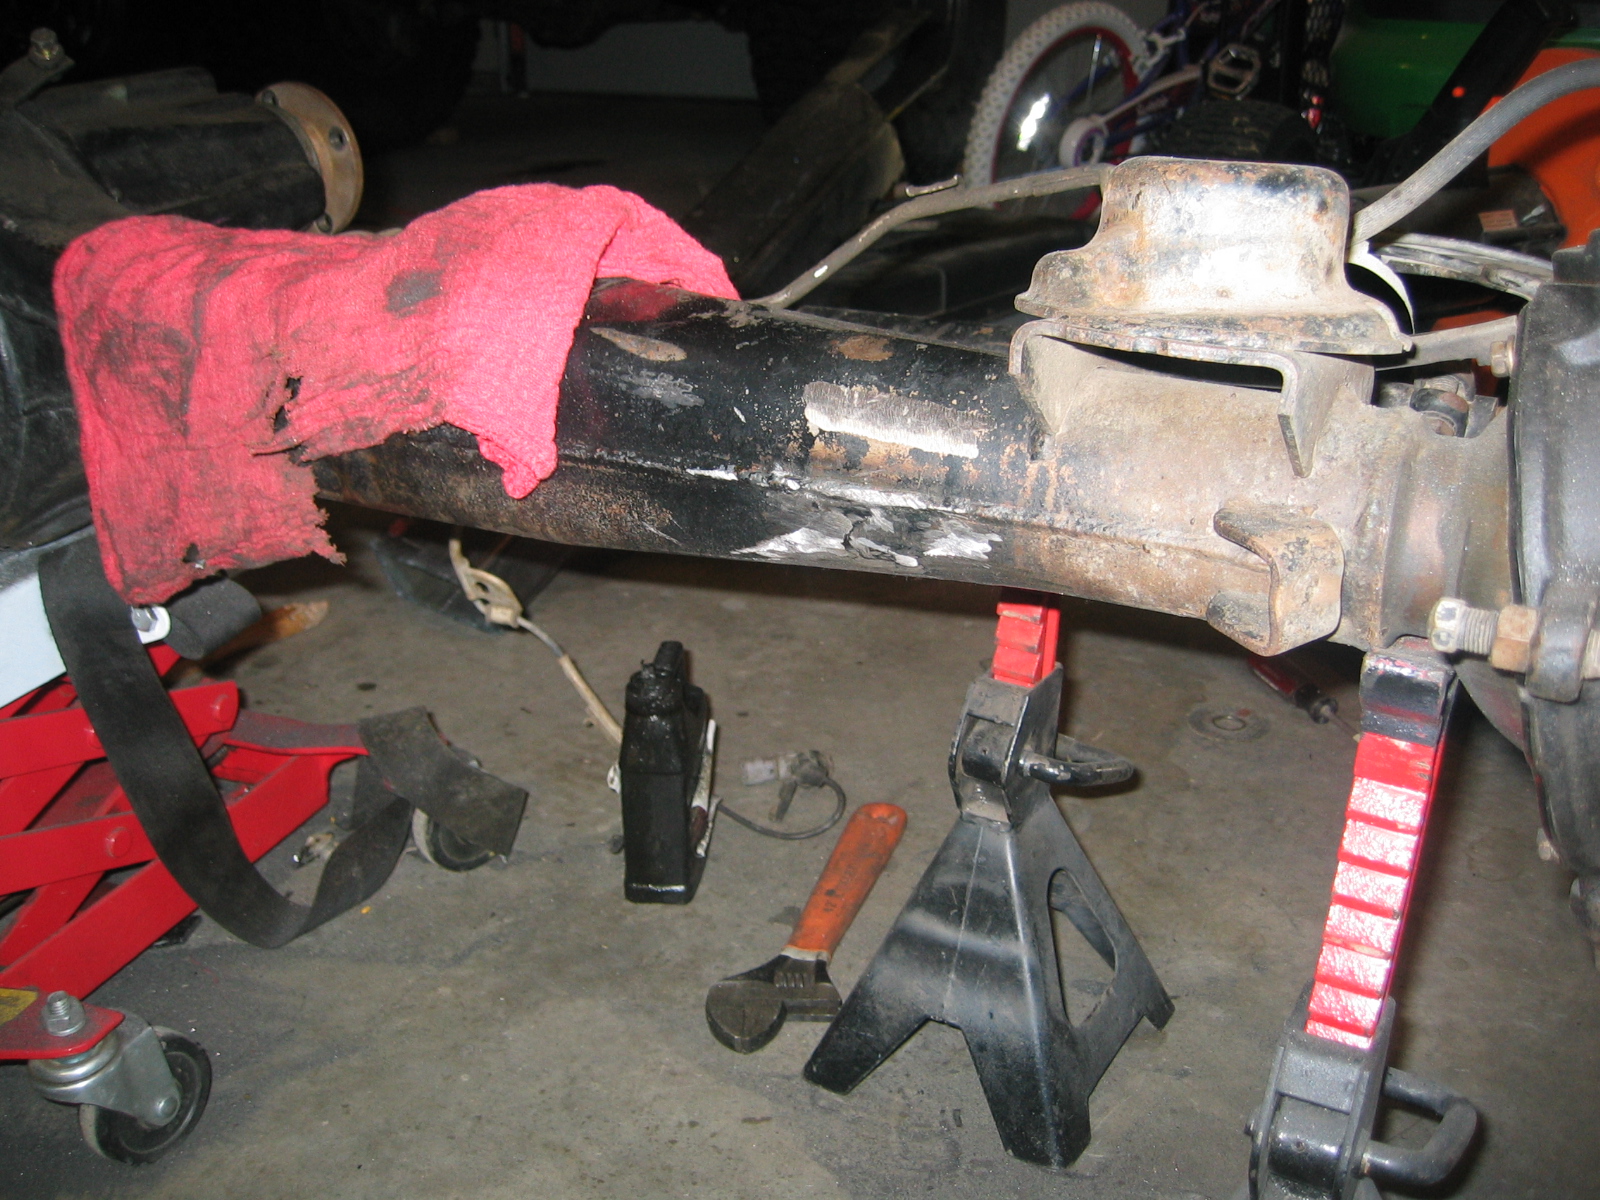
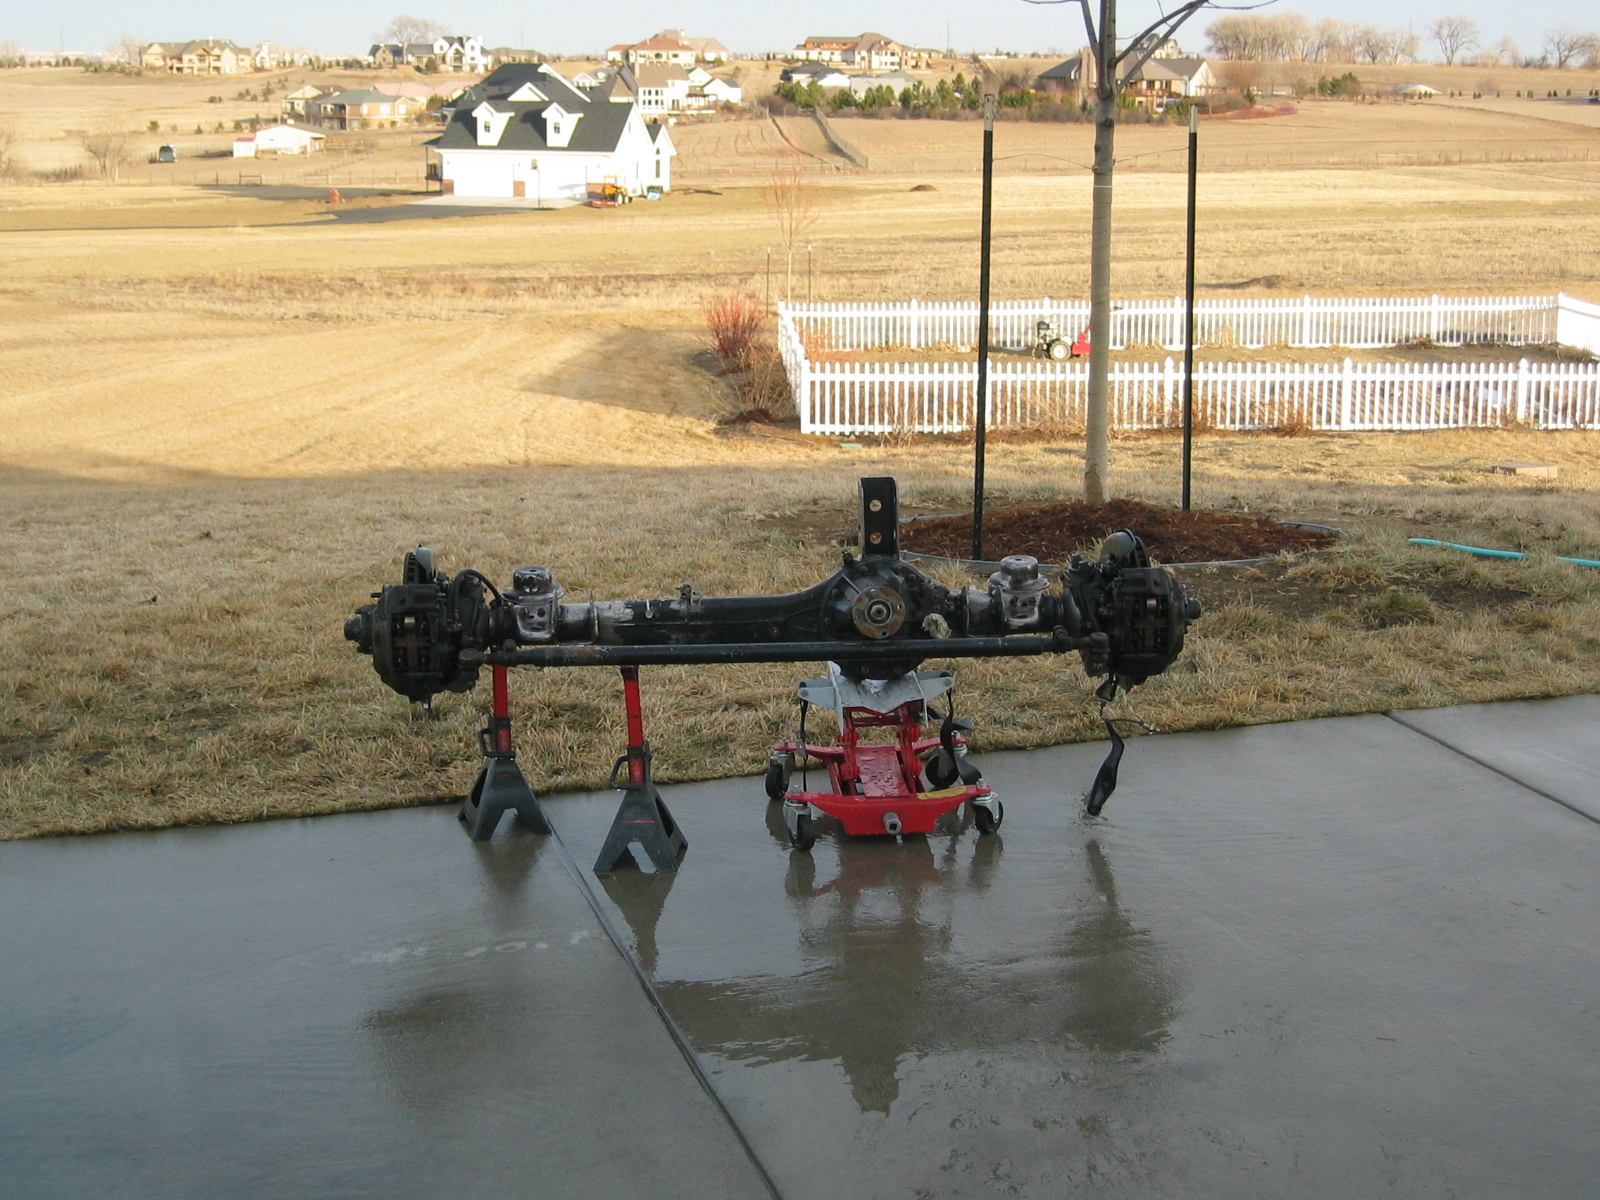
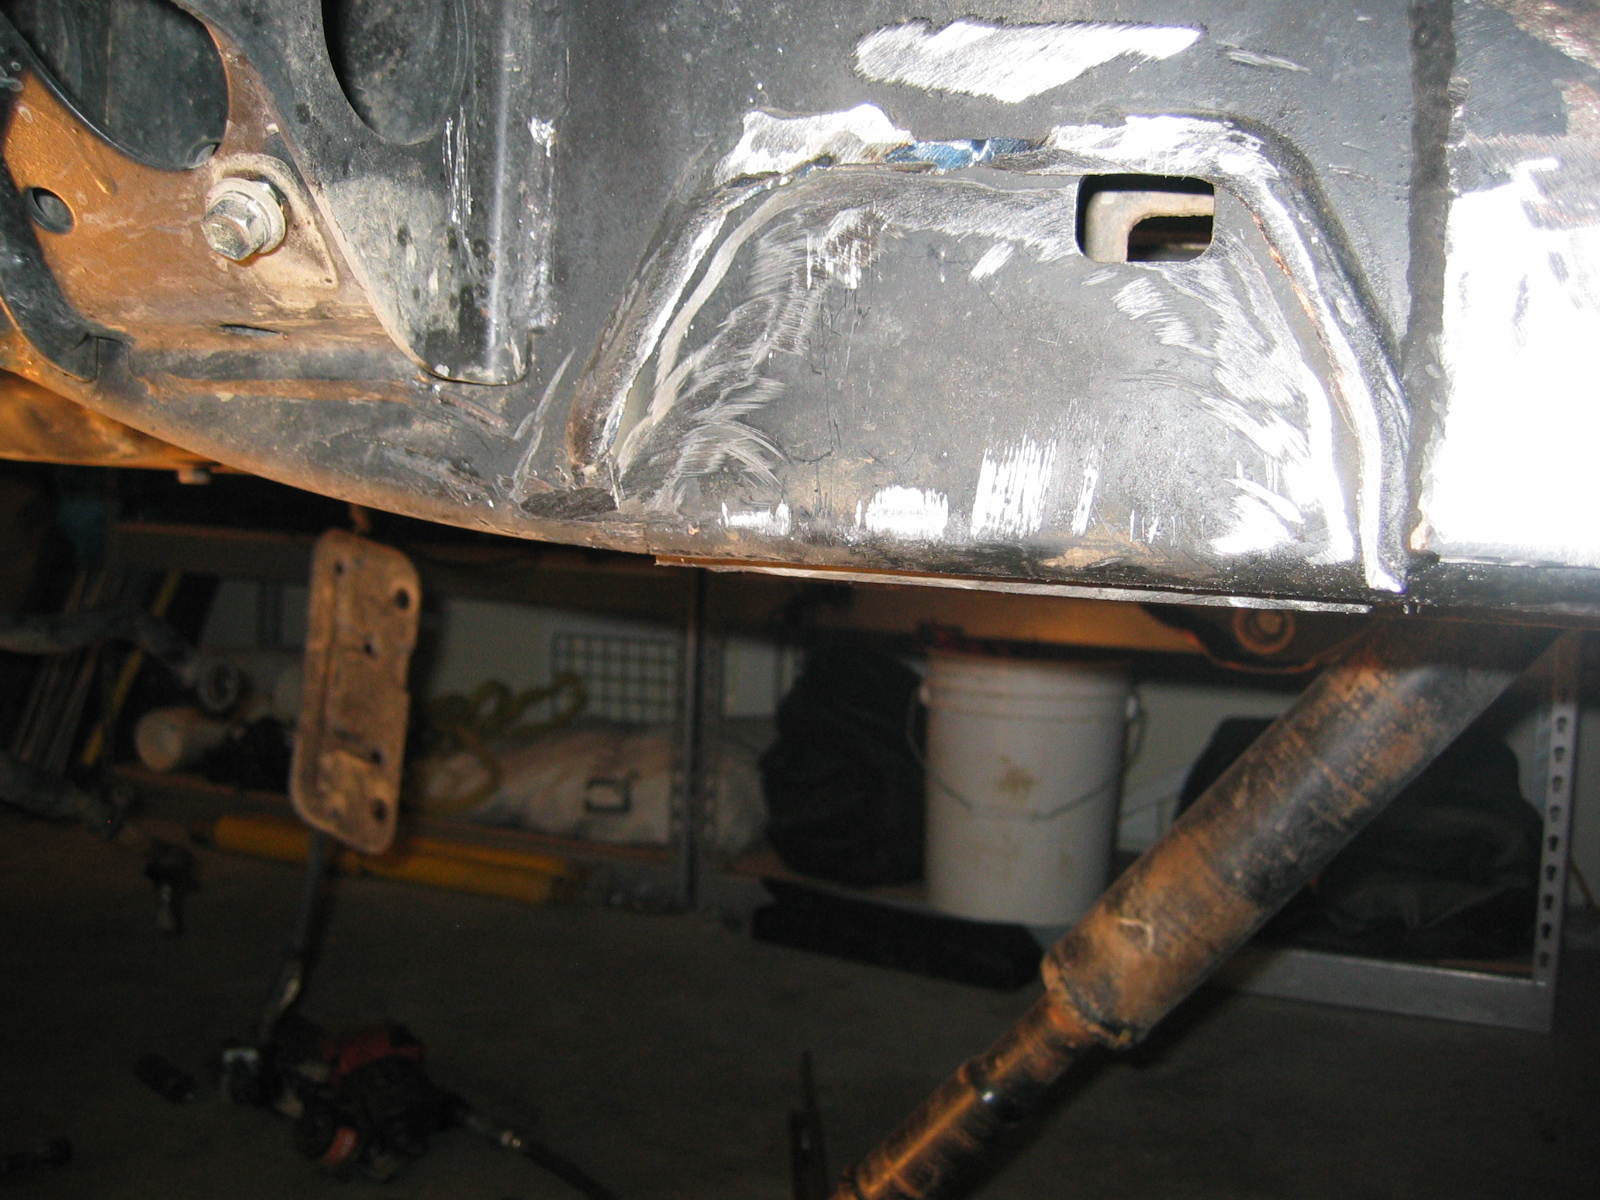
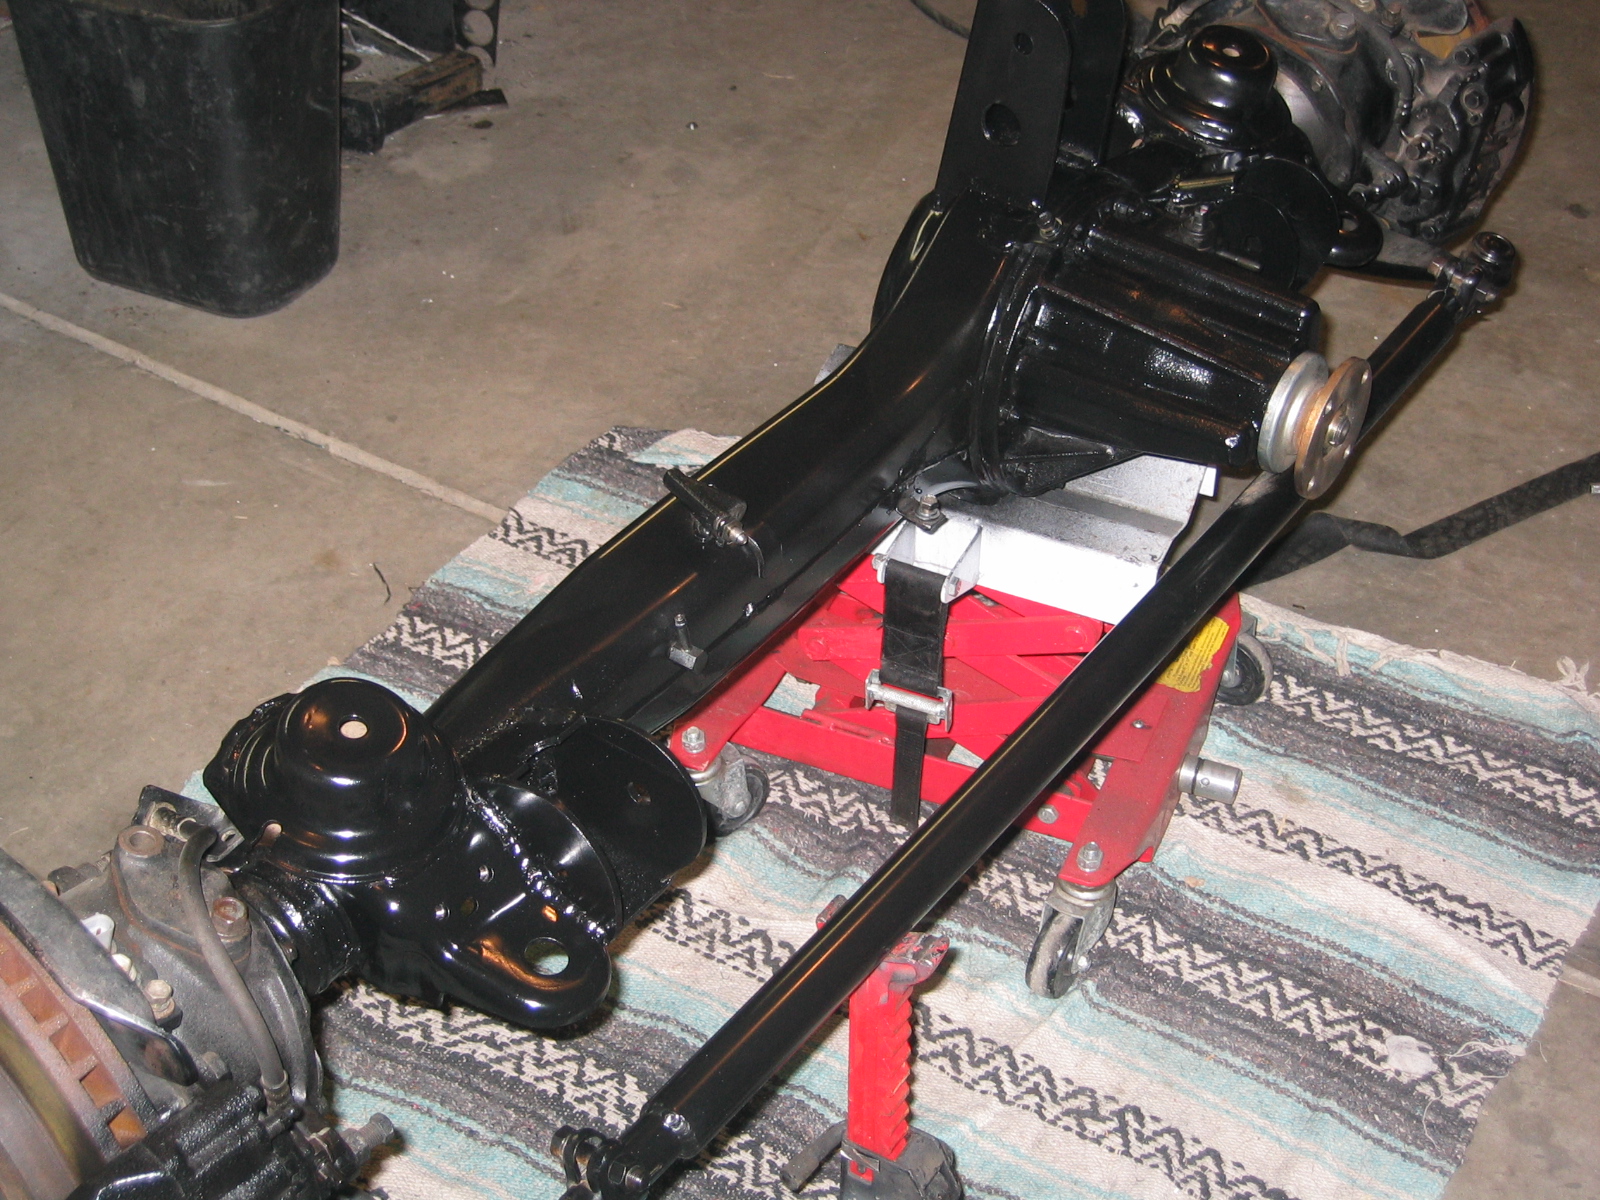
February 7th - Axle ready to paint. Frame mounts removed Got the axle all cleaned up and ready to paint. I power washed the whole thing and removed all the old paint. It's shiny silver now :) Started removing the old frame mounts today as well.
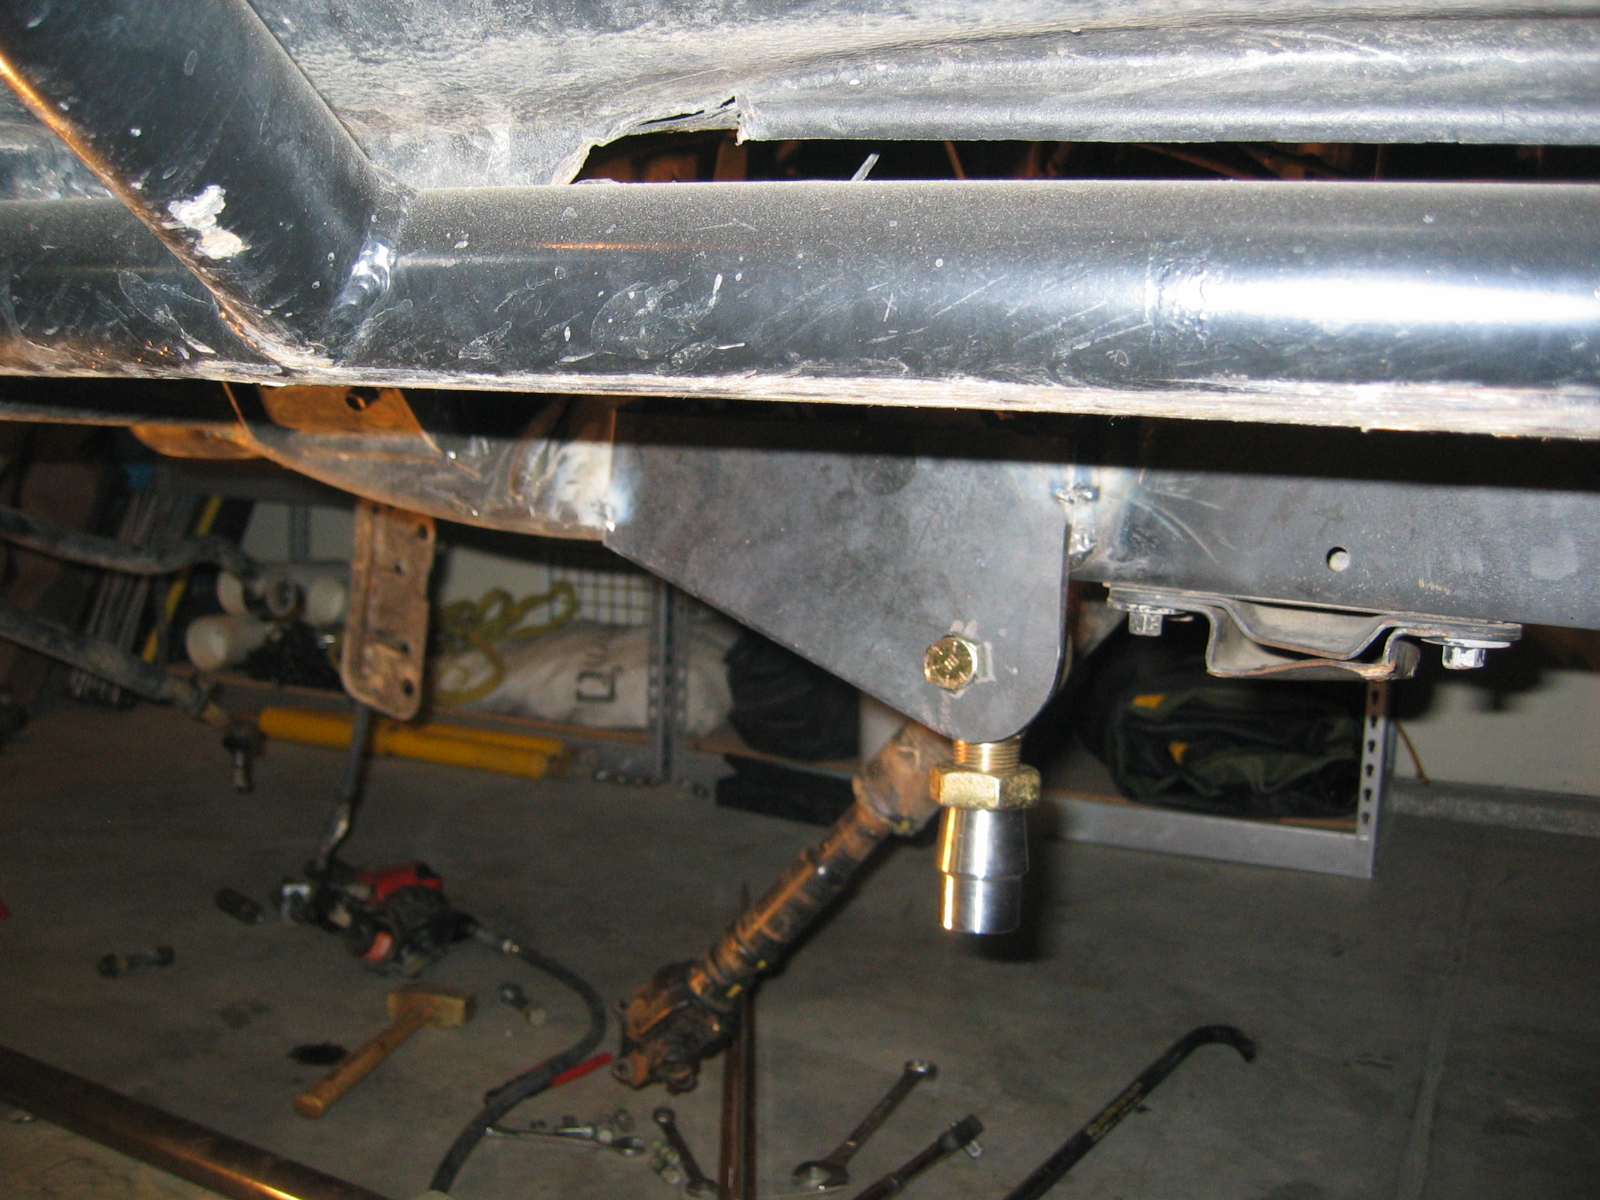
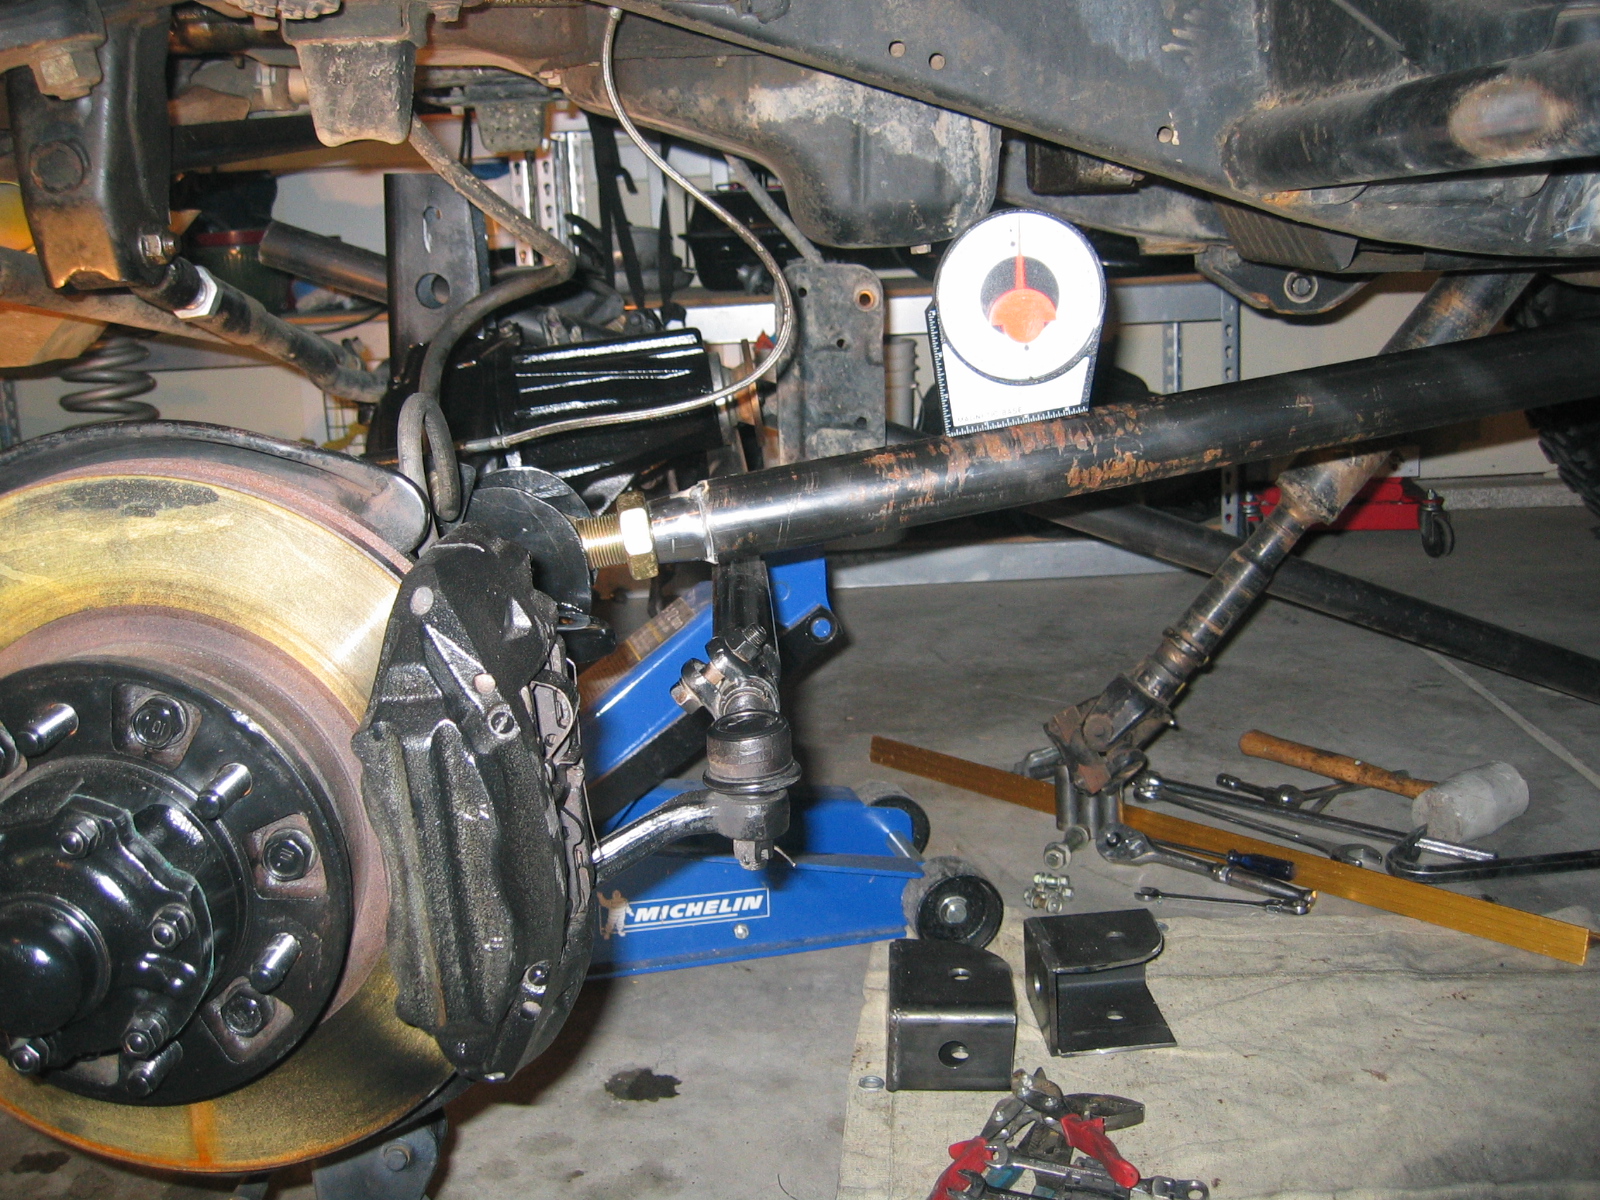
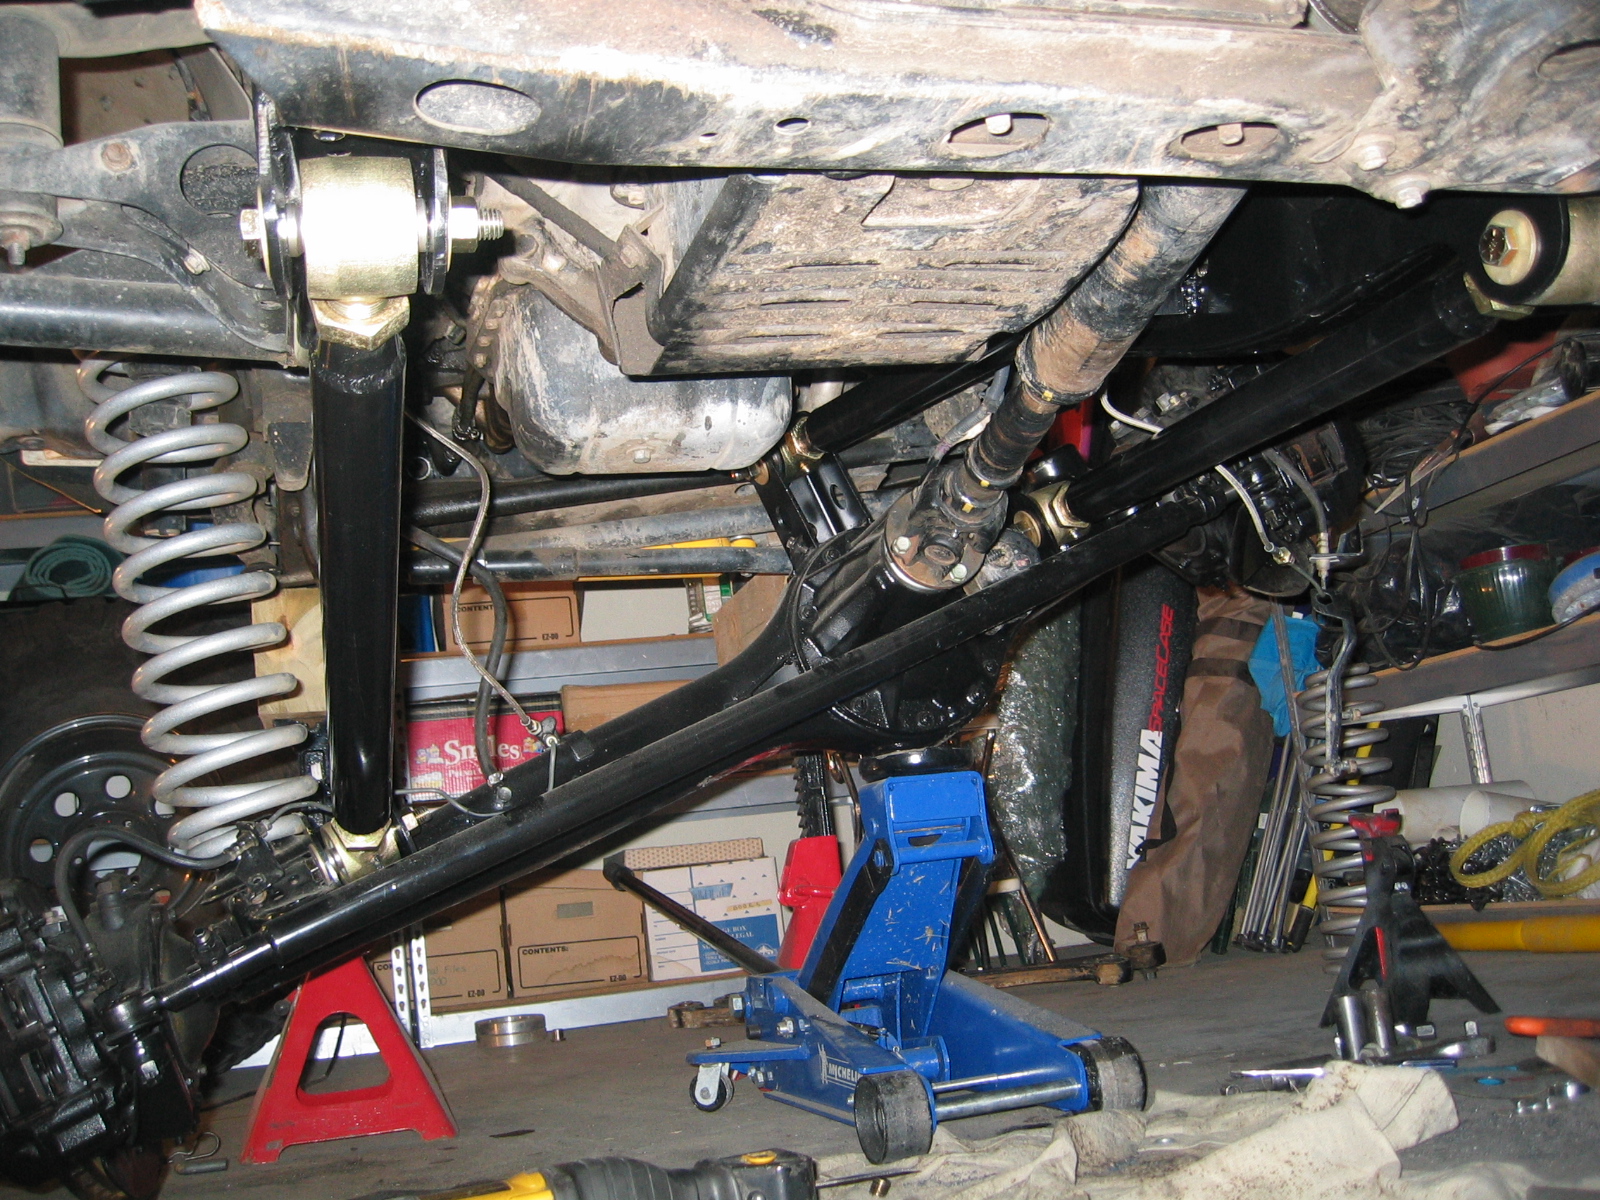
I'm toying around with the idea to keep the links under the frame instead of on the inner sides. This the only way if I want to keep my lower arms completely straight. If I mount the joint inside the frame it will require a bend. Not sure what I'm going to decide quite yet. I made up a temporary mount showing how much clearance I will lose if I go with it below the frame. It's the same height as the old mounts but they are moved back 6".
I am going to build the upper link, paint the axle and put it under the truck then decide. All the other measurements will stay the same. The only thing that will change is the angle of the lower arm. Just a few degrees more if I mount the joint on the frame.
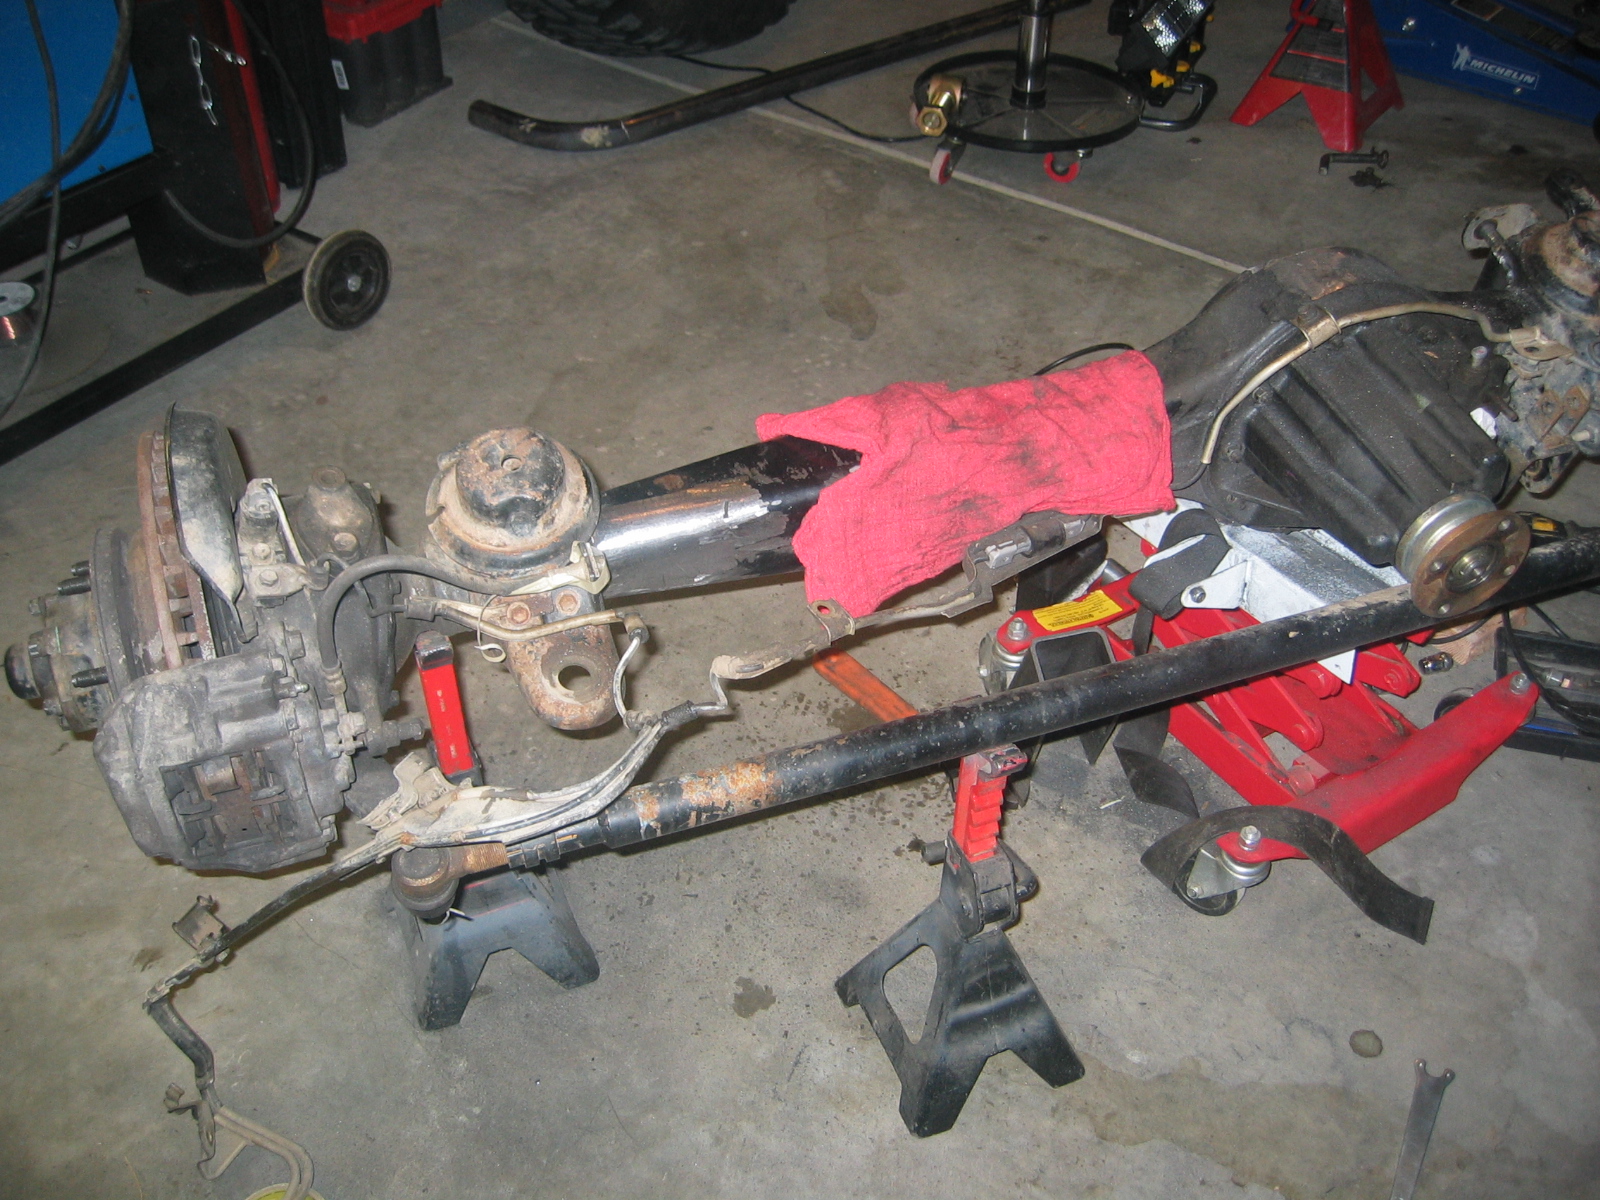
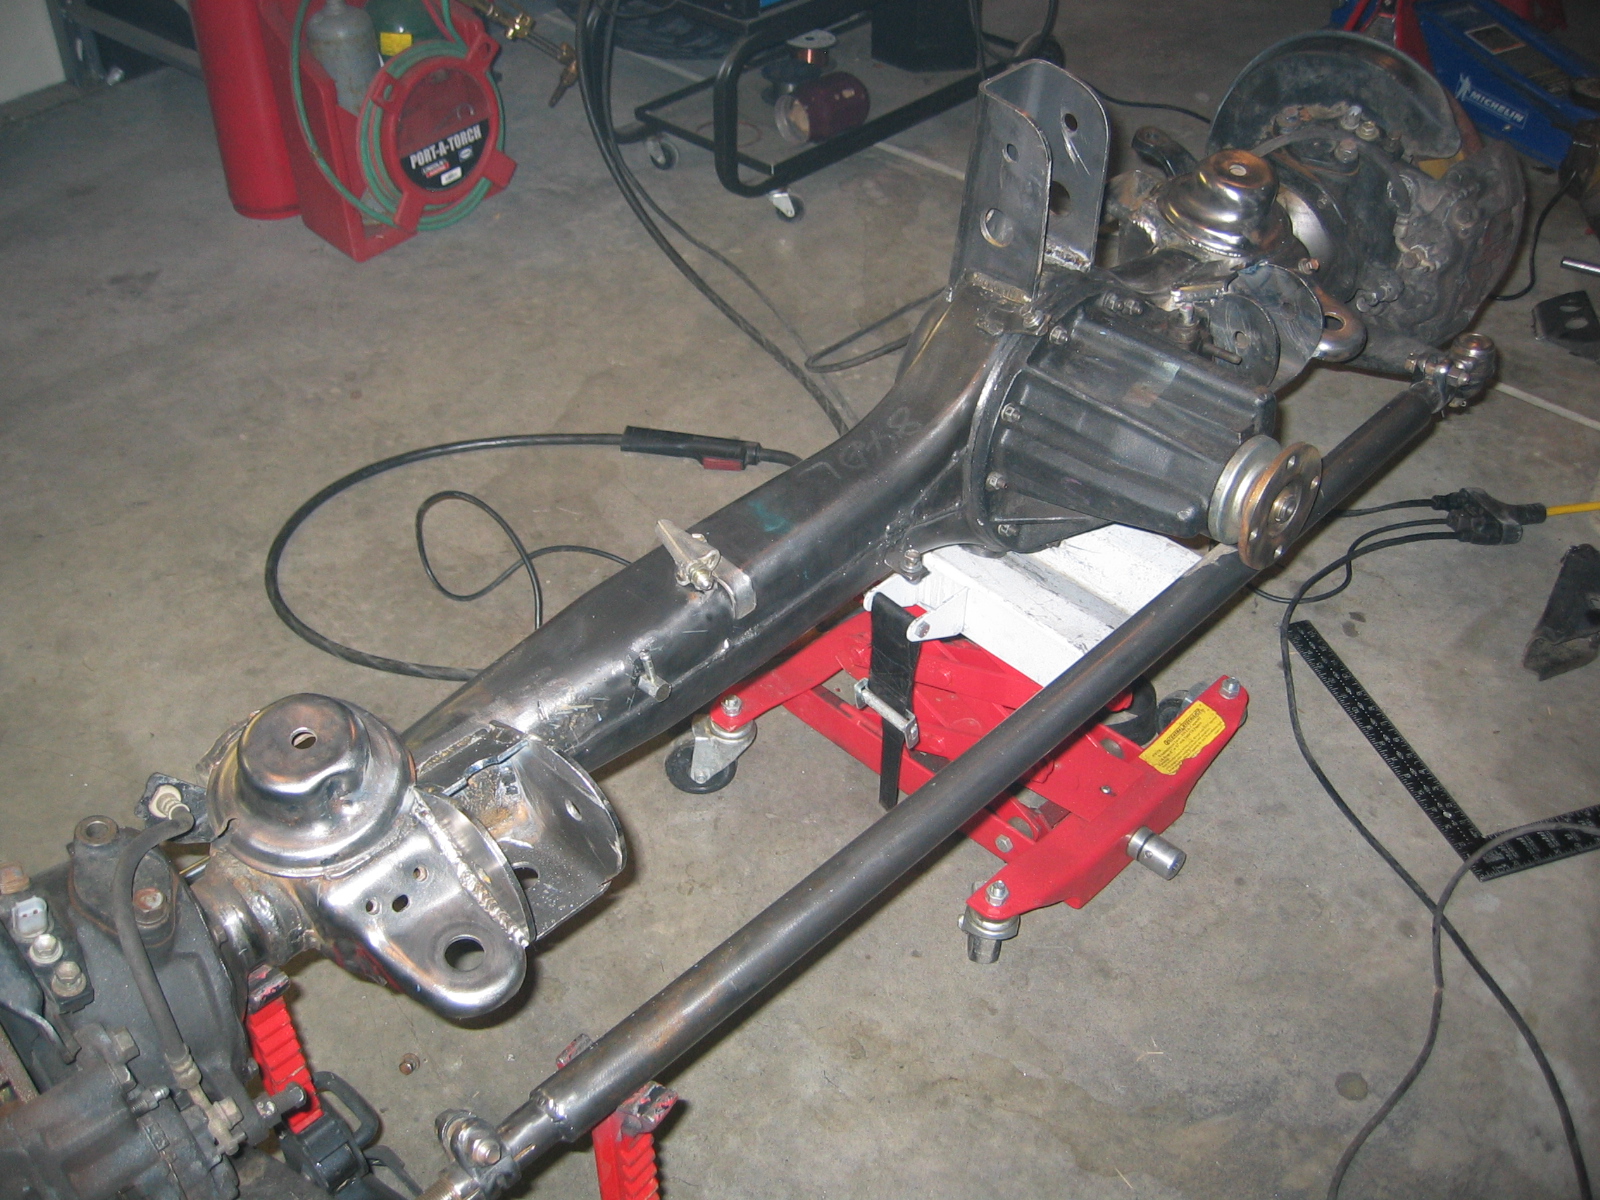
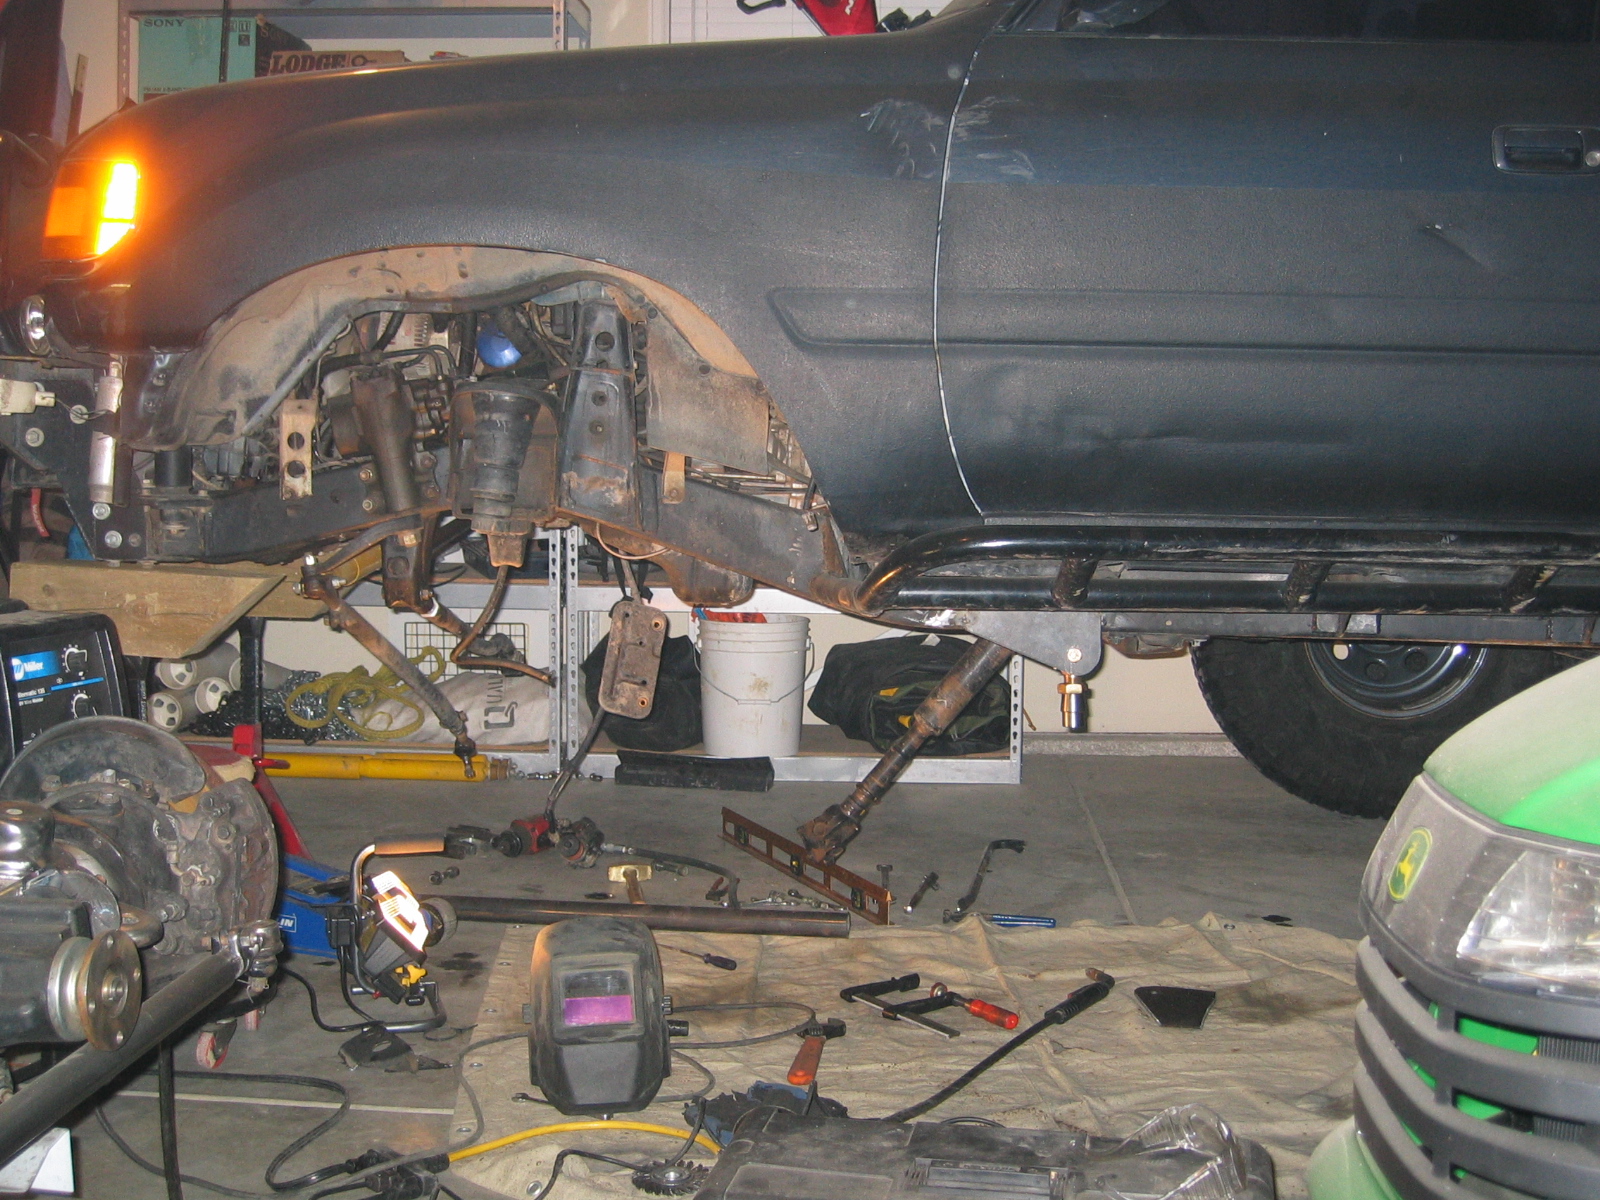
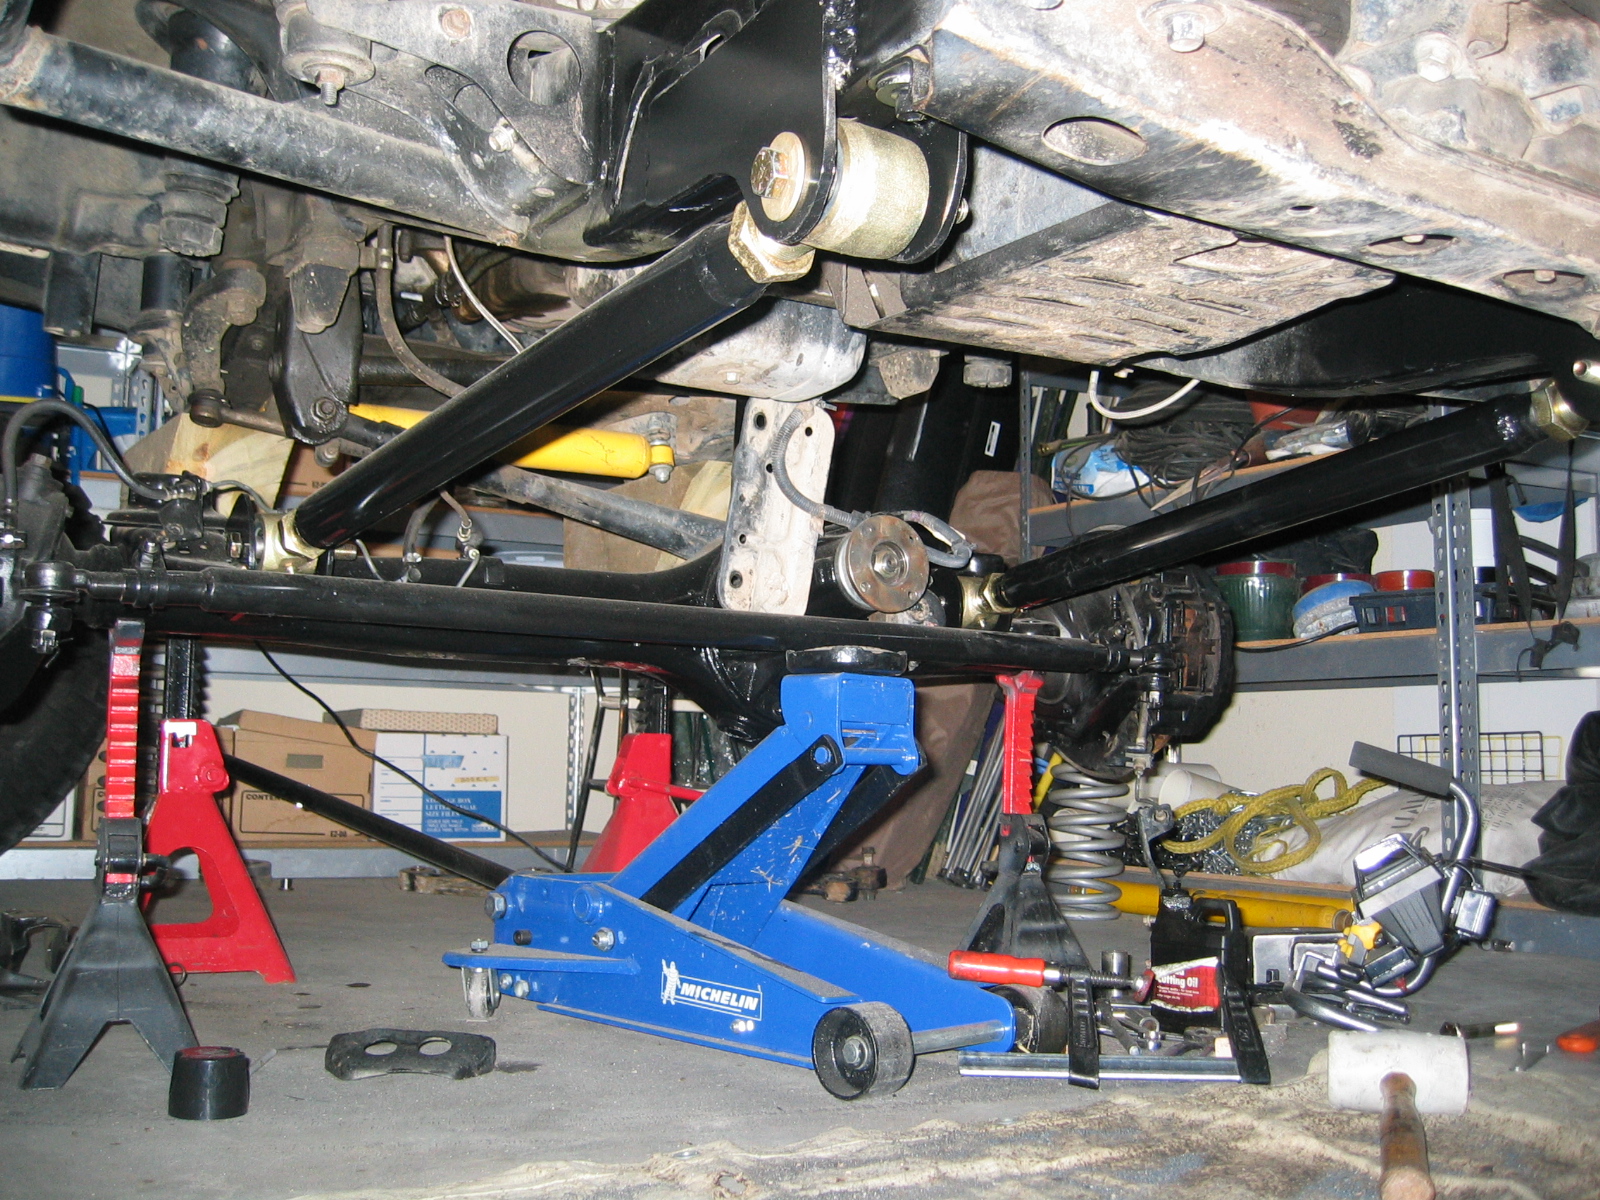
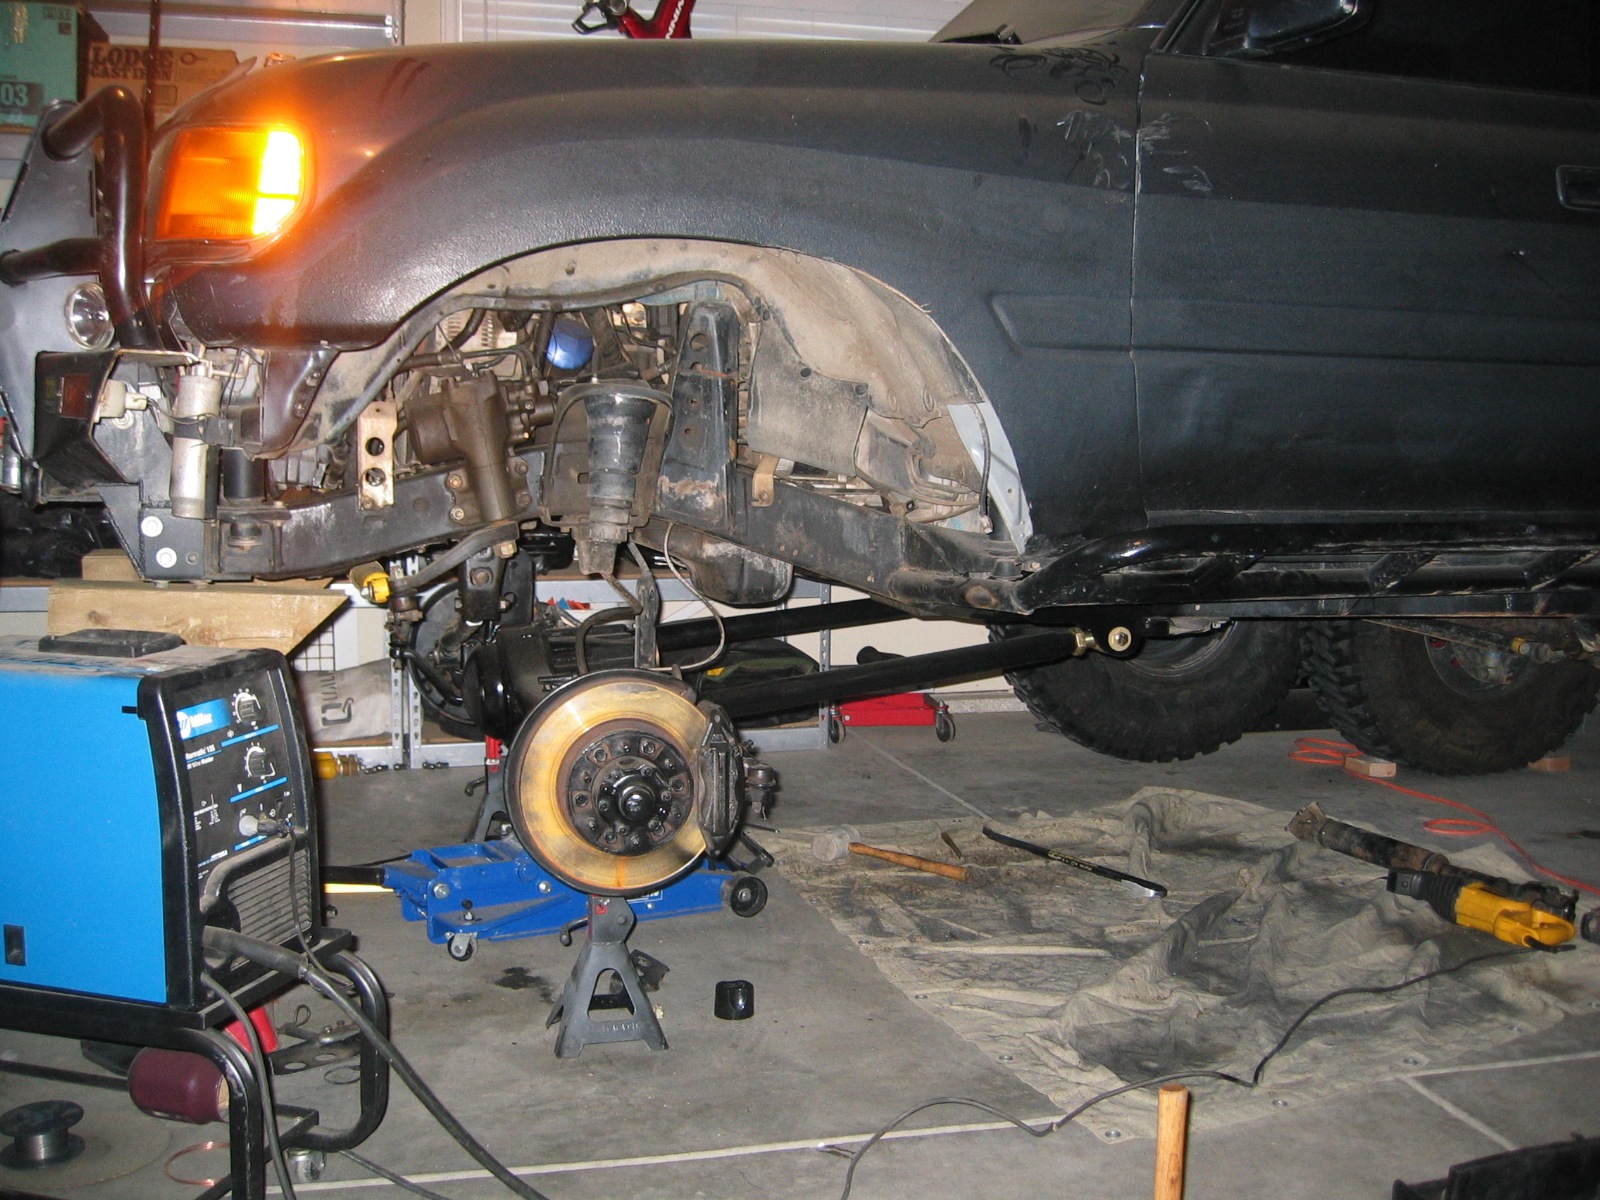
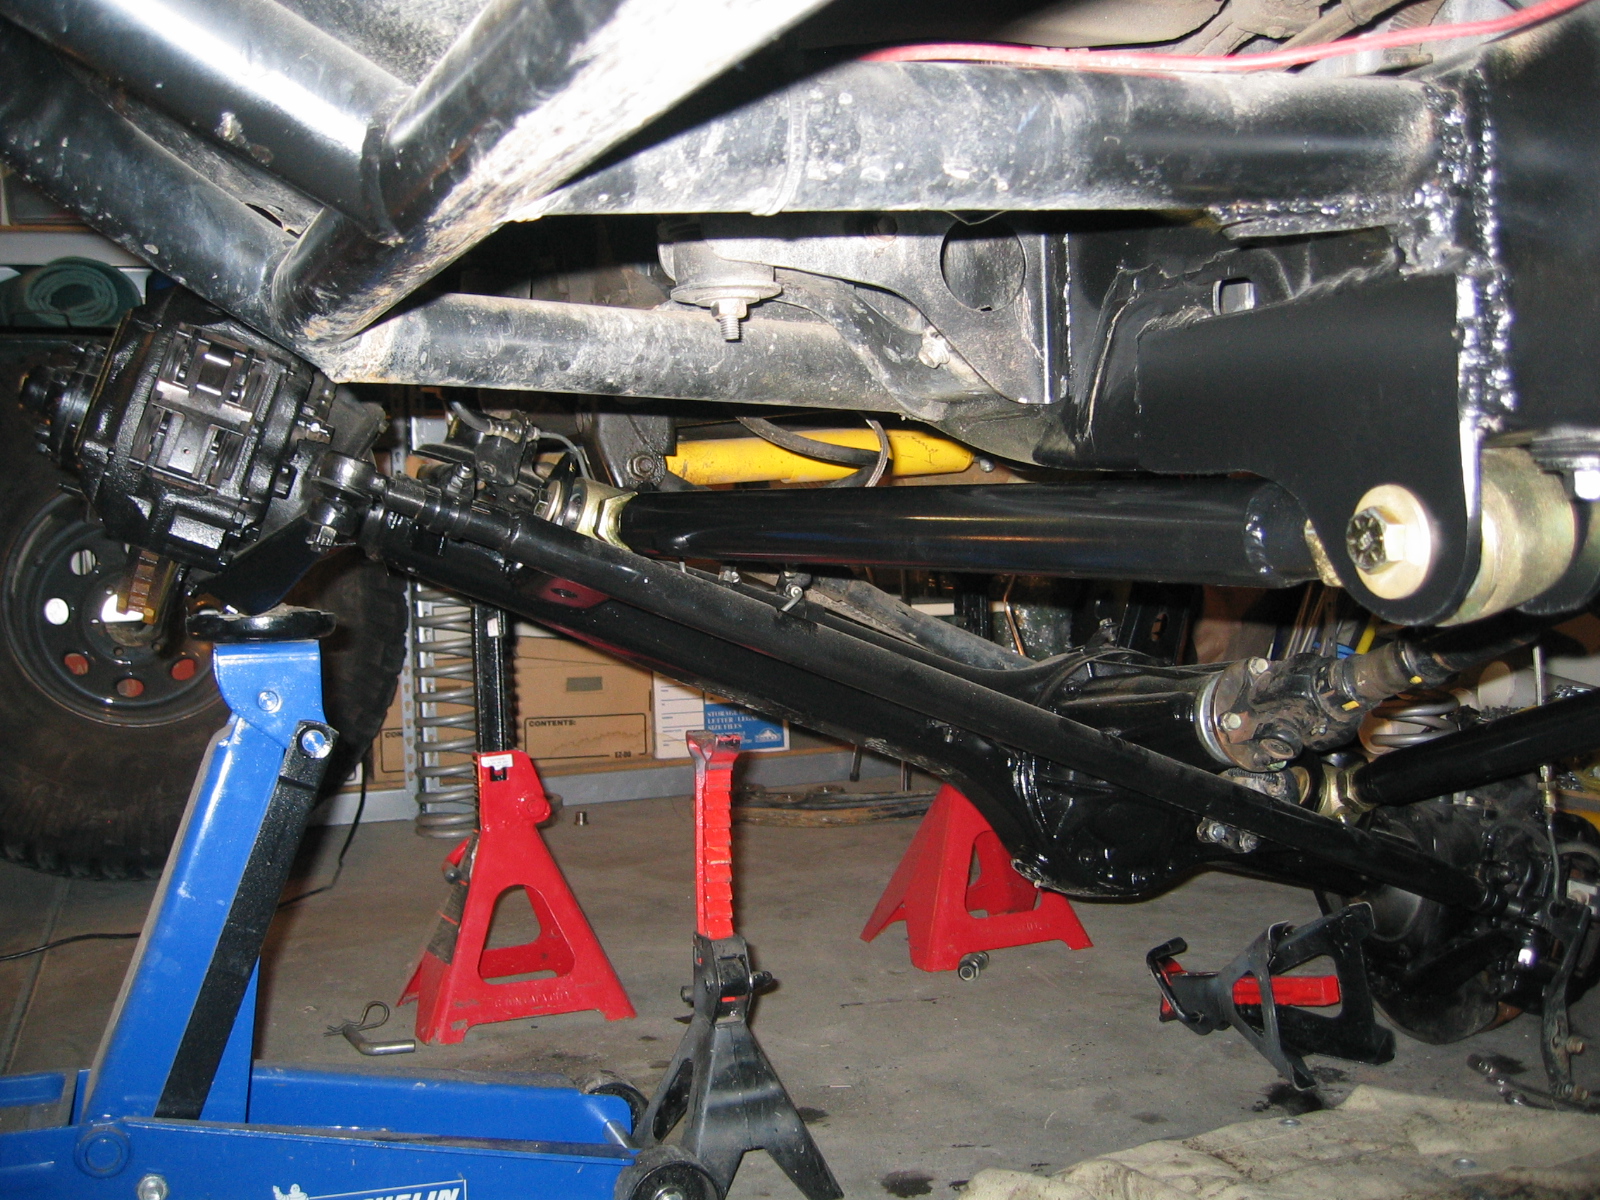
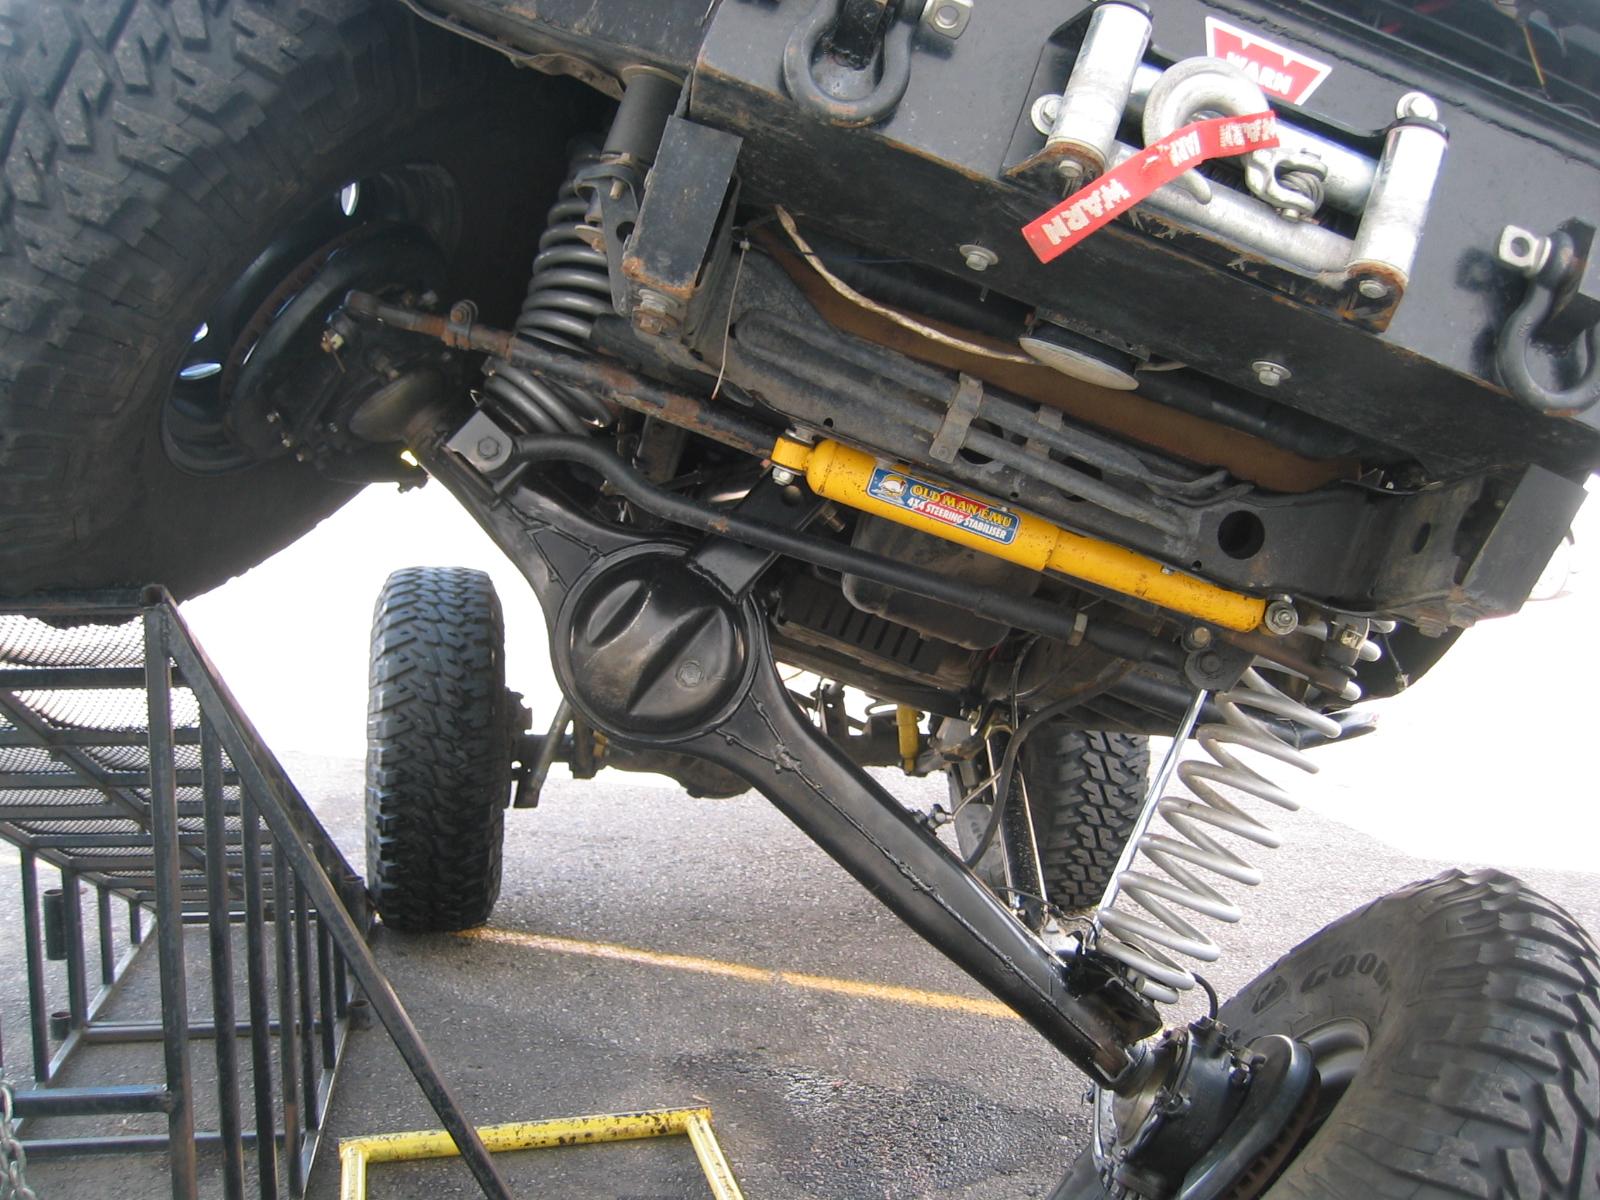
February 10th - Axle back under truck. Testing links. I've decided to mount the lower arms below the frame. This is good because this keeps the arms straight with no bends plus keeps me at around 6 degrees. The ultimate setup in my opinion would be to mount the arms on the outside of the frame about a foot further back. I simply cannot do this with my catalitic converter as low as it is. I tried almost every combination on the cruiser and this is what makes the most sence without getting too crazy with it.
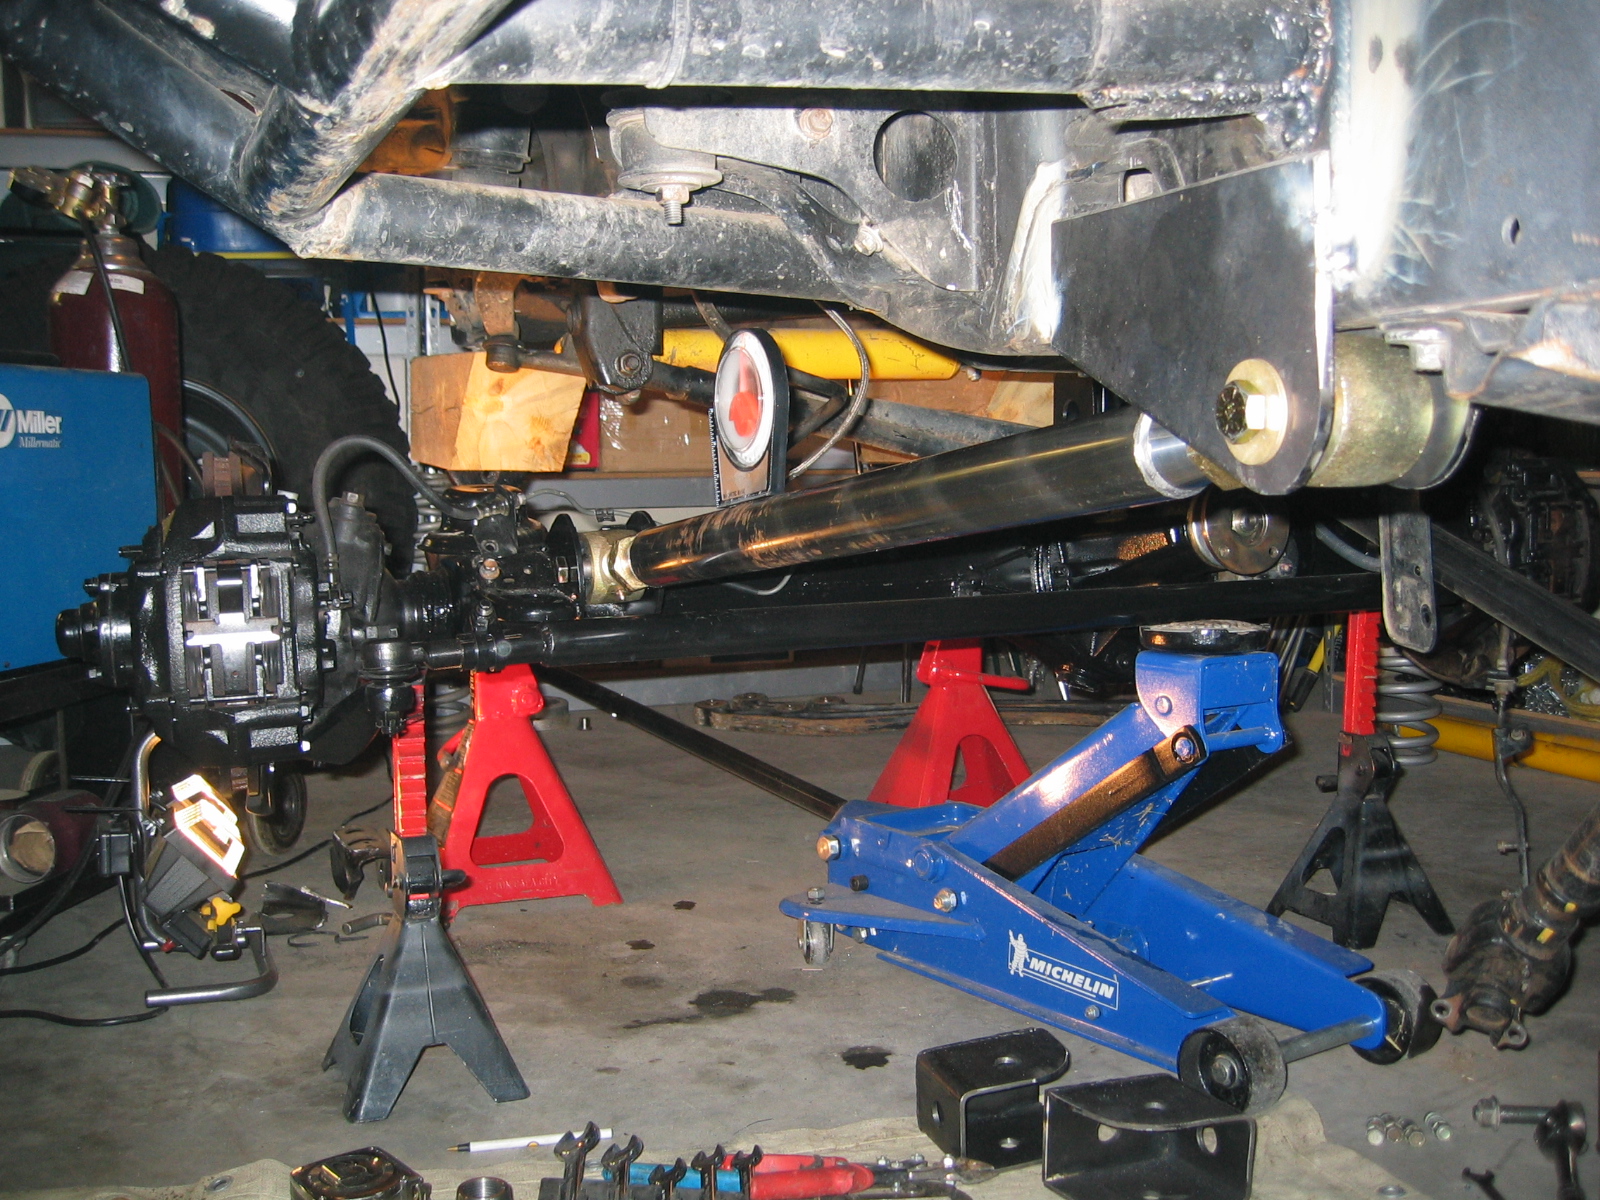
The measurements look good so far. The truck will be about 1-2" lower than it is right now on jack stands. So the angle of links will be less than it appears in the photos. The lower link still allows me my 5-6" of up travel before they hit the frame being completely straight at 0 degree. I can't believe this is almost done! I have built my enclosure for the upper link and will do it after I get the other lower link done.
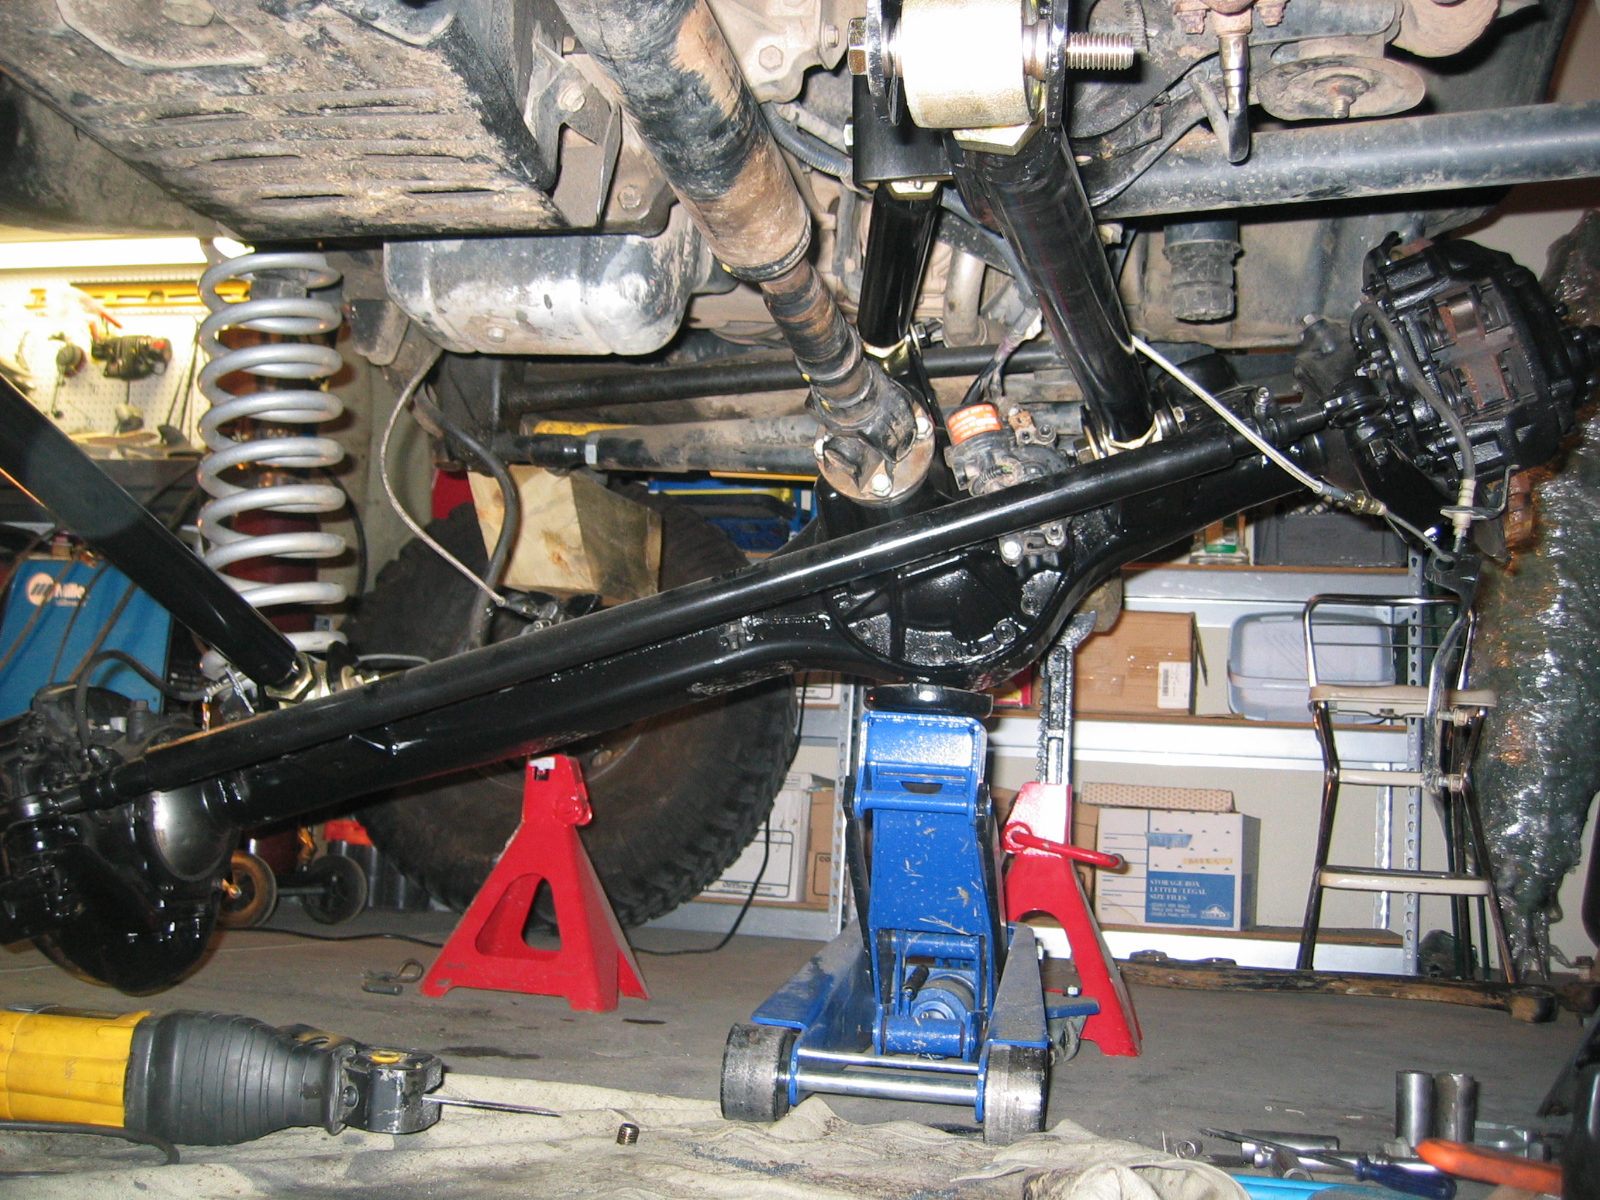
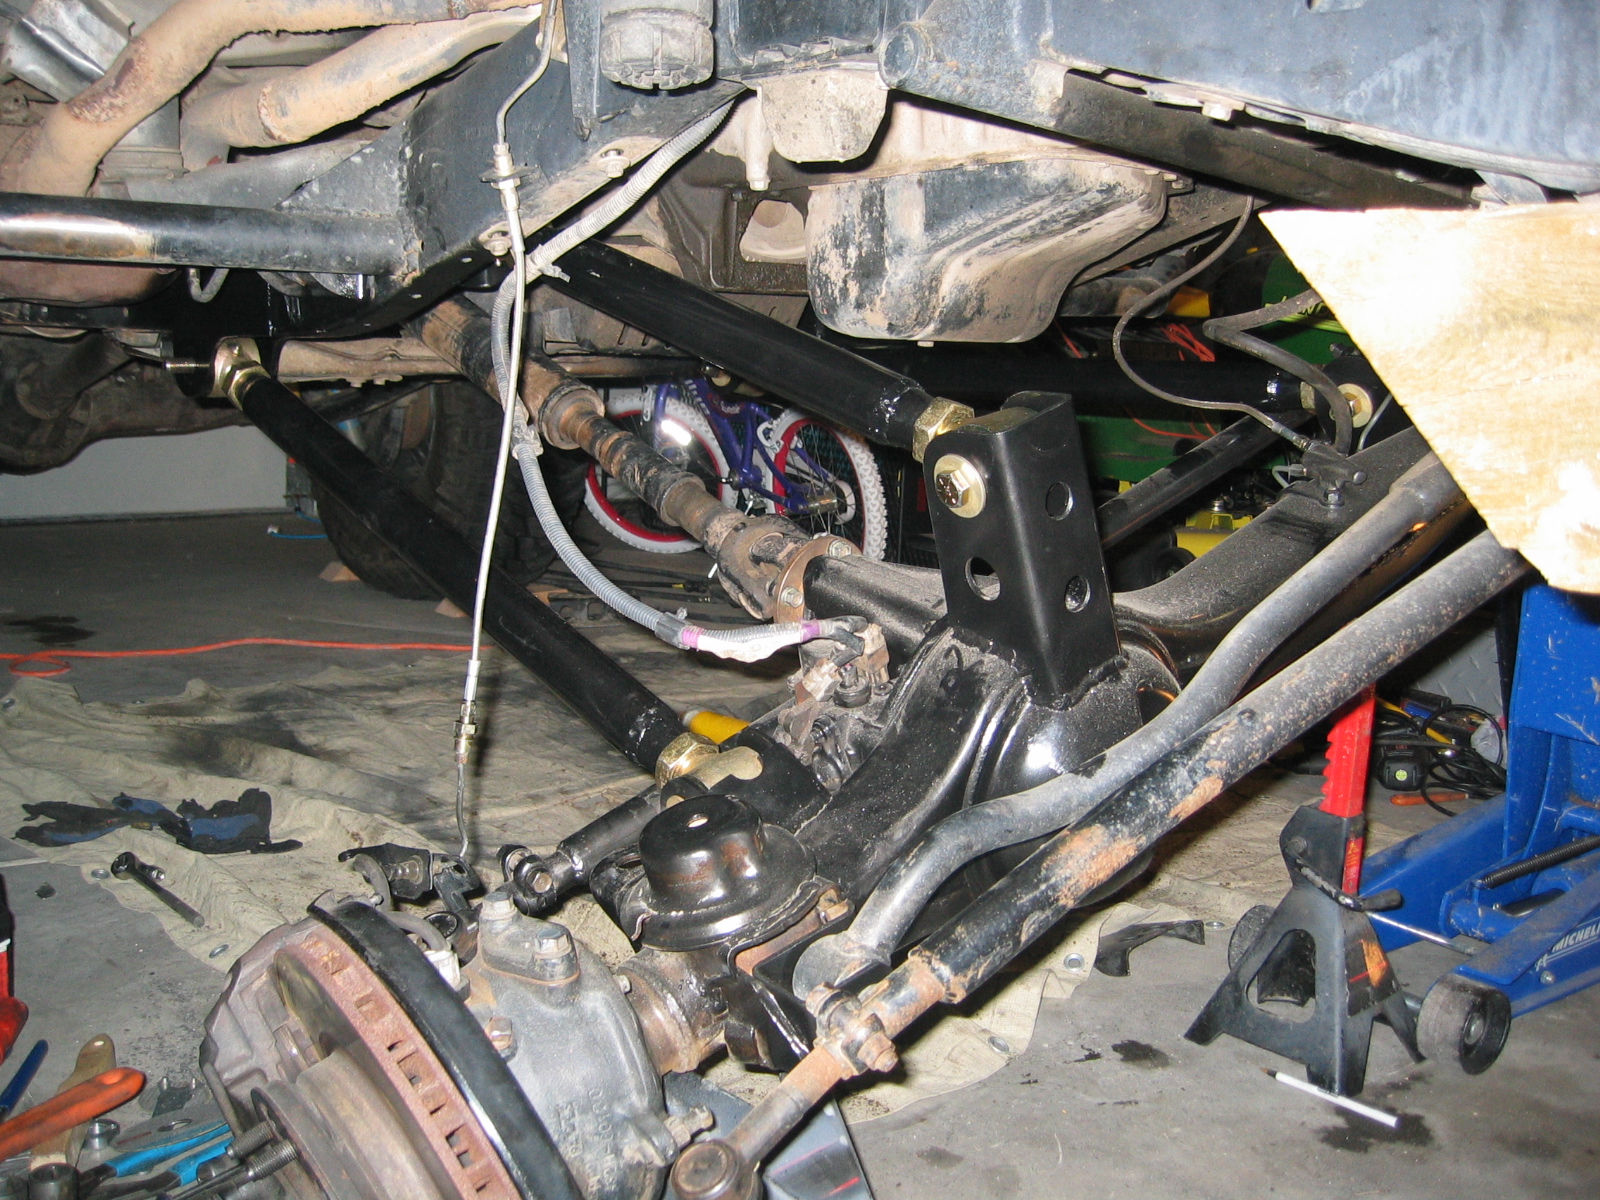
Both lower links are now done. They turned out awesome!
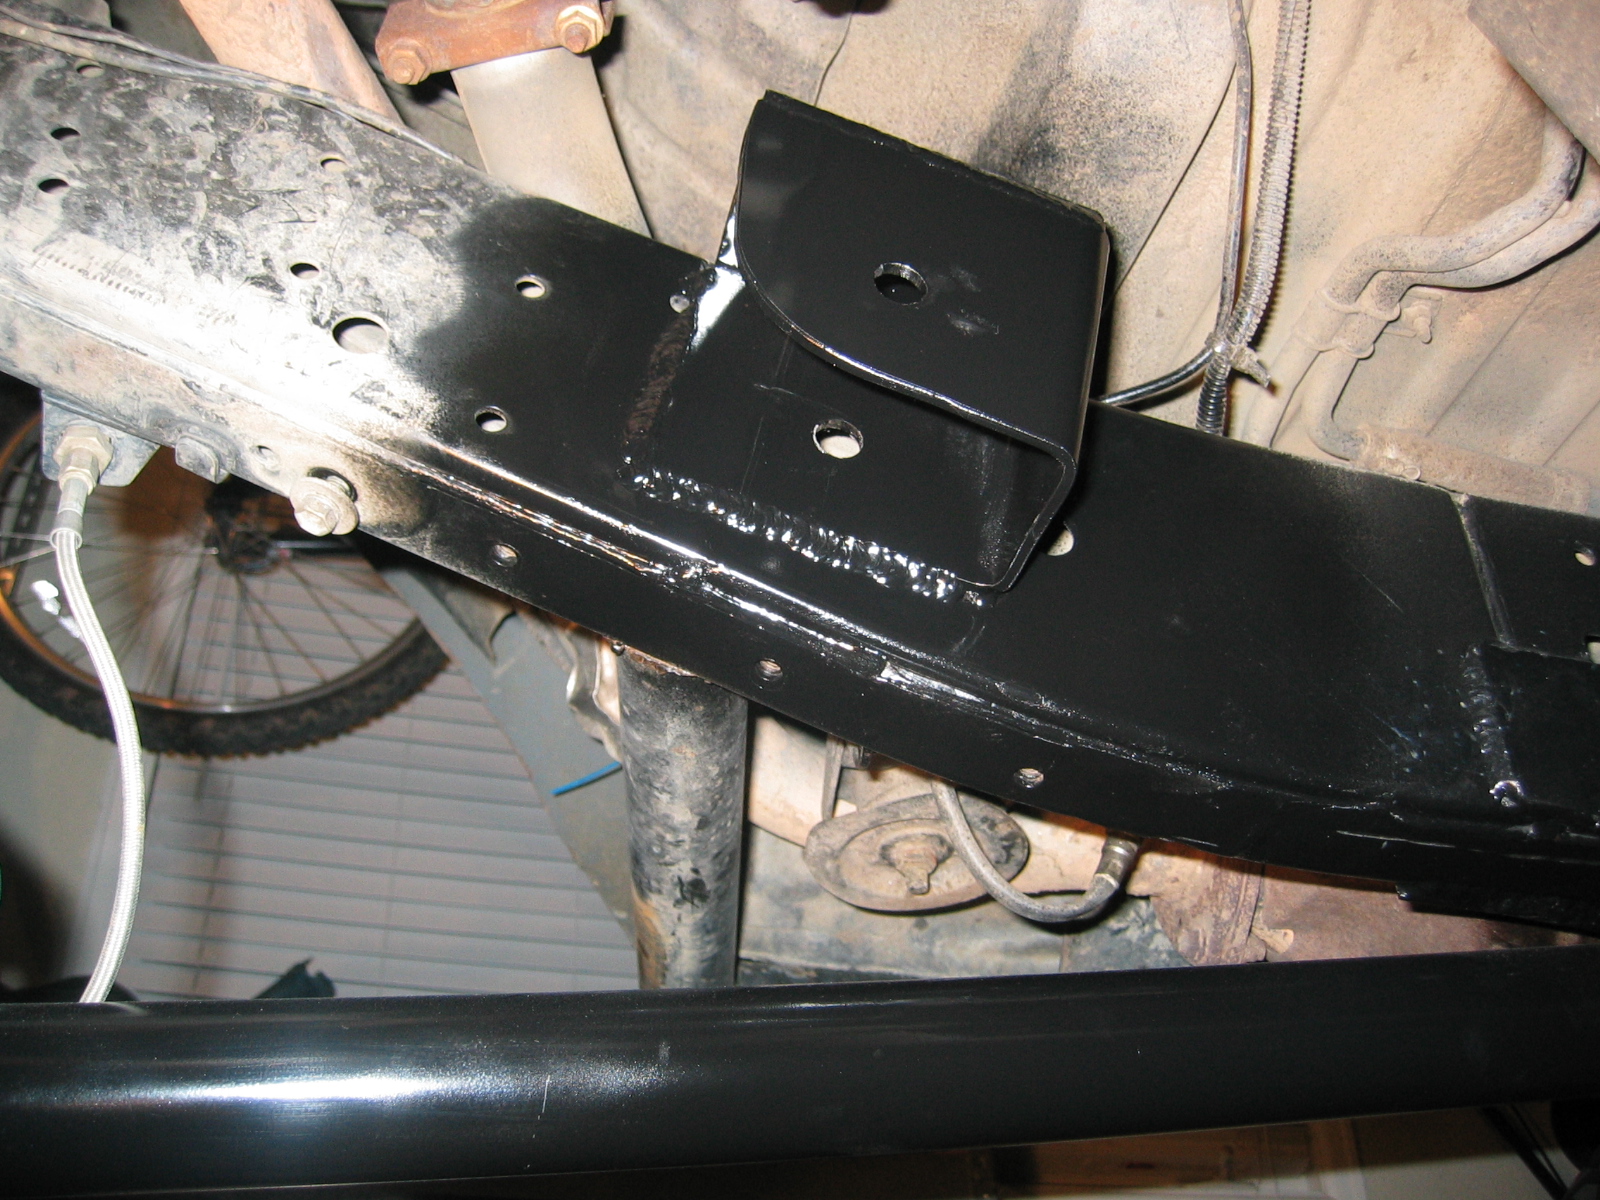
February 13th - Almost done :) I finished the last upper mount today. This mount goes through the frame and has a boxed enclusure welded to the frame. After connecting all the links it was time to test out the articulation.
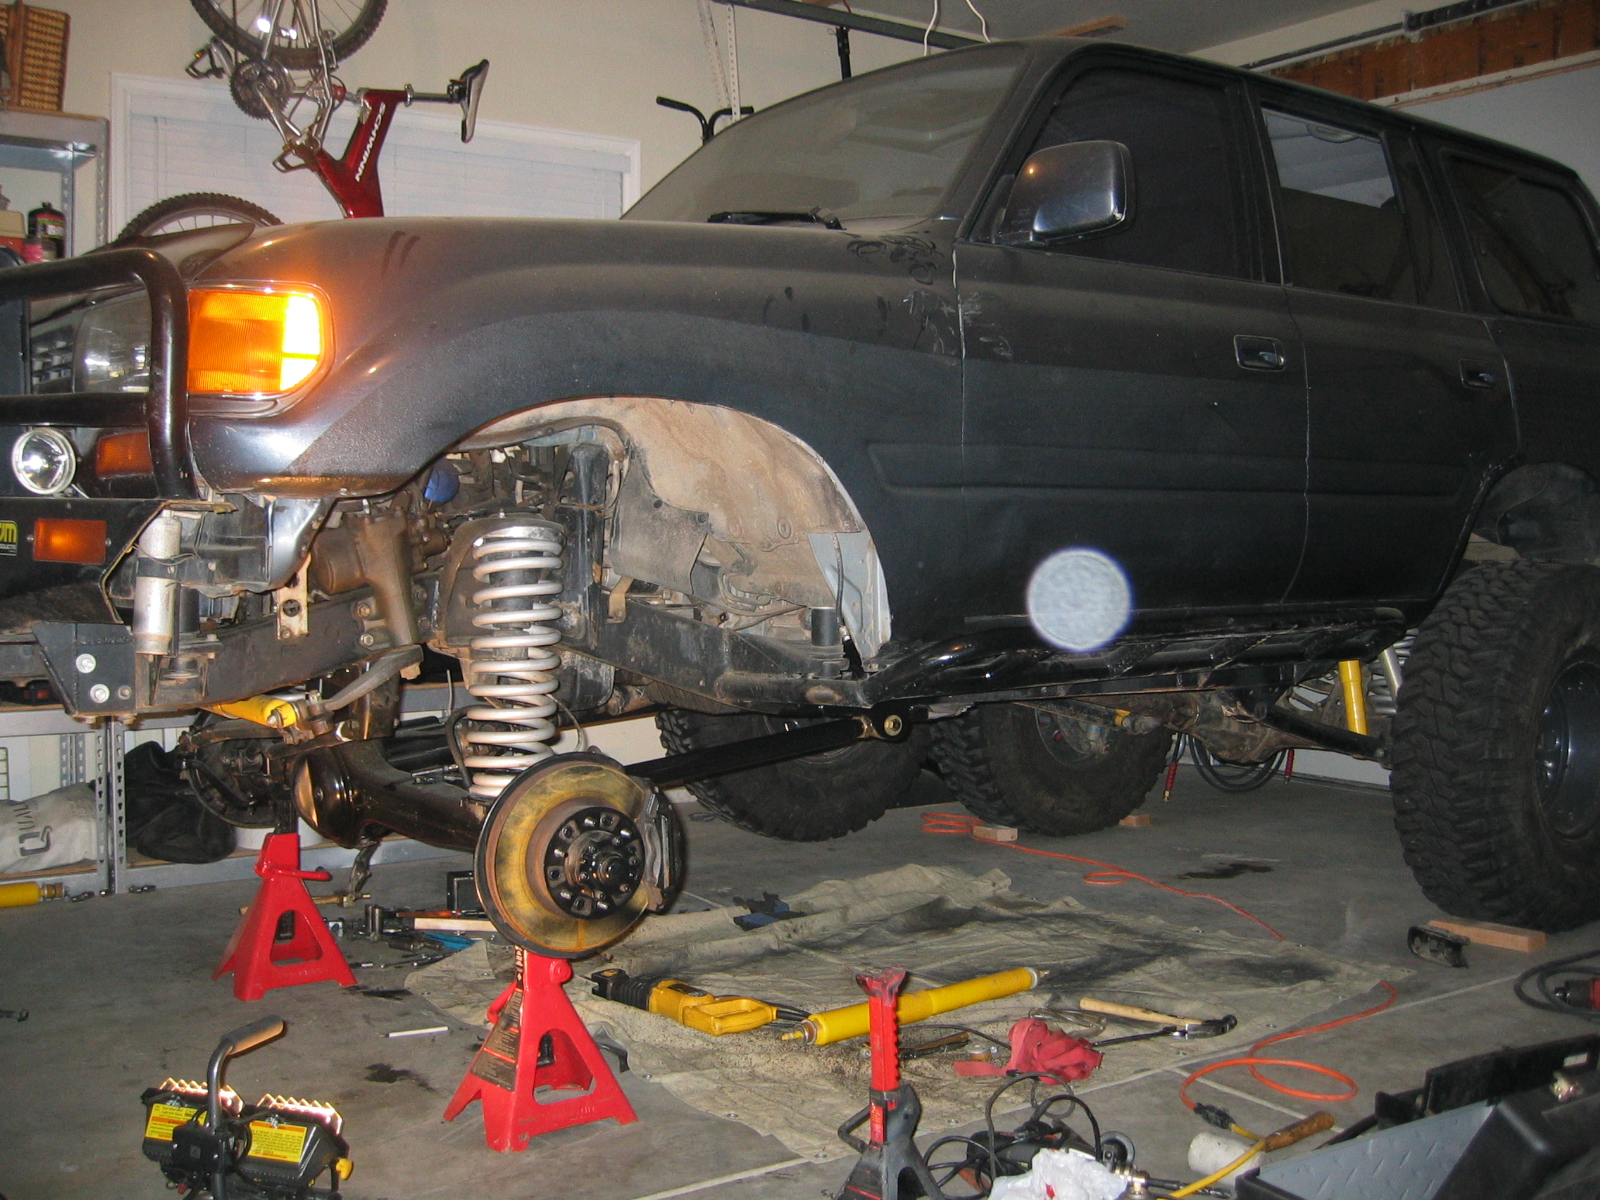
This is how the truck sits at rest. Everything checked out great as far as binding issues. I'm very excited to go wheel this beast!!
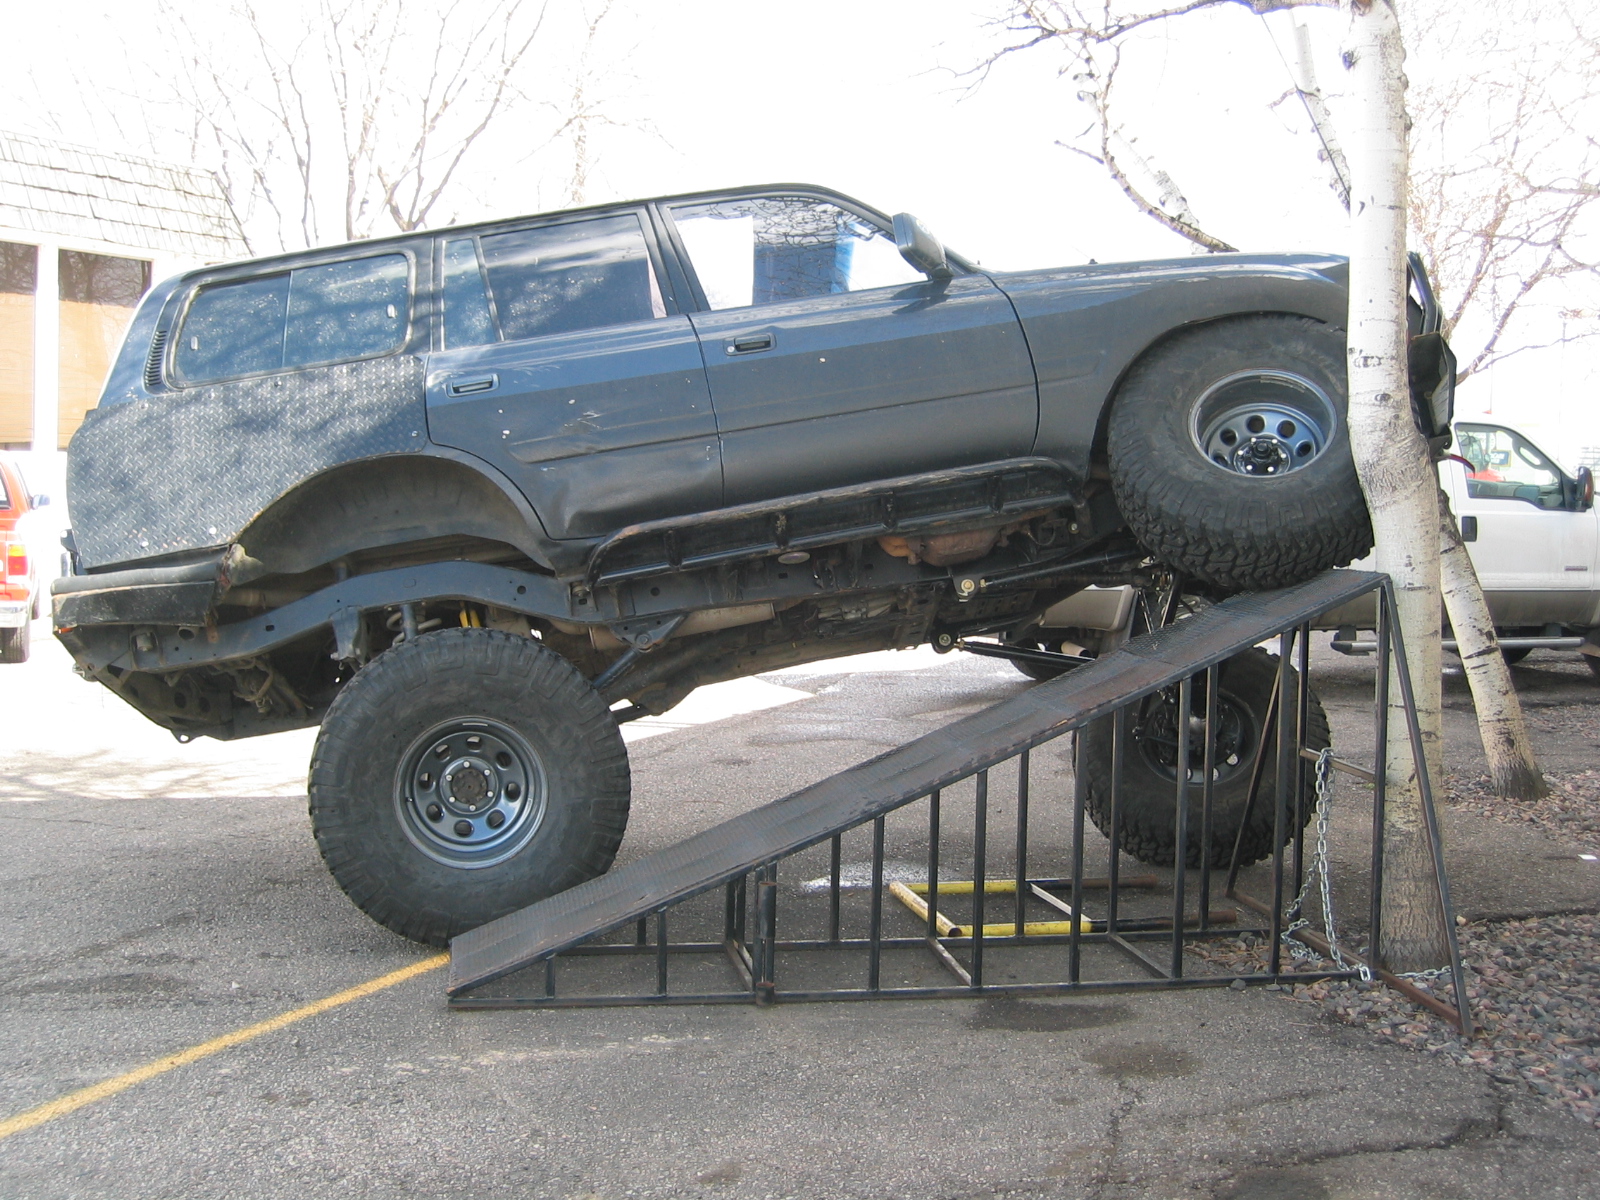
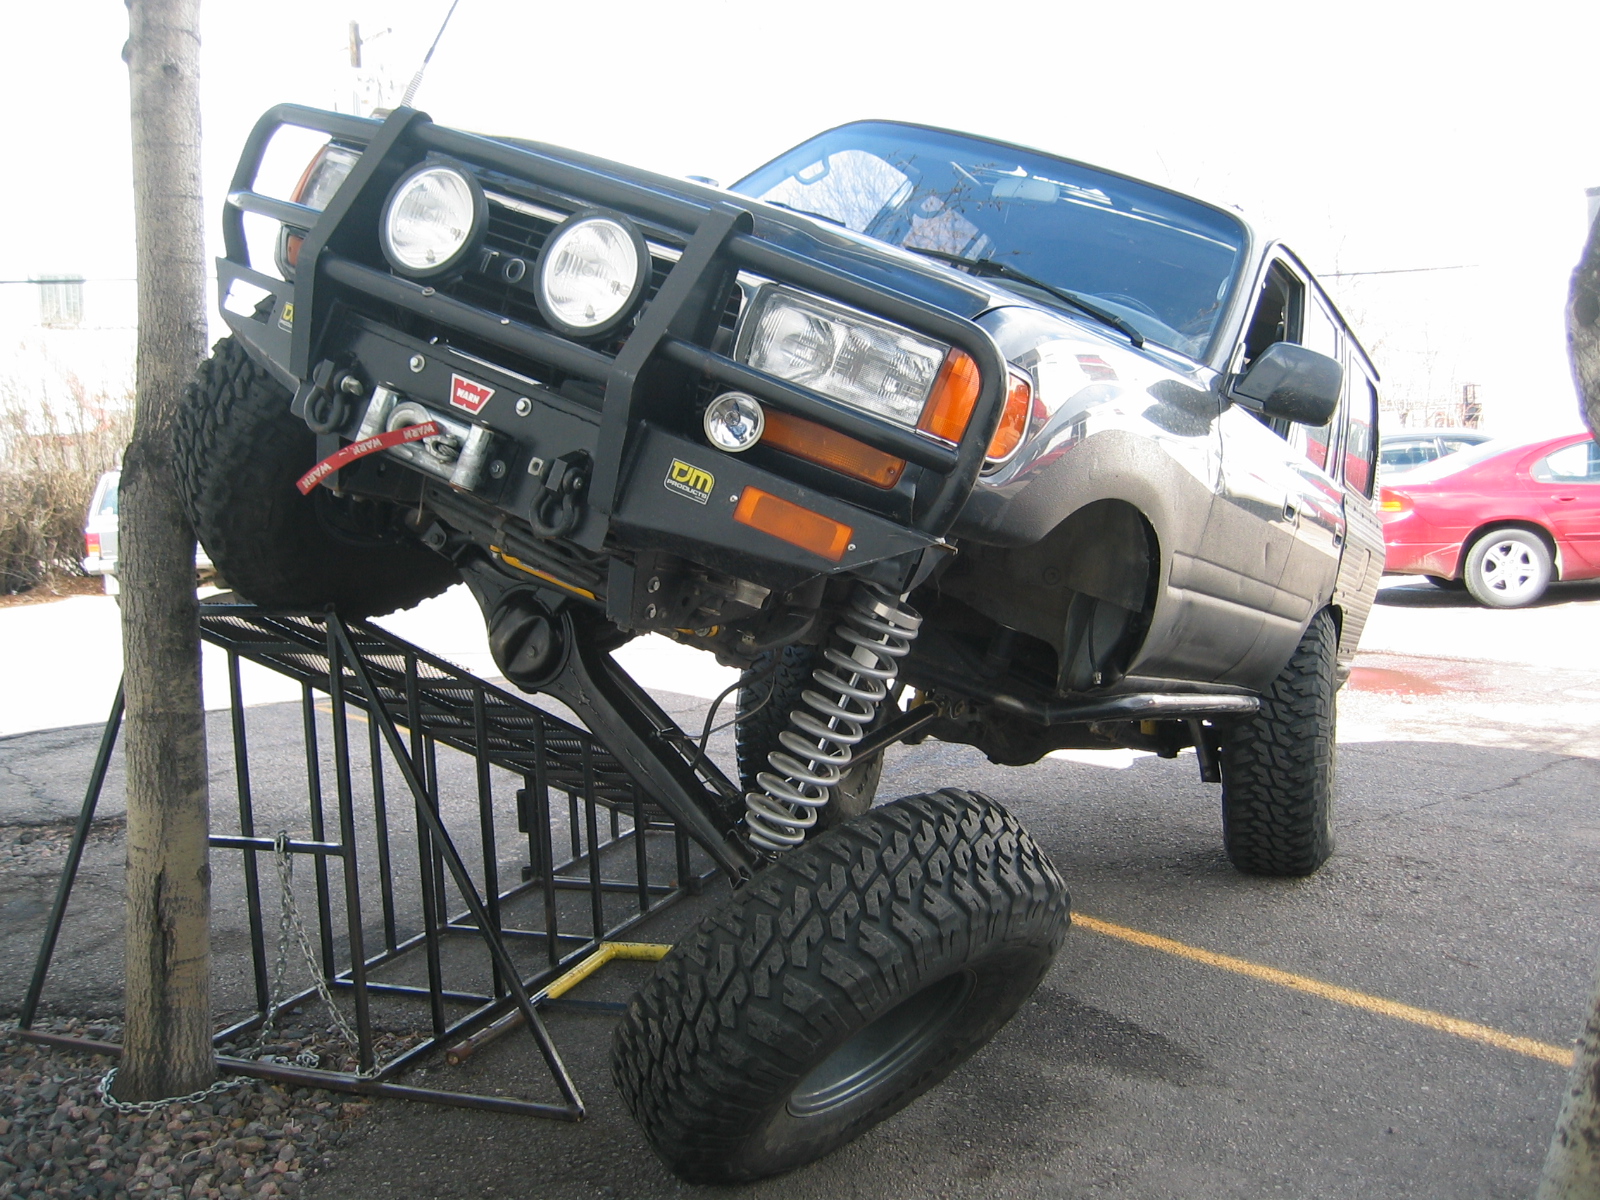
Some flex shots of the final product
Final Stats
|
||||||||||||||||||||||||
![]()